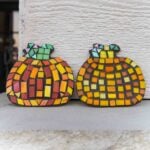
Mosaic Pumpkins
These easy mosaic pumpkins are a simple fall craft you make on your own or turn it into a craft night with the girls!
Servings: 1 pumpkin
Equipment
Instructions
- Start by placing the mosaic tiles you want on top of your wooden pumpkin in whatever design you want.Mosaic tiles, Wooden pumpkins
- Take off one piece at a time, add some glue to the back, and press it firmly down back onto the pumpkin.Mosaic adhesive
- After everything is glued on, give the tiles about ten minutes to dry completely before you move onto grouting the pumpkins!
- Mix the powdered grout with water according to the package directions.Powdered grout
- Place some grout on top of the tiled pumpkin and spread it out using the grout scraper, removing any excess grout as you go. You want to have a thin layer of grout on top of the pumpkin.
- Let the grout dry for a few minutes. You want it to not just completely scrape off but not be totally dry either.
- Wet the sponge and use it to wash away the grout on top of the tiles, leaving the grout in between them. Keep going until all of the grout on top of the tiles is gone.
- Let the grout dry completely and your pumpkins are ready to display with your other favorite fall decorations!
Notes
Get different shapes of mosaic tiles so you can fit them together tighter. The little triangles are great for filling in spaces between larger rectangle and square pieces!
Choose your grout color based on where you want to display them. I wanted to put them outside so I went with black grout since our porch is so light colored already, but if I was using them inside I would’ve gone with white!
You can make it a little easier and less messy by putting some of the glue onto a plate and using a q-tip or even a toothpick to transfer a little glue from the glue pile onto the back of your tile.