



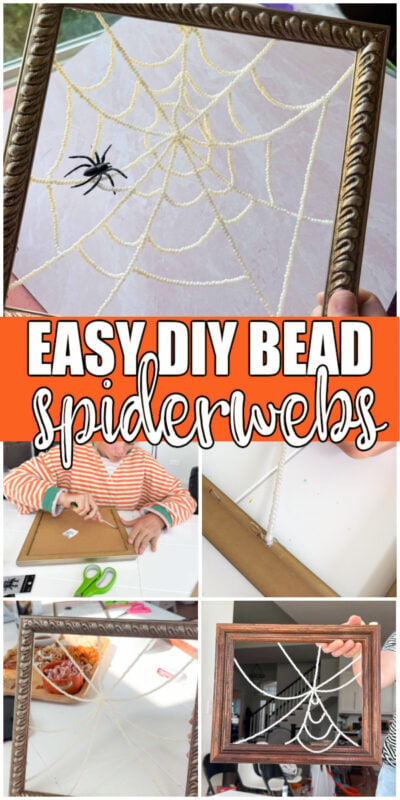
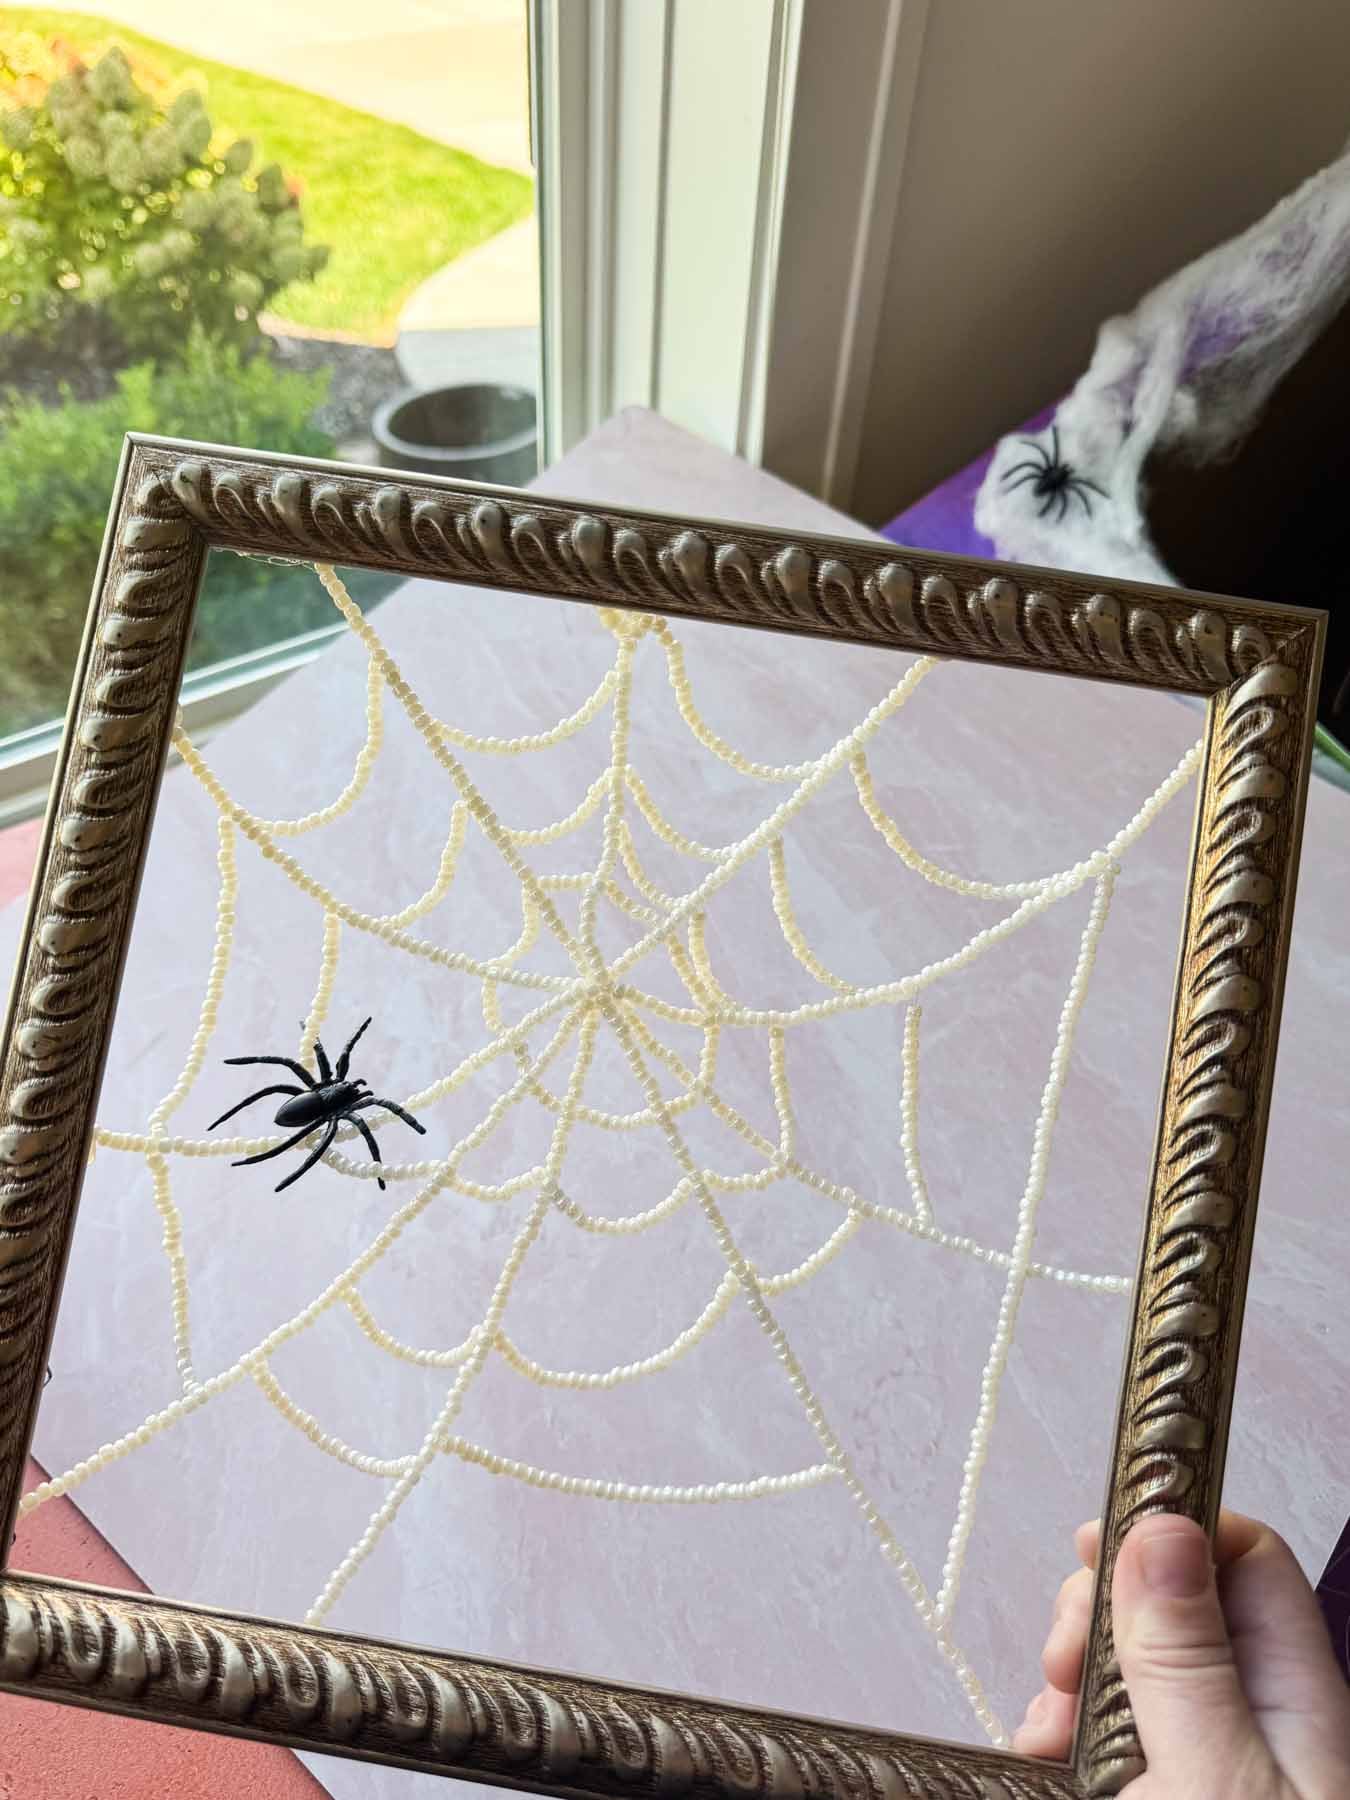
Make your own framed beaded spiderweb craft in just a few easy steps and you’ll have a gorgeous Halloween decoration you can use year after year! This makes the perfect Halloween girls night craft (or should I say ghouls night) that you create together while chatting, snacking, or even watching your favorite Halloween movie!

Want to save this Idea?
Enter your email below and we’ll send this idea straight to your inbox (plus you’ll receive tons of fun weekly ideas from us!)
I’m a big fan of cozy craft nights when the temps cool down and Halloween just seems to be a holiday designed for DIYing your own costumes and creations!
When creating this craft, I knew what I wanted it to look like from the beginning. The hardest part was figuring out how to get the webs to look like webs, not a daisy. I spent more time than I care to admit analyzing spiderwebs.
In the end, I realized that no web is perfect, and mine didn’t need to be either. I found that the more organic and imperfect the web was, the better it looked. So don’t worry if yours doesn’t curve just the way you want it to, it’ll all come together in the end.
Trust the process and embrace the imperfections; after all, it’s meant to be a creepy cobweb that has been in the attic for ages. And we’ve put together step by step instructions so that if you are a perfectionist, this can get you the closest thing to a spiderweb as possible.

Supplies
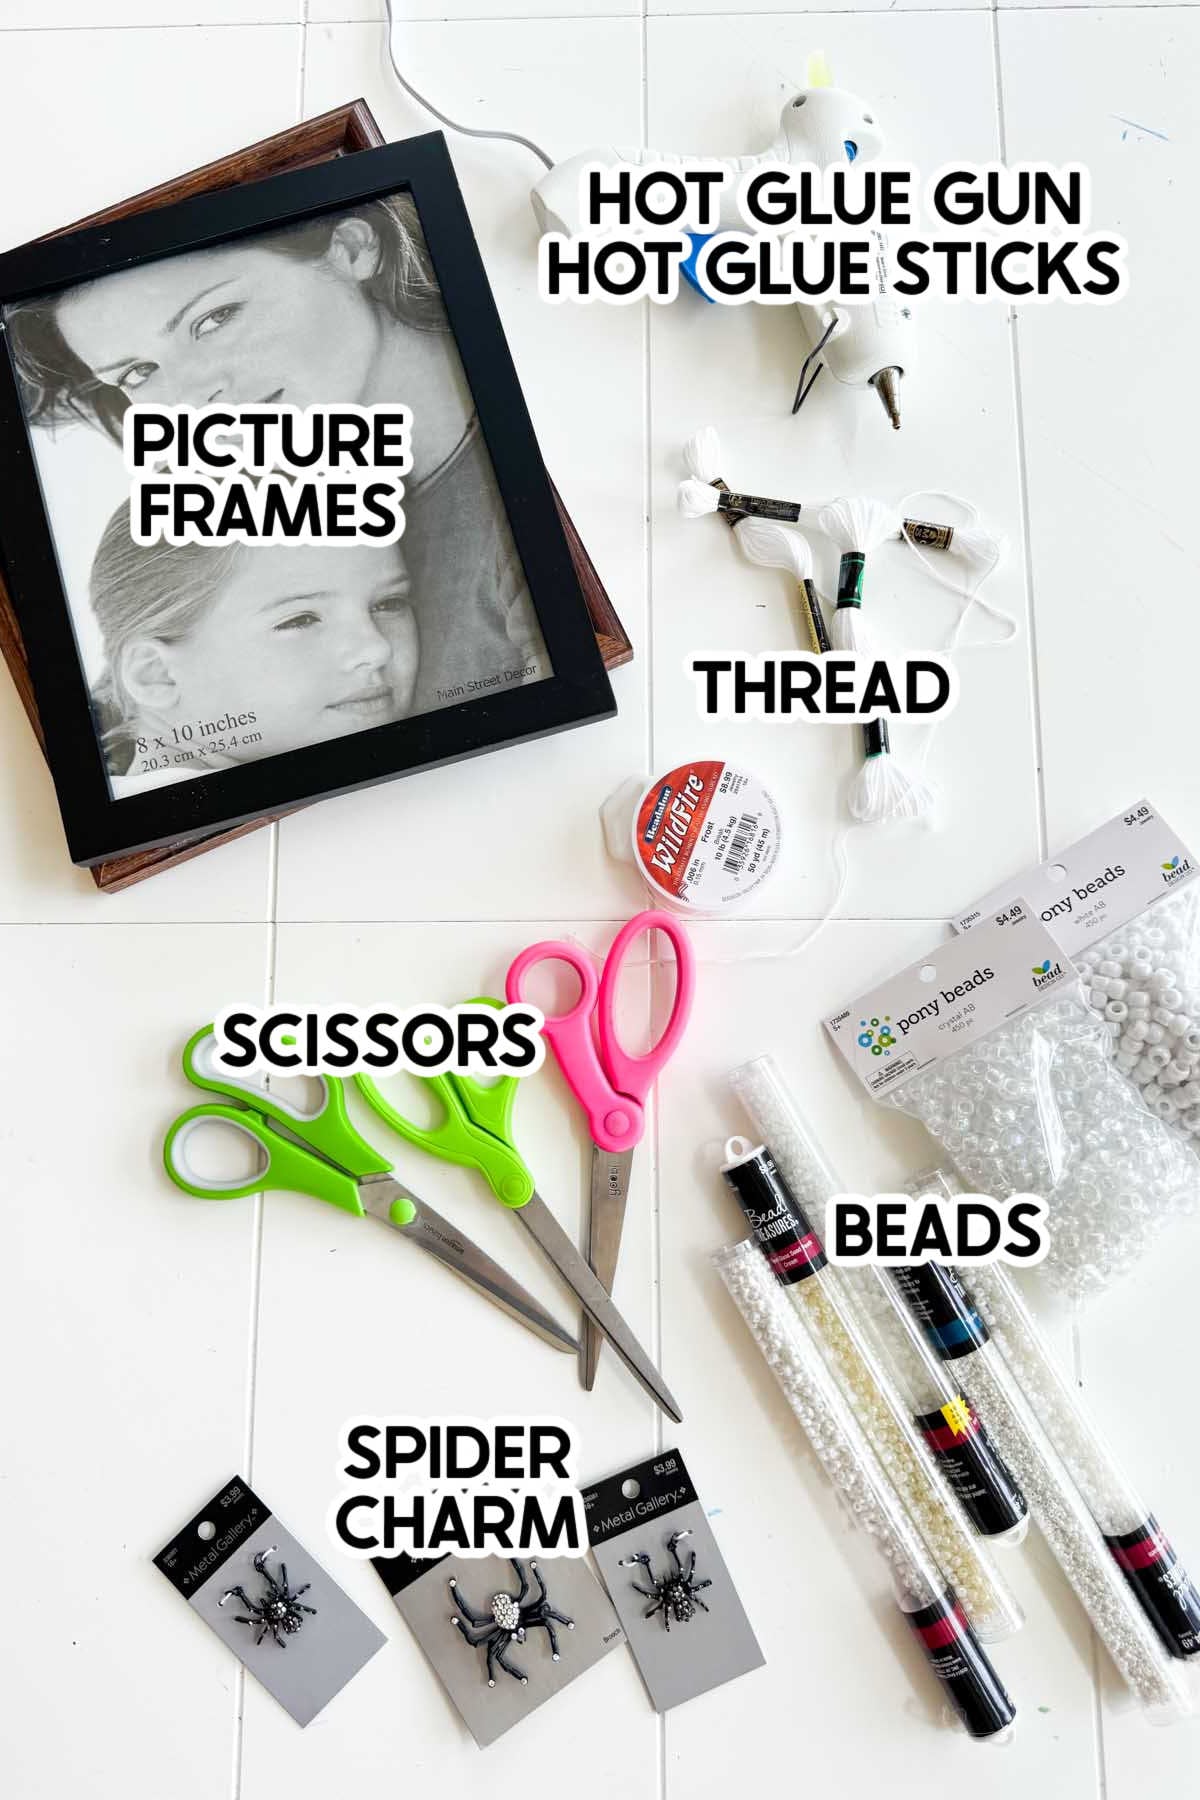

Supply notes
- Frame – I found mine at a thrift store. It can be any size, shape, or color you want. Just know the bigger you go, the more beading you will have to do and the longer it will take.
- White beads – 6/0 or 8/0 sized seed beads are best for this. I used one and a half 2.9-ounce tubes on my frame. It’s tempting to use 11/0 beads to make it look daintier, but that will take a long time if your frame is larger than 8×10. Pony beads will work, but it’s hard to get them to have movement for the connecting strands, so I don’t recommend them.
- Thread – I used this Wildfire Jewelry fishing line and there was enough to make two frames. You can use whatever fits your beads, as long as it is white and has no stretch. I tried it with thin wire and embroidery thread and didn’t love the lack of movement that came with it.
- Spider charm – this is optional but a fun touch if you want to add it so it looks more like a spiderweb!

How to Set up Spider Web Craft
Setting it up is really easy, especially once you have all your supplies.
Everyone’s frame is going to be different; that’s the nature of thrifting used frames. Some frames will need more prep work than others, but it’s worth doing before everyone arrives.
Each frame needs to be stripped down to just the frame. You can toss or repurpose the glass, images, and whatever backing it comes with. In some cases, you may need to remove staples or nails as well.
Once frames are stripped, you will want to lay out all the other supplies for people to choose from and plug in the hot glue guns.
With everything set out you are ready to get started.
How to Make The framed Spiderwebs
I’m going to tell you right now, this craft takes a little longer than you’d expect depending on the size of your frame. It’s pretty mindless work, so it’s perfect to do while catching up with friends, but know it’s not going to take ten minutes.
If you want something a little shorter, I’d try these fall sketch frames instead!
Okay let’s get started. The first thing you need to do is prep your frames.
Prep the Frames
- Strip your frame down to just the frame. Toss or repurpose the glass, images, cardboard backing, mat and anything else. You’ll just be using the frame for this craft.
- Remove any staples or nails that might be sticking out or taking away from the frame in any way.
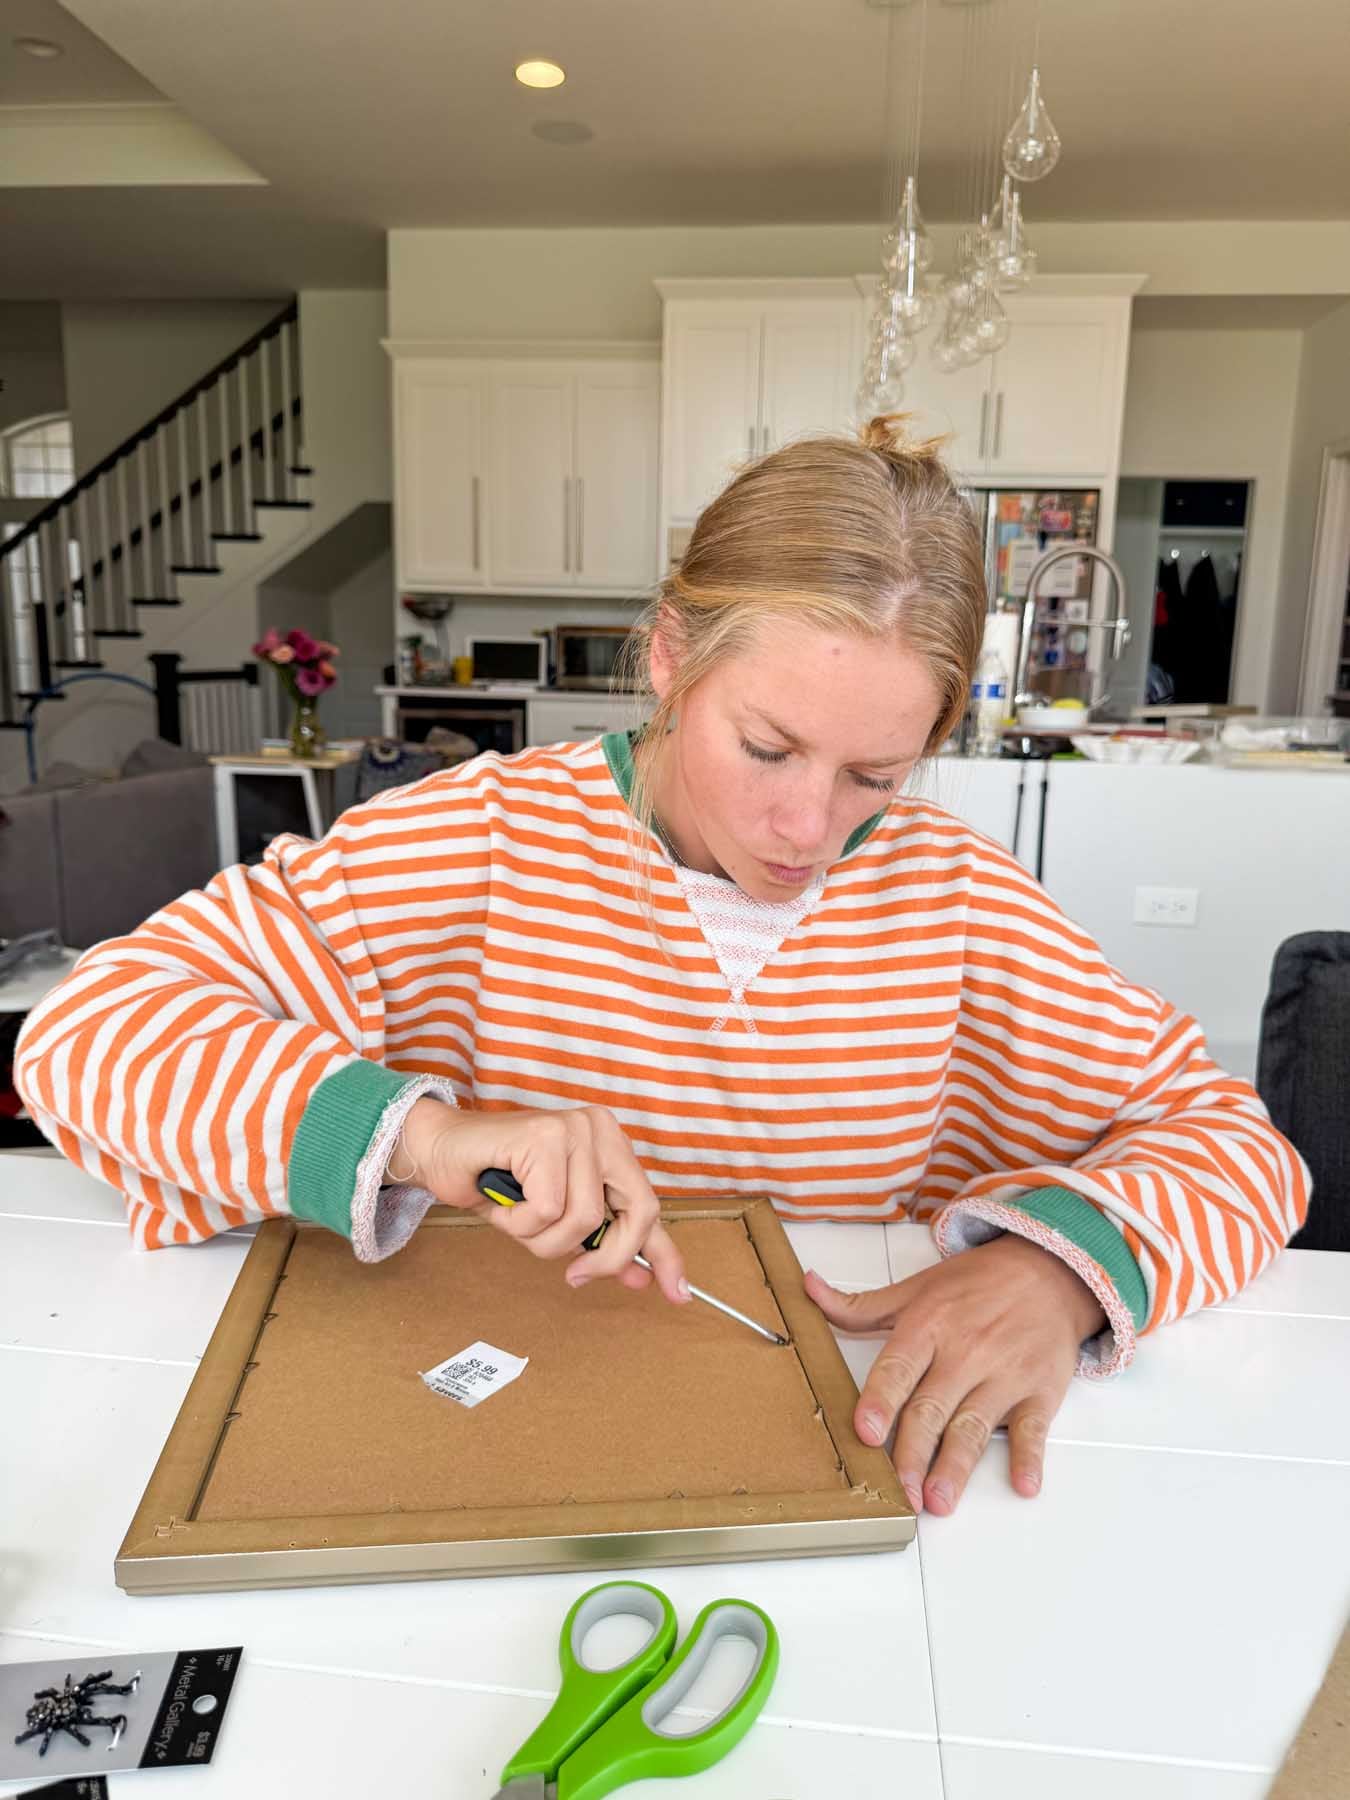
Once your frame is prepped, it’s time to get started on your spiderwebs!
I wish I could give you exact measurements to create the perfect spiderweb, but with everyone using different supplies and frames, it’s not that simple. I’ve included instructions below on how to make these but the exact length of your thread, number of beads, dimensions, and so on will be up to you based on the supplies you choose.
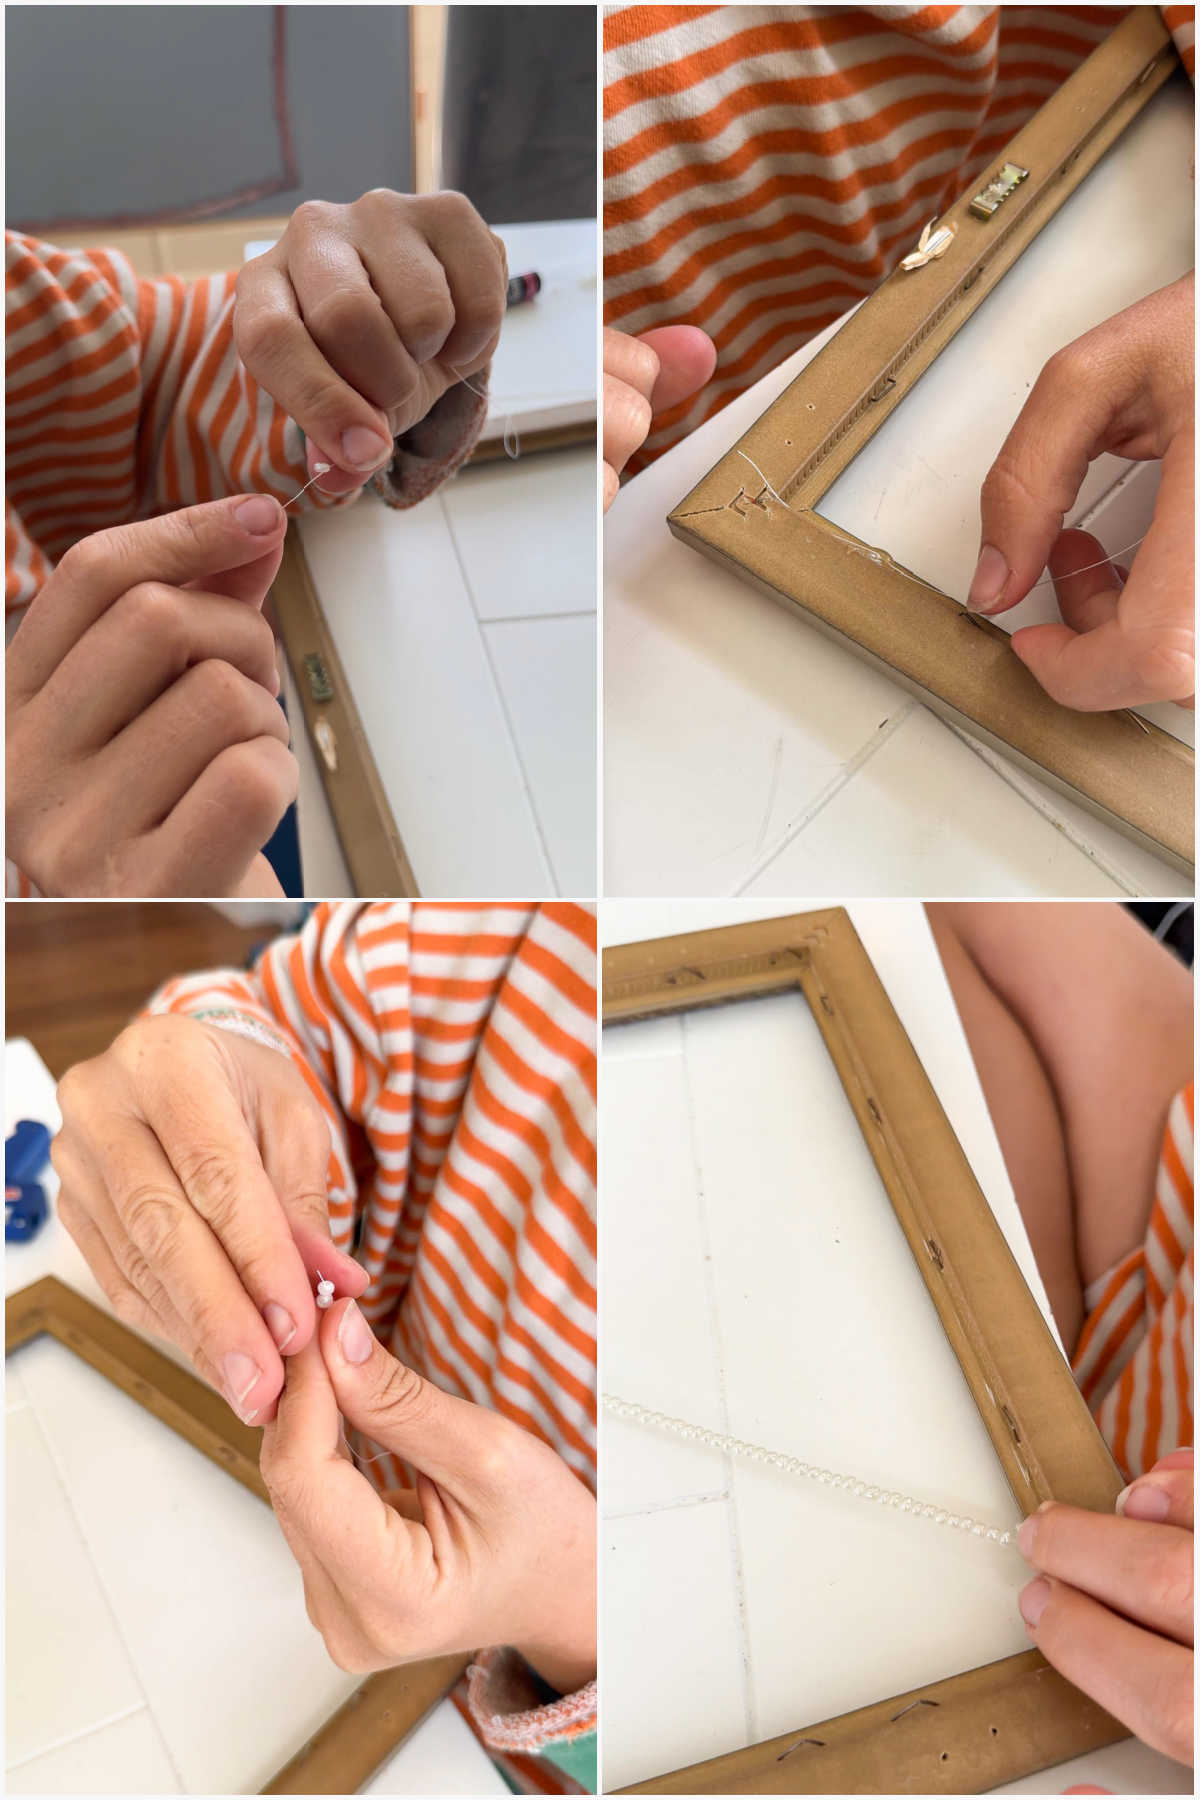
Create the Main Crossbeam
- Decide is where you want your center to be. This is important because everything will be centered around it.
- Cut a string 6 inches longer than your frame and tie a bead onto one of the ends.
- Hot glue that bead to the back of the frame where you want your main crossbeam to go.
- When the bead is glued onto the frame, start stringing beads. String until they reach across to the other side of the frame without any visible gaps.
- Tie off another bead at the end; you should be able to do an overhand knot on the beat then slide it down to get it tight.
- Once the bead is tight, hot glue that bead into place, creating one long beaded strand going across your frame.
Tip!
If you’re not sure how to do an overhand knot, here’s an article showing the step by step process for how to tie an overhand knot with a video. It’s a fancy name for a super simple knot.
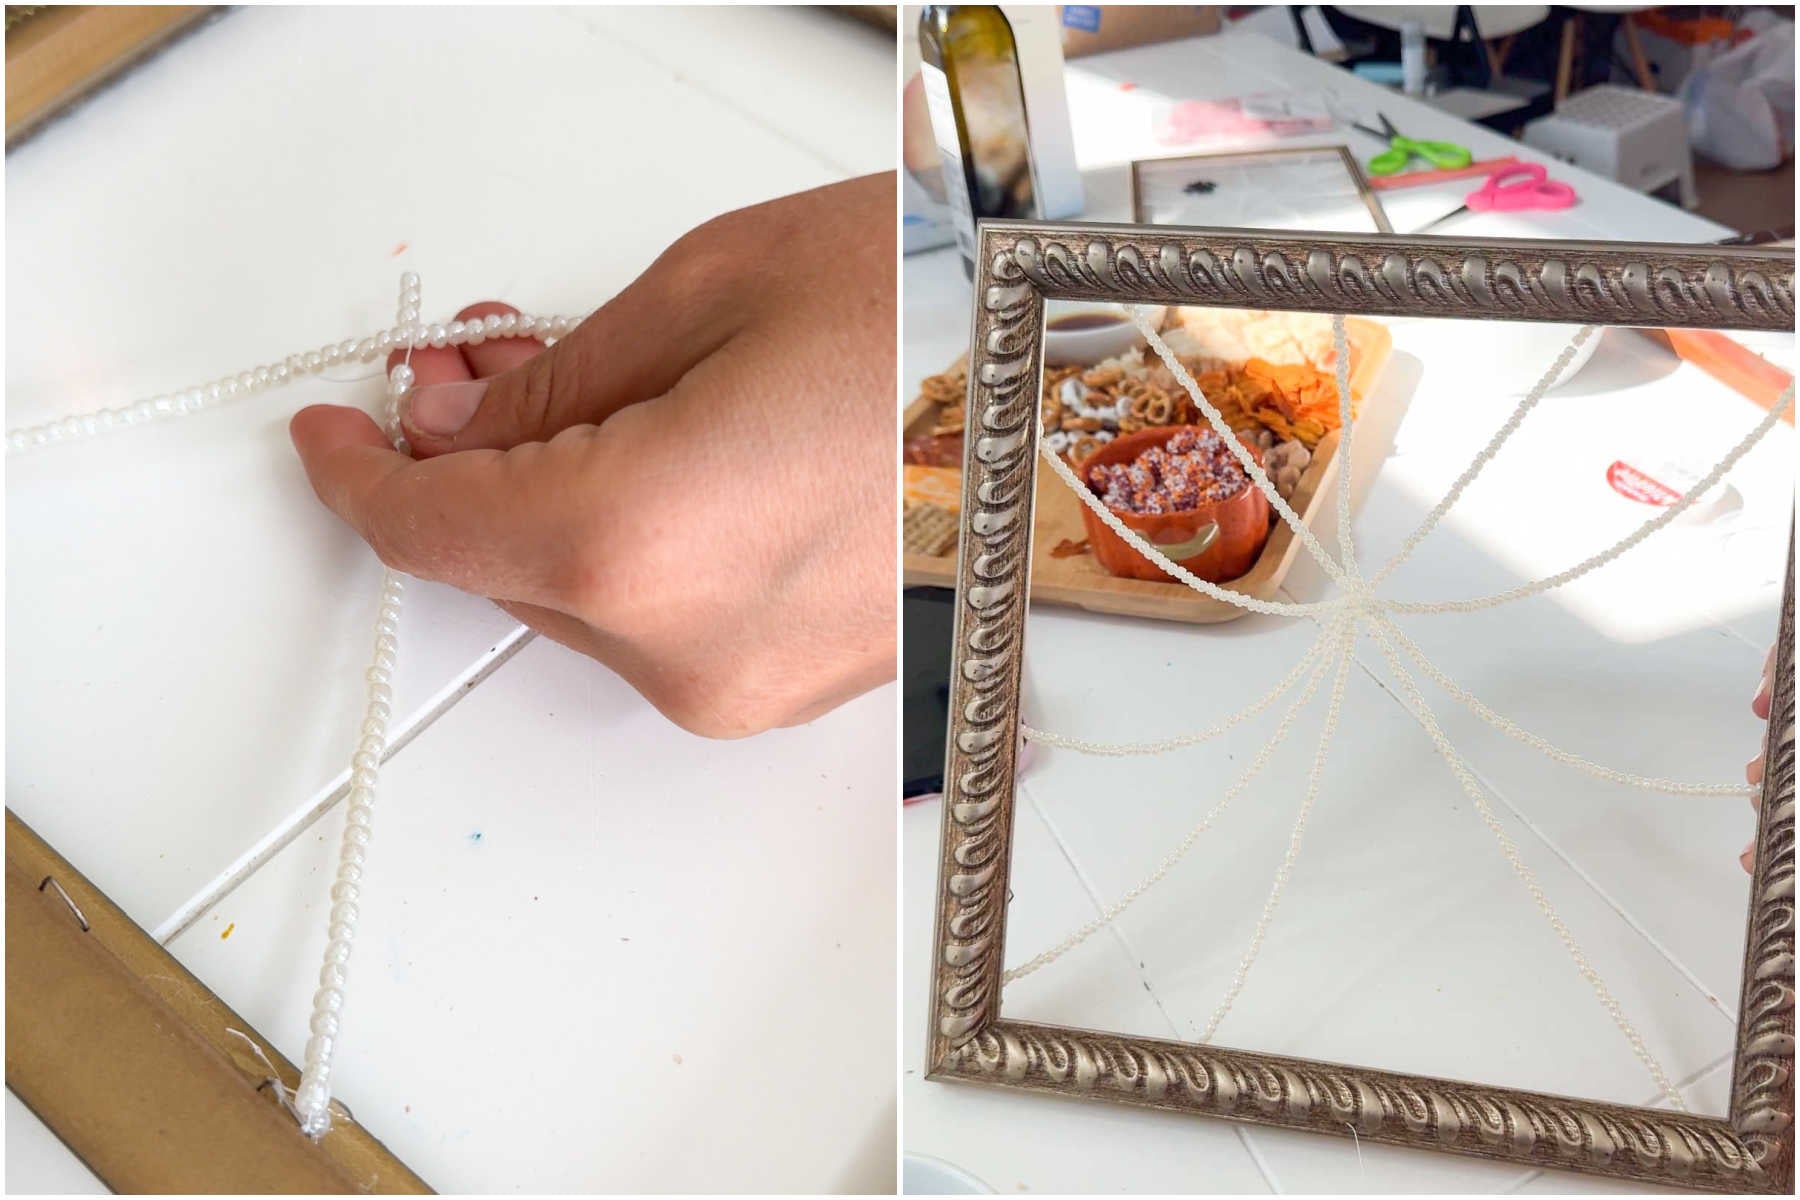
Attach remaining crossbeams
- Just like before, tie a bead to the end of a string that is 6 inches longer than the distance between your frame and the center point.
- Hot glue that bead at your desired point on your frame and allow it to dry.
- String beads until you reach the center point.
- Tie off your beaded strand at the desired center point using two overhand knots.
- Repeat this process until you have the desired number of crossbeams.
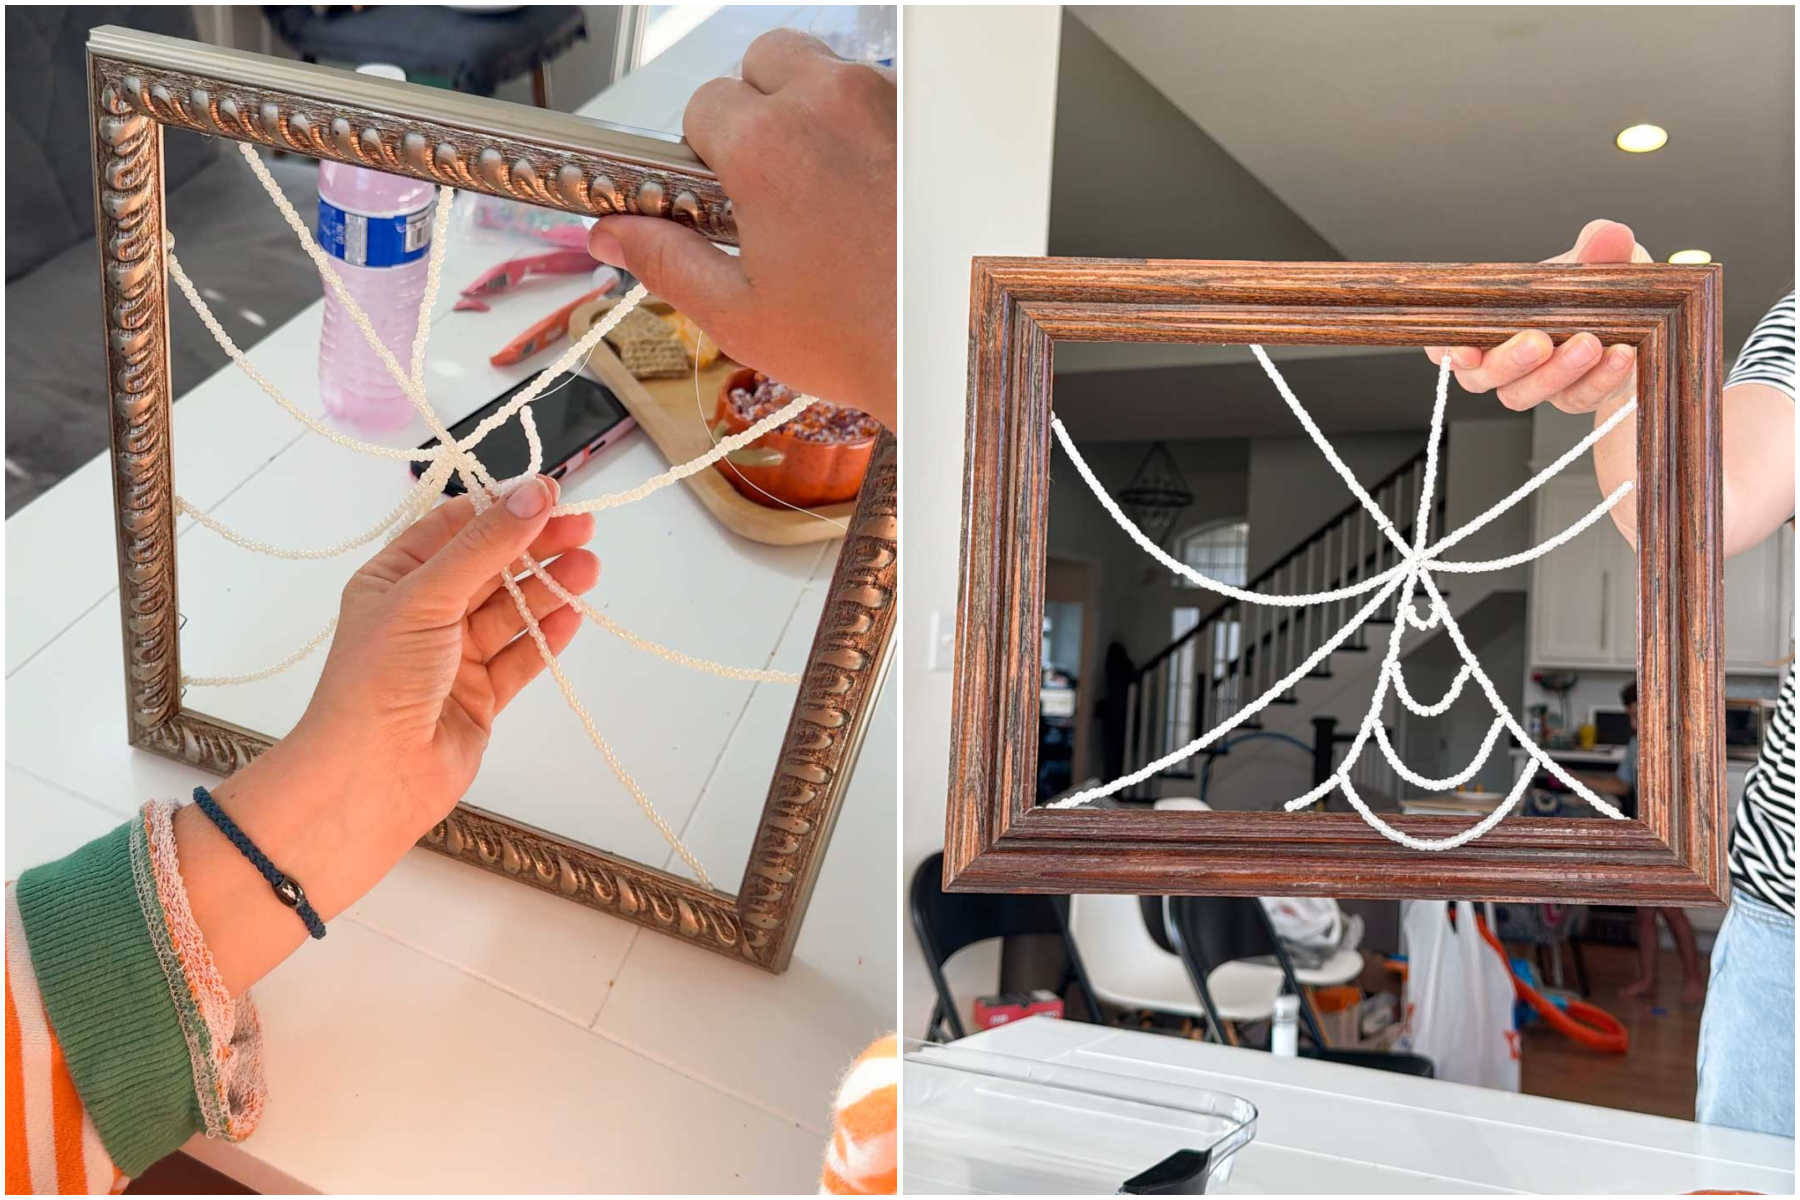
Create center webs
- Starting close to your center, tie a double overhand knot between two beads on one of the cross beams.
- String enough beads to connect to the next closest crossbeam with the desired droop.
- Connect to that crossbeam by tying a double overhand knot between two beads again. Cut off any excess string.
- Repeat this process to add as many center webs as you want.
Tips for the center webs
Decide which direction you want your frame to stand. Once you have that, you can design your center webs around it. That lets you create the droops you want without worrying whether they will still hang the same when the frame rotates.
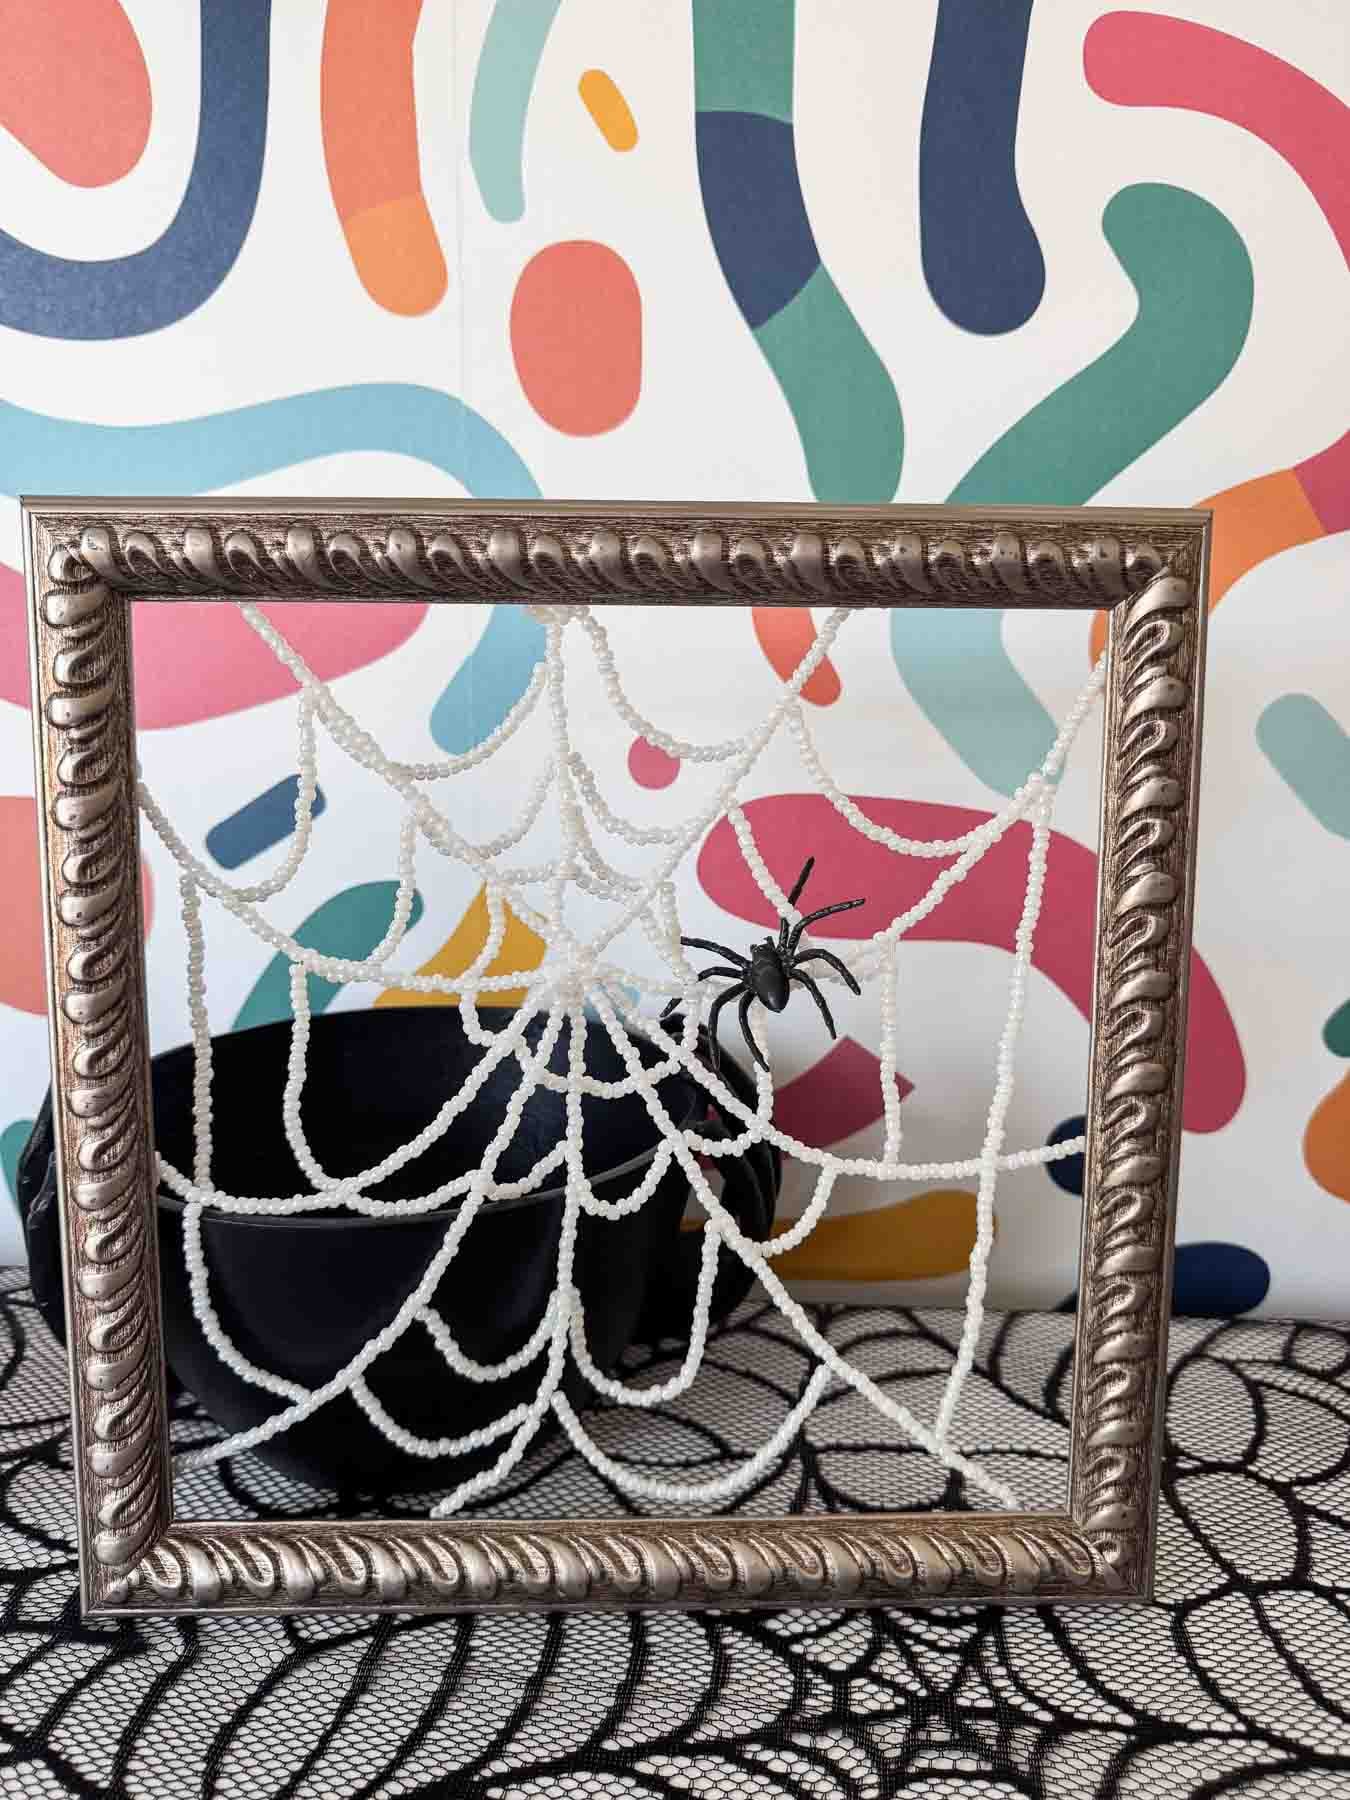
Finishing Touches
- Now is the time to adjust or redo any of the center webs that you aren’t happy with.
- Once you are happy with all of the webs, add any final details you want, like a beaded spider or a loosely hanging strand of beads.
- You also want to clean up any visible strings and hot-glue any sections that need extra support.
- Once you’re happy with it, you’re done and ready to put it out for Halloween.

Helpful Tips
- Feel free to experiment with tying or amount of beads to make it what you want. Every spiderweb is different and so is every spiderweb craft!
- Pay attention to the way the string wants to hang. If it’s a part that naturally droops towards the center, then it does better with extra beads. If it naturally falls away from the center, then try it with fewer beads.
- Make sure to add enough beads to cover the strings unless you want to have string visible.
- Play around with it. If you like the look of the string don’t add beads to the center sections and use a thicker embroidery thread instead.
- Use a toothpick to hold the bead in place while the hot glue is drying if you find the bead slips during the process.

More Fall Girls Night Ideas
If you liked these beaded spiderwebs, try one of these other girls night ideas next! Or just do them on your own, they’re fun that way too!
- Mug Candles – make your own fall mug candles with all sorts of cozy finishes!
- DIY sweatshirts – a simple cozy craft where make your own fall fabric sweatshirts!
- Sweater pumpkin craft – this one goes viral every year for good reason, it’s a super simple and fun way to repurpose old sweaters!
- Rope pumpkin – a Dollar Tree special that takes inexpensive items and turns them into something you’ll love putting up!
- Custom mugs – this simple craft takes vinyl for cups and turns it into a custom mug you’ll love using for hot chocolate all fall long!
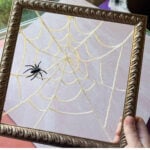
Beaded Spiderwebs Craft
Ingredients
- 1 frame
- 2.9 ounces white seed beads 6/0 or 8/0
- pack beading thread white
- 1 spider charm optional
Instructions
- Remove backing and glass from the frame.1 frame
- Decide where you want your center to be.
- Cut a string 6 inches longer than your frame and tie a bead onto one of the ends.pack beading thread
- Hot glue that bead to the back of the frame where you want your main crossbeam to go.
- When the bead is glued onto the frame, start stringing beads. String until they reach across to the other side of the frame without any visible gaps.2.9 ounces white seed beads
- Tie off another bead at the end; you should be able to do an overhand knot on the beat then slide it down to get it tight.
- Hot glue the bead into place, creating one long beaded strand going across your frame.
- Just like before, tie a bead to the end of a string that is 6 inches longer than the distance between your frame and the center point.
- Hot glue that bead at your desired point on your frame and allow it to dry.
- String beads until you reach the center point.
- Tie off your beaded strand at the desired center point using two overhead knots.
- Repeat this process until you have the desired number of crossbeams.
Create Center Beams
- Starting close to your center, tie a double overhand knot between two beads on one of the cross beams.
- String enough beads to connect to the next closest crossbeam with the desired droop.
- Connect to that crossbeam by tying a double overhand knot between two beads again. Cut off any excess string.
- Repeat this process to add as many center webs as you want.
- Adjust or redo any of the center webs that you aren’t happy with.
Finishing Touches
- Add any final details you want, like a beaded spider or a loosely hanging strand of beads.1 spider charm
- Clean up any visible strings and hot-glue any sections that need extra support and put out to display!
Tips & Notes:

Want more Party Ideas?
Want more easy party ideas like this one? Enter your first name and email address in the form below to join the Play Party Plan community! You’ll receive weekly party ideas, games, and recipes directly to your inbox!












Leave a Reply