



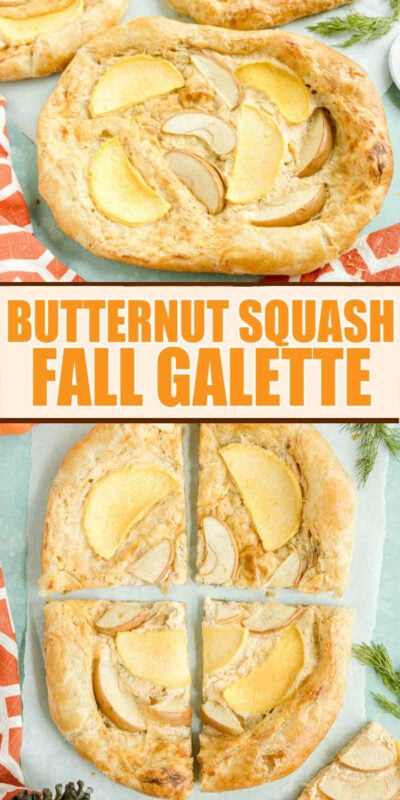
A butternut squash galette is the recipe you’ve probably never tried and need to this fall season. Flaky puff pastry is filled with savory gruyere cheese, then topped with sweet butternut squash and apples to create this essential fall appetizer. It’s savory, rich, and tastes like all the best parts of fall in each bite.


Want to save this recipe?
Enter your email below and we’ll send this idea straight to your inbox (plus you’ll receive fun weekly ideas from us too!)
Easy Squash Galette
One of our local bakeries makes an incredible peach galette during the summer. I’d never had a galette before but after trying the rustic version of a tart, I knew I wanted to try making one at home. I didn’t have time to spend making a homemade crust, but I think this one still tastes great even with the shortcut of using puff pastry!
When creating the recipe, I ran a dozen tests to get it just right. I tried all sorts of vegetables, from mushrooms to asparagus to beets. In the end, the butternut squash paired with apples gave just the right amount of sweetness that really brought the dish together.
This butternut squash galette hits all the right fall flavors in every bite. The rich nutty flavor of the gruyere cheese pairs beautifully with the buttery crust and sweet butternut squash.
While this appetizer may have a fancy name and taste as if it came from the bakery down the street, it’s deceptively easy to make. Once you try it, it’ll become as much of a fall staple as a bowl of zuppa toscana or a caramel apple dip.

Why You’ll Love This
- Elevated Appetizer – this galette is a fancier appetizer that’s still easy to make, perfect for a girls night or fall dinner party!
- Quick assembly – using pre-made pastry dough allows you to make and bake this in less than 45 minutes.
- Feeds a crowd – while tempting to eat the entire galette alone, one batch makes three galettes and can easily serves 12 people.

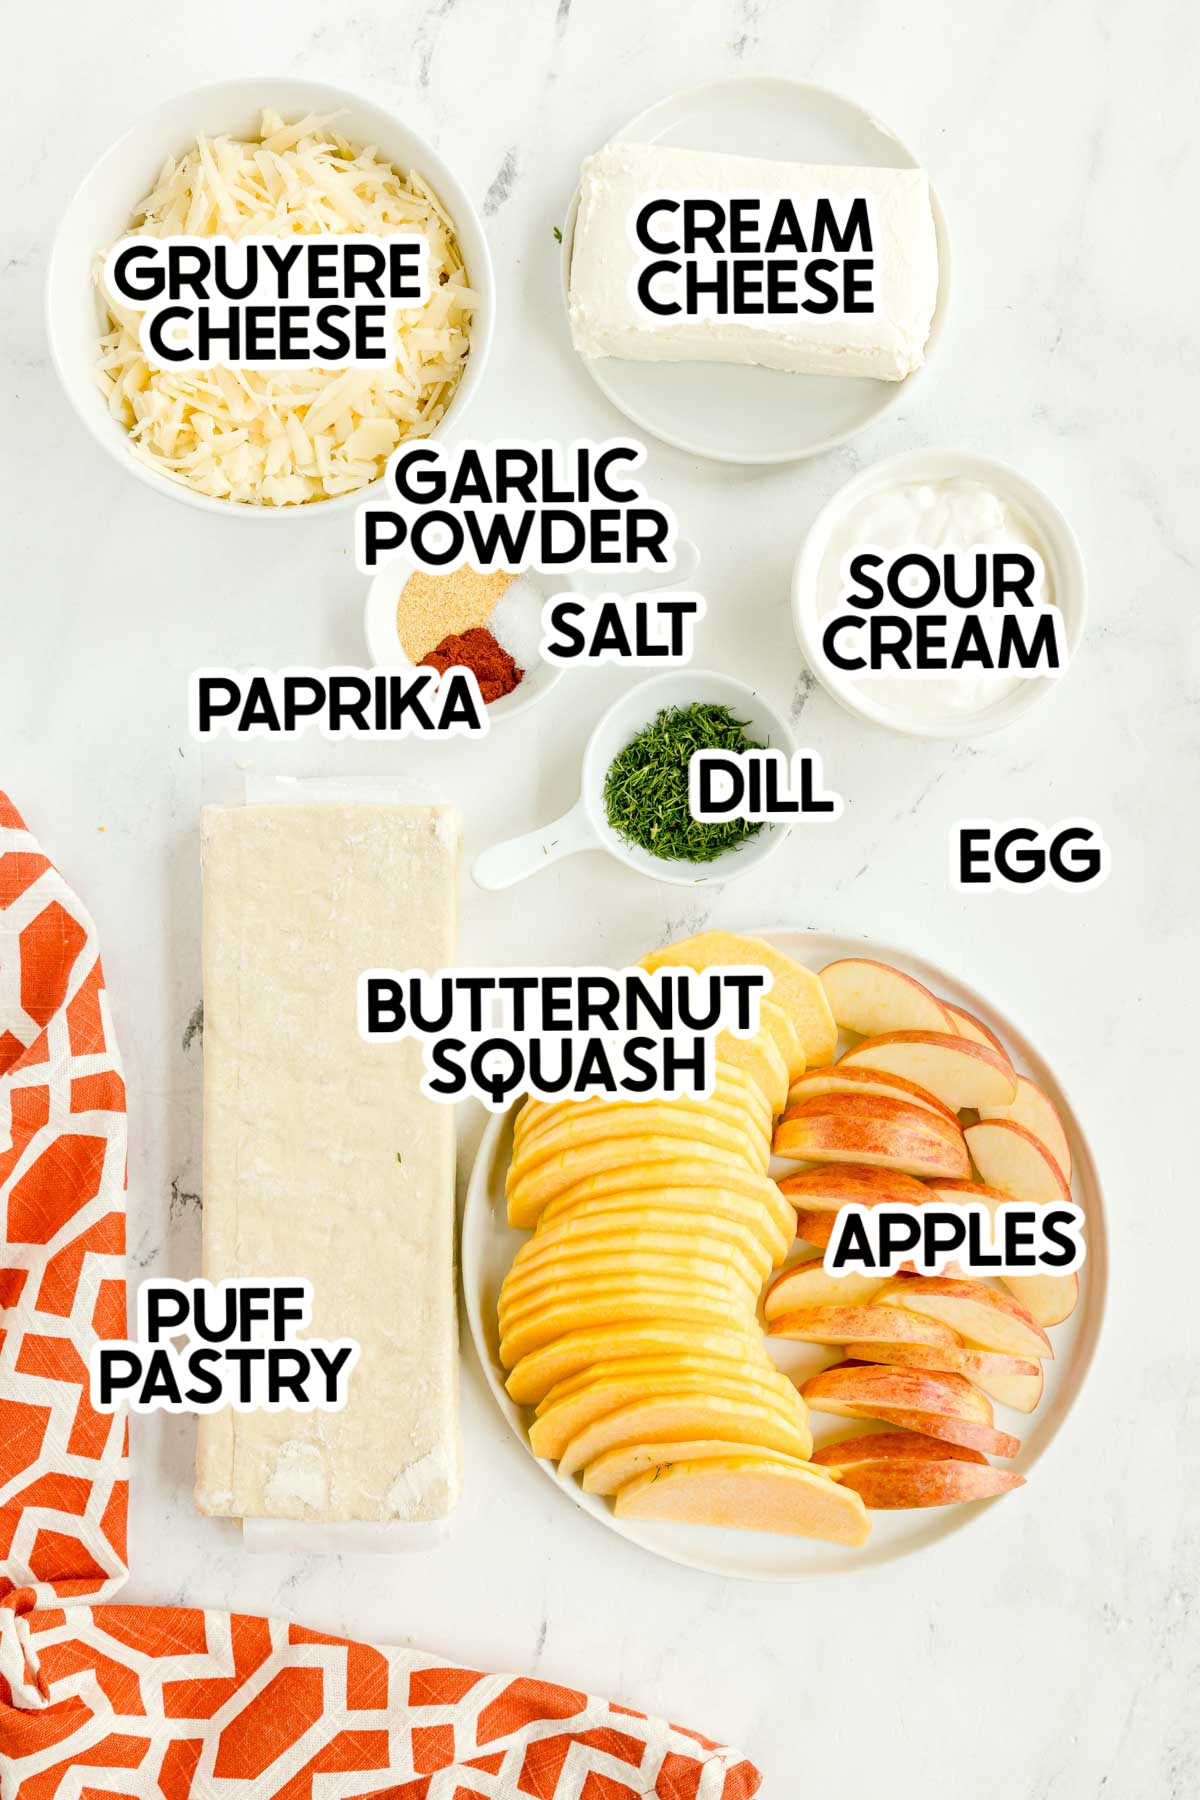
Ingredients in a butternut squash galette

Ingredient notes & Substitutions
- Cream cheese – it’s best when softened, so make sure to allow about an hour at room temperature before mixing. Low-fat cream cheese and full-fat cream cheese will bake the same in this recipe, but using a lower-fat cream cheese will give you less flavor.
- Sour cream – the more fat the better the flavor but a lower fat will work too.
- Gruyere – this recipe is designed around this cheese; however, if you cannot get it, a Swiss cheese will work. Buy a block and shred it yourself.
- Dill – fresh is best in my opinion, but if you want to use dried, use 1/2 tsp.
- Puff pastry – not all store-bought pastries are the same; one that uses butter will be much richer and flakier than one that uses oils.
- Butternut squash – cut this as thinly as possible so it’ll cook through. If you don’t love butternut squash, this also works with acorn or delicata squash.
- Apple – pick your favorite apple, just make sure to cut it very thinly. Or if you don’t want to use apple, you can omit it all together.
Tip!
It is essential that you use thinly sliced toppings. The size and shape don’t matter as long as it is thin so it will cook through in the time that the puff pastry does.
How to make a butternut squash galette
This galette is broken down into a few steps, including making the filling, assembling, and baking. You’ll be blown away with how tasty it is for the minimal amount of work it takes. I’ve included basic instructions below but make sure to check out the full recipe card for all the details.
1 – Make the filling
- Preheat the oven to 400 degrees and line two baking sheets with parchment paper.
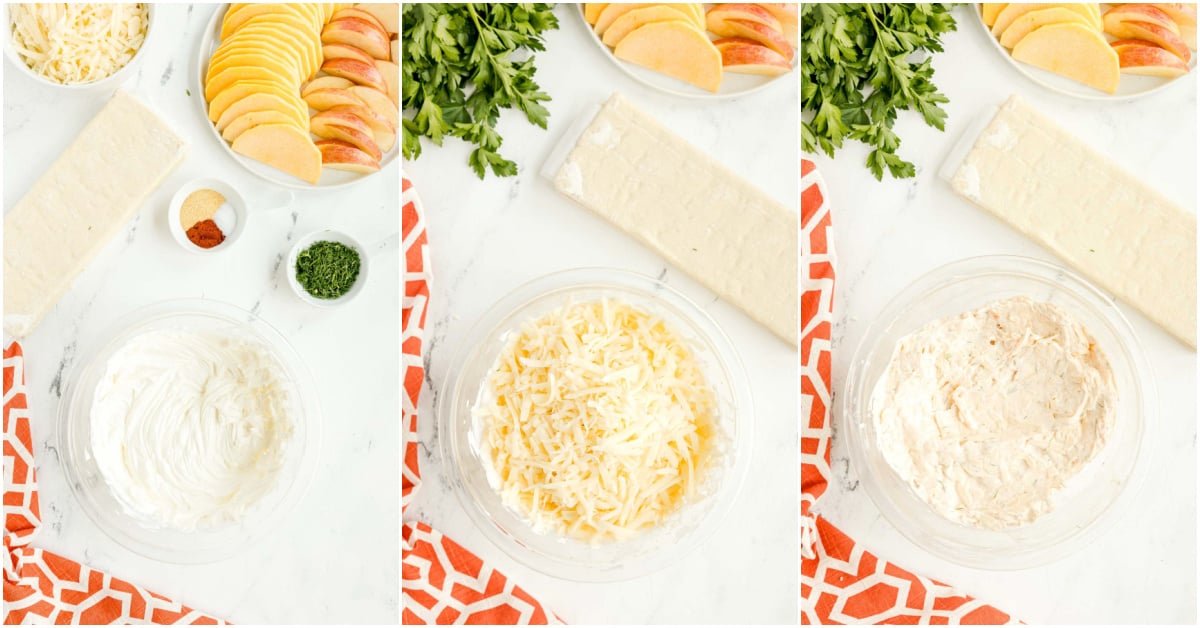
- In a medium bowl, add softened cream cheese and sour cream, then mix with a wooden spoon or rubber spatula until throughly combined.
- Fold the shredded cheese into the cream mixture.
- Add in the various spices and mix until everything is evenly combined.
2 – Assemble the galette
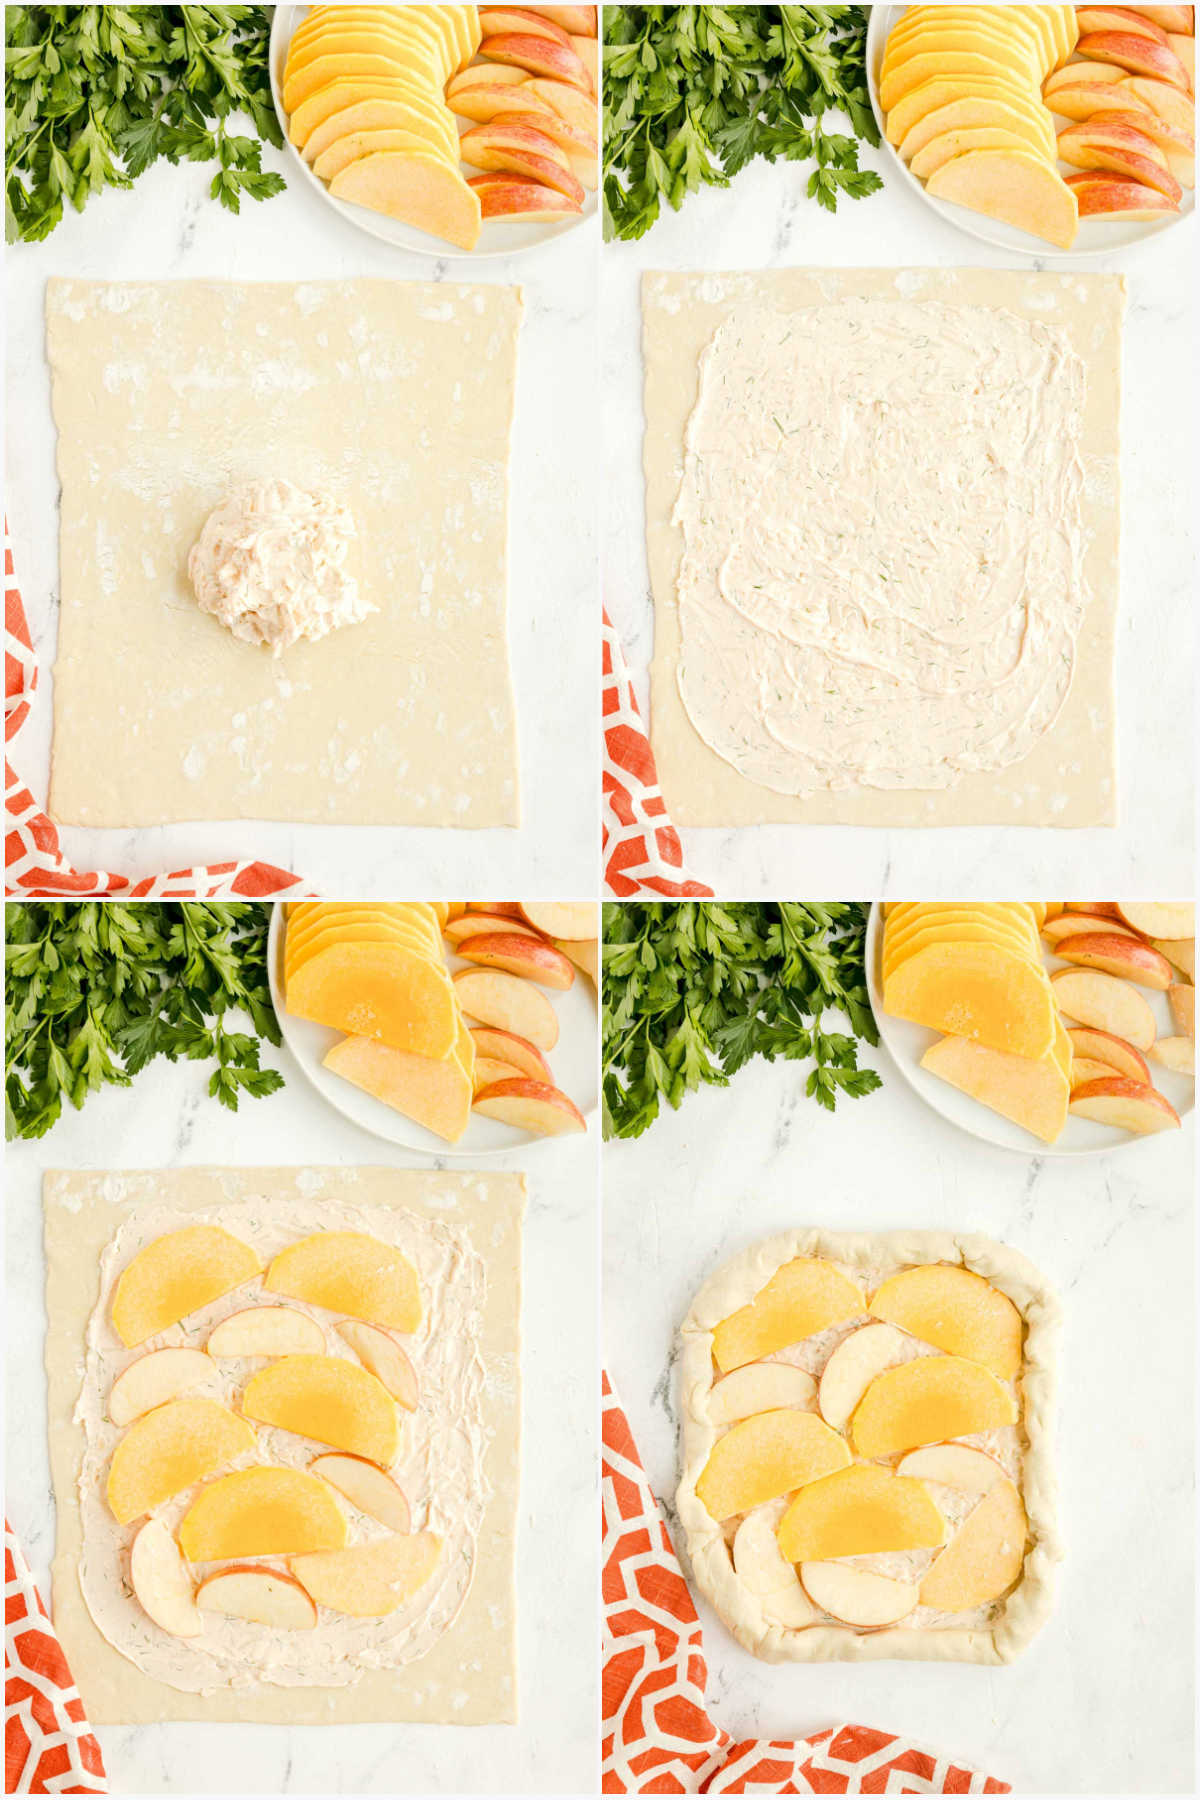
- Working with one sheet of puff pastry at a time, lay it on a clean surface and gently roll out any bumps until it is roughly 1 inch longer on each side.
- Evenly spread about 1/4 of the cream cheese mixture in a circle on the pastry. Make sure to leave 1/2 an inch of raw dough along all the edges.
- Top the cream cheese layer with a thin layer of finely sliced butternut squash and apples. Taking care not to overlap the slices.
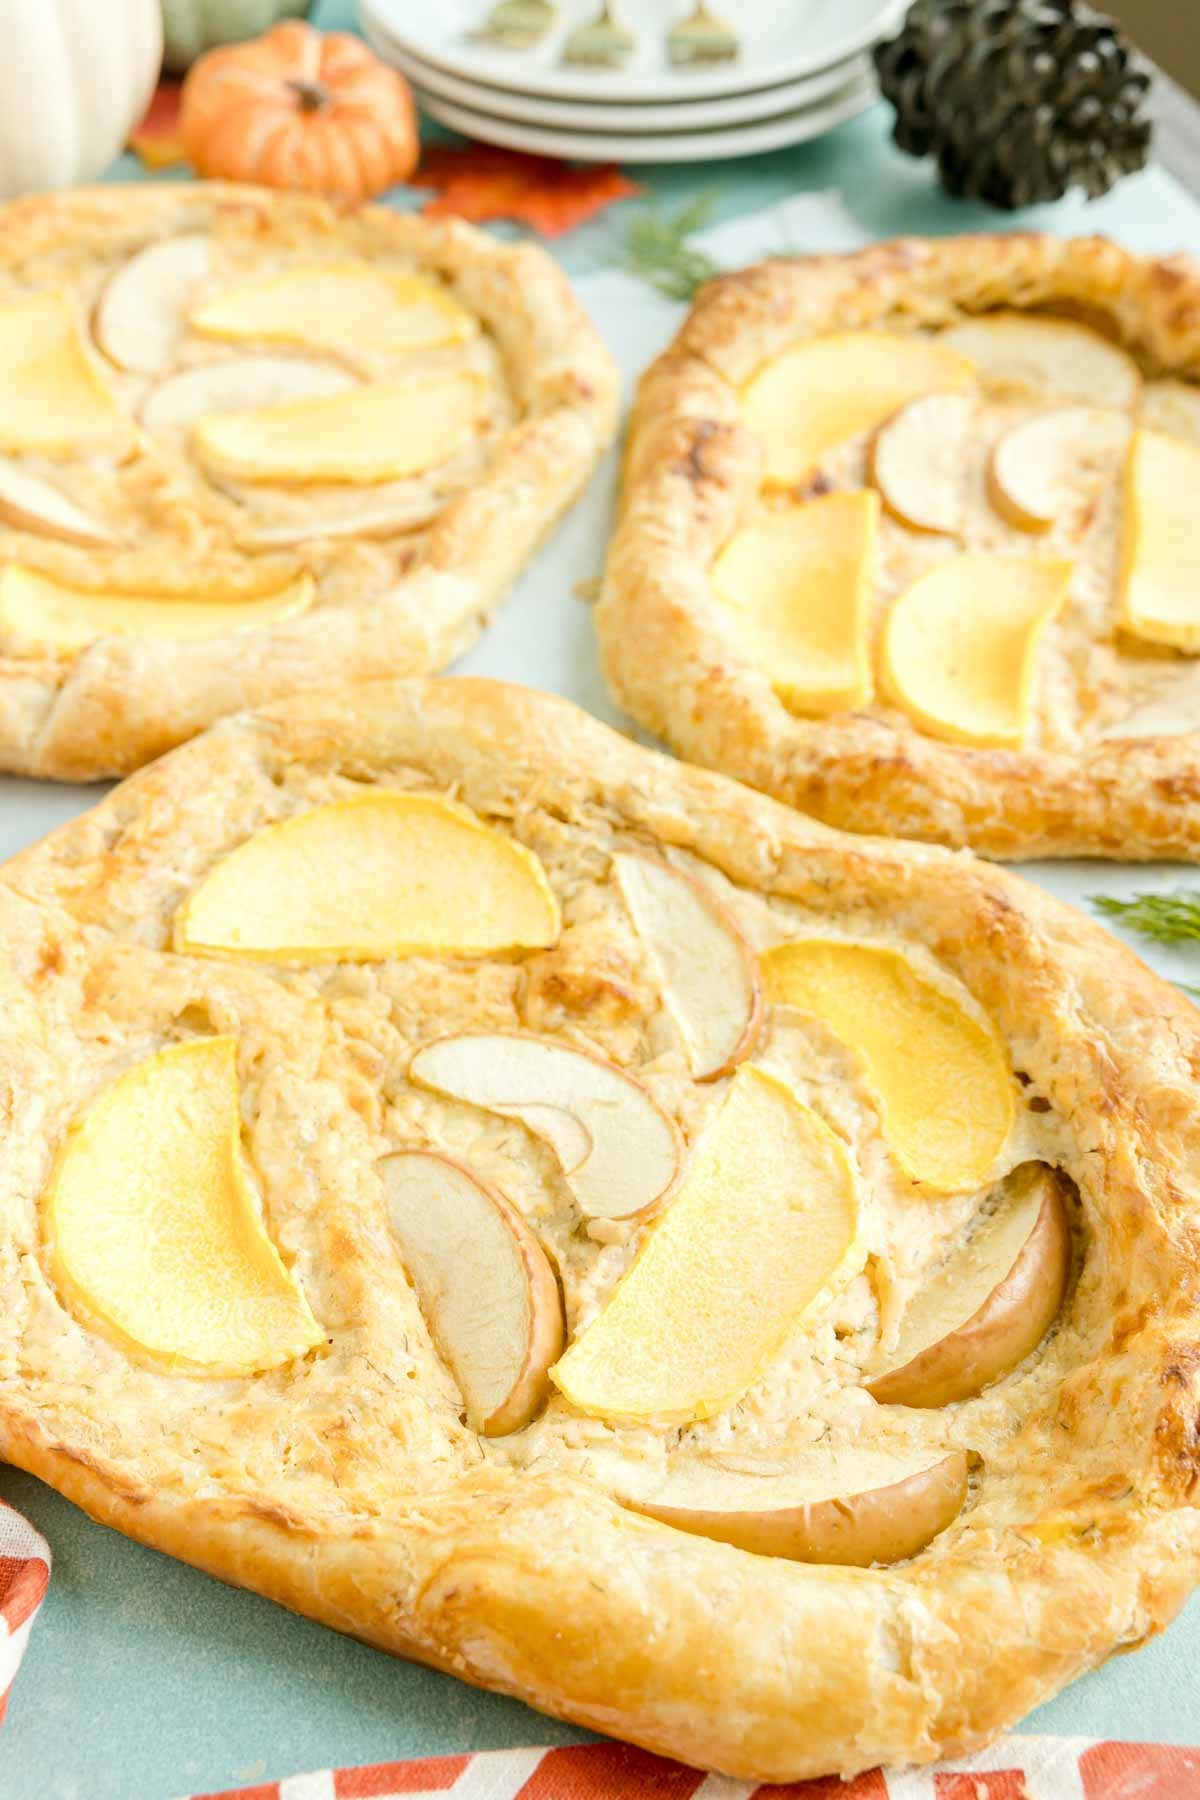
- Fold over the raw edges onto the cream cheese mixture to create a rough circle that resembles an oversized danish.
- Transfer the pastry to one side of a baking sheet.
- Repeat the process with the remaining three pastry doughs.
Tip!
Taste the mixture before adding it to the puff pastry; some cheeses are saltier than others, so you might want to add 1/4 tsp of salt after tasting it. The cheese we used was fairly salty so extra salt isn’t written into the recipe, but you may want to add it depending on your salt preferences.
Shaping Tip
Don’t stress about the shape of the danish, it’s meant to be rustic. If you find it easier to create a rectangle, that works too! The important part is that you leave at least 1/2 an inch of dough to be folded over.
3 – Bake and Serve
- Create an egg wash by beating an egg with a splash of water then brush over all the raw dough edges.
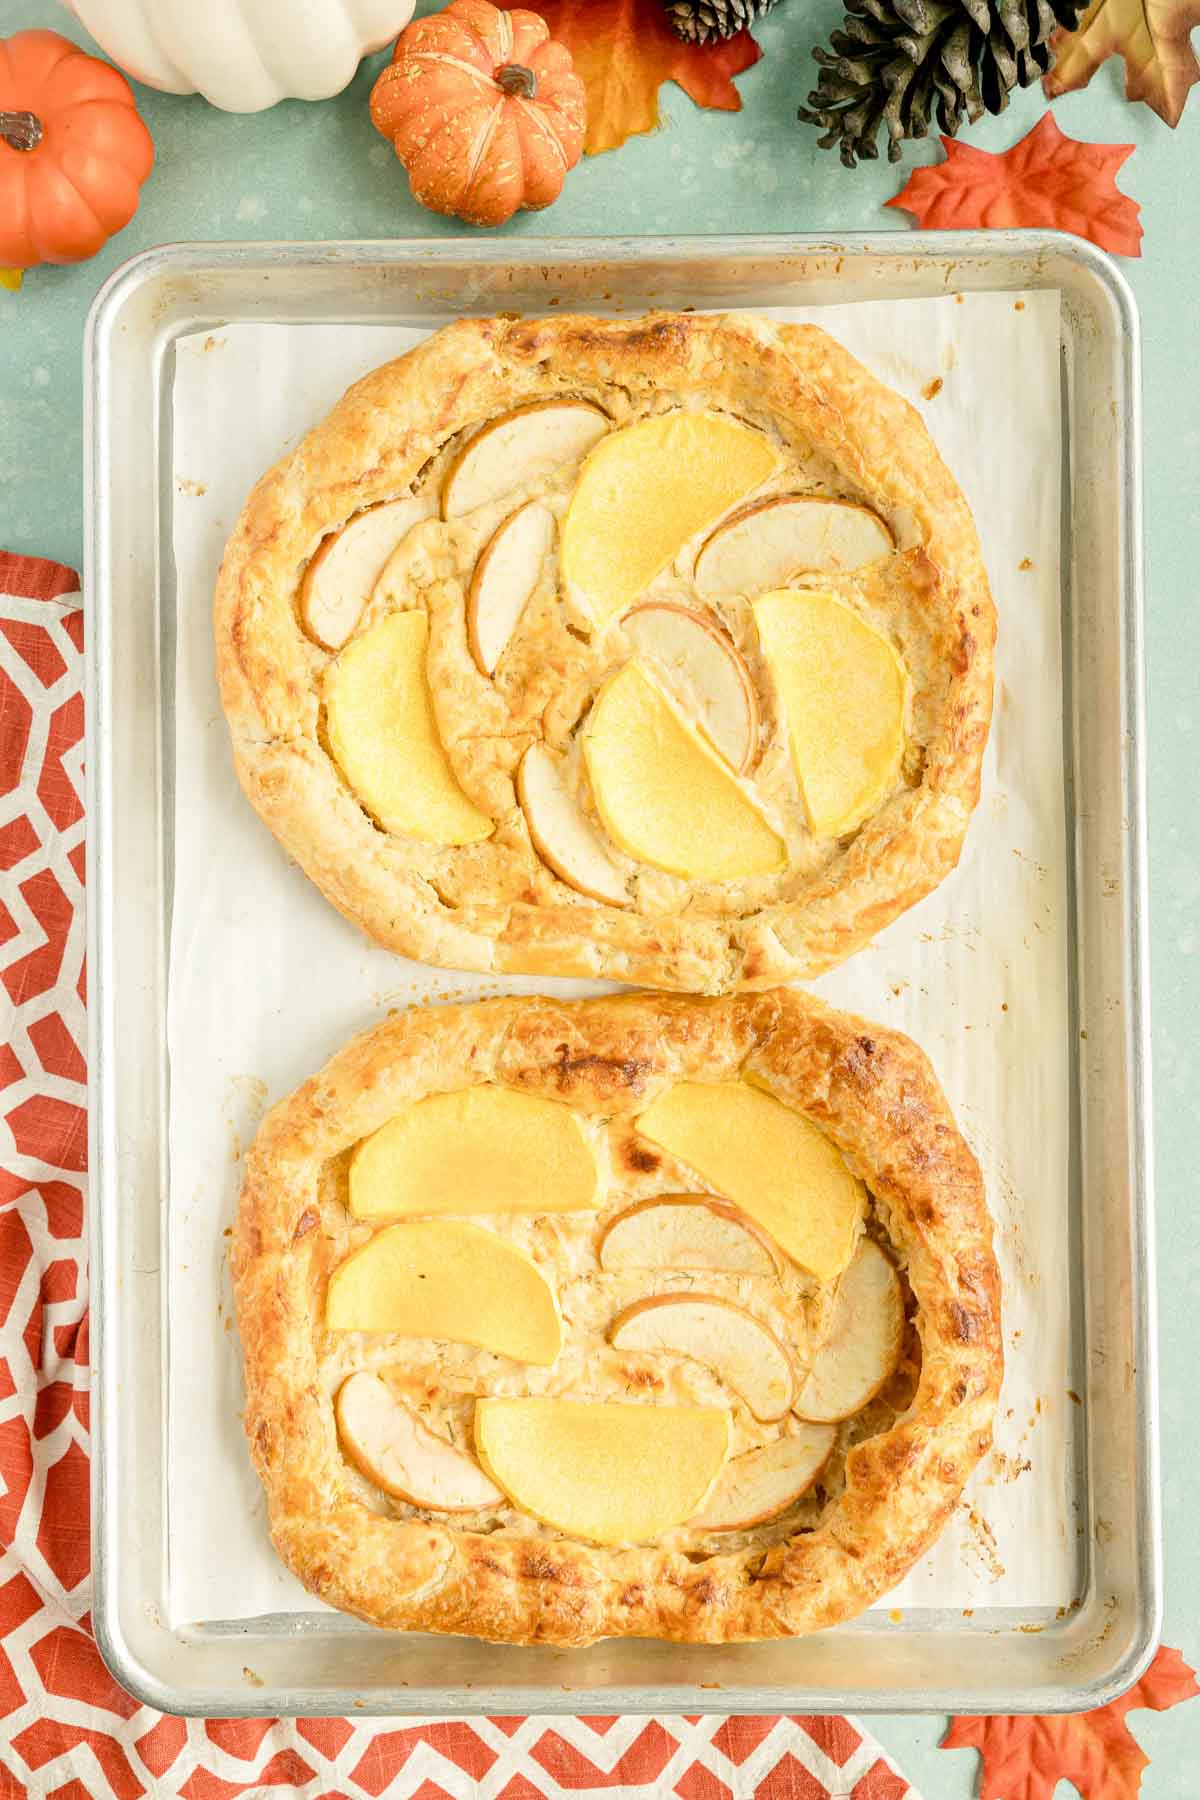
- Bake in the oven for 20-22 minutes until the edges are golden brown.
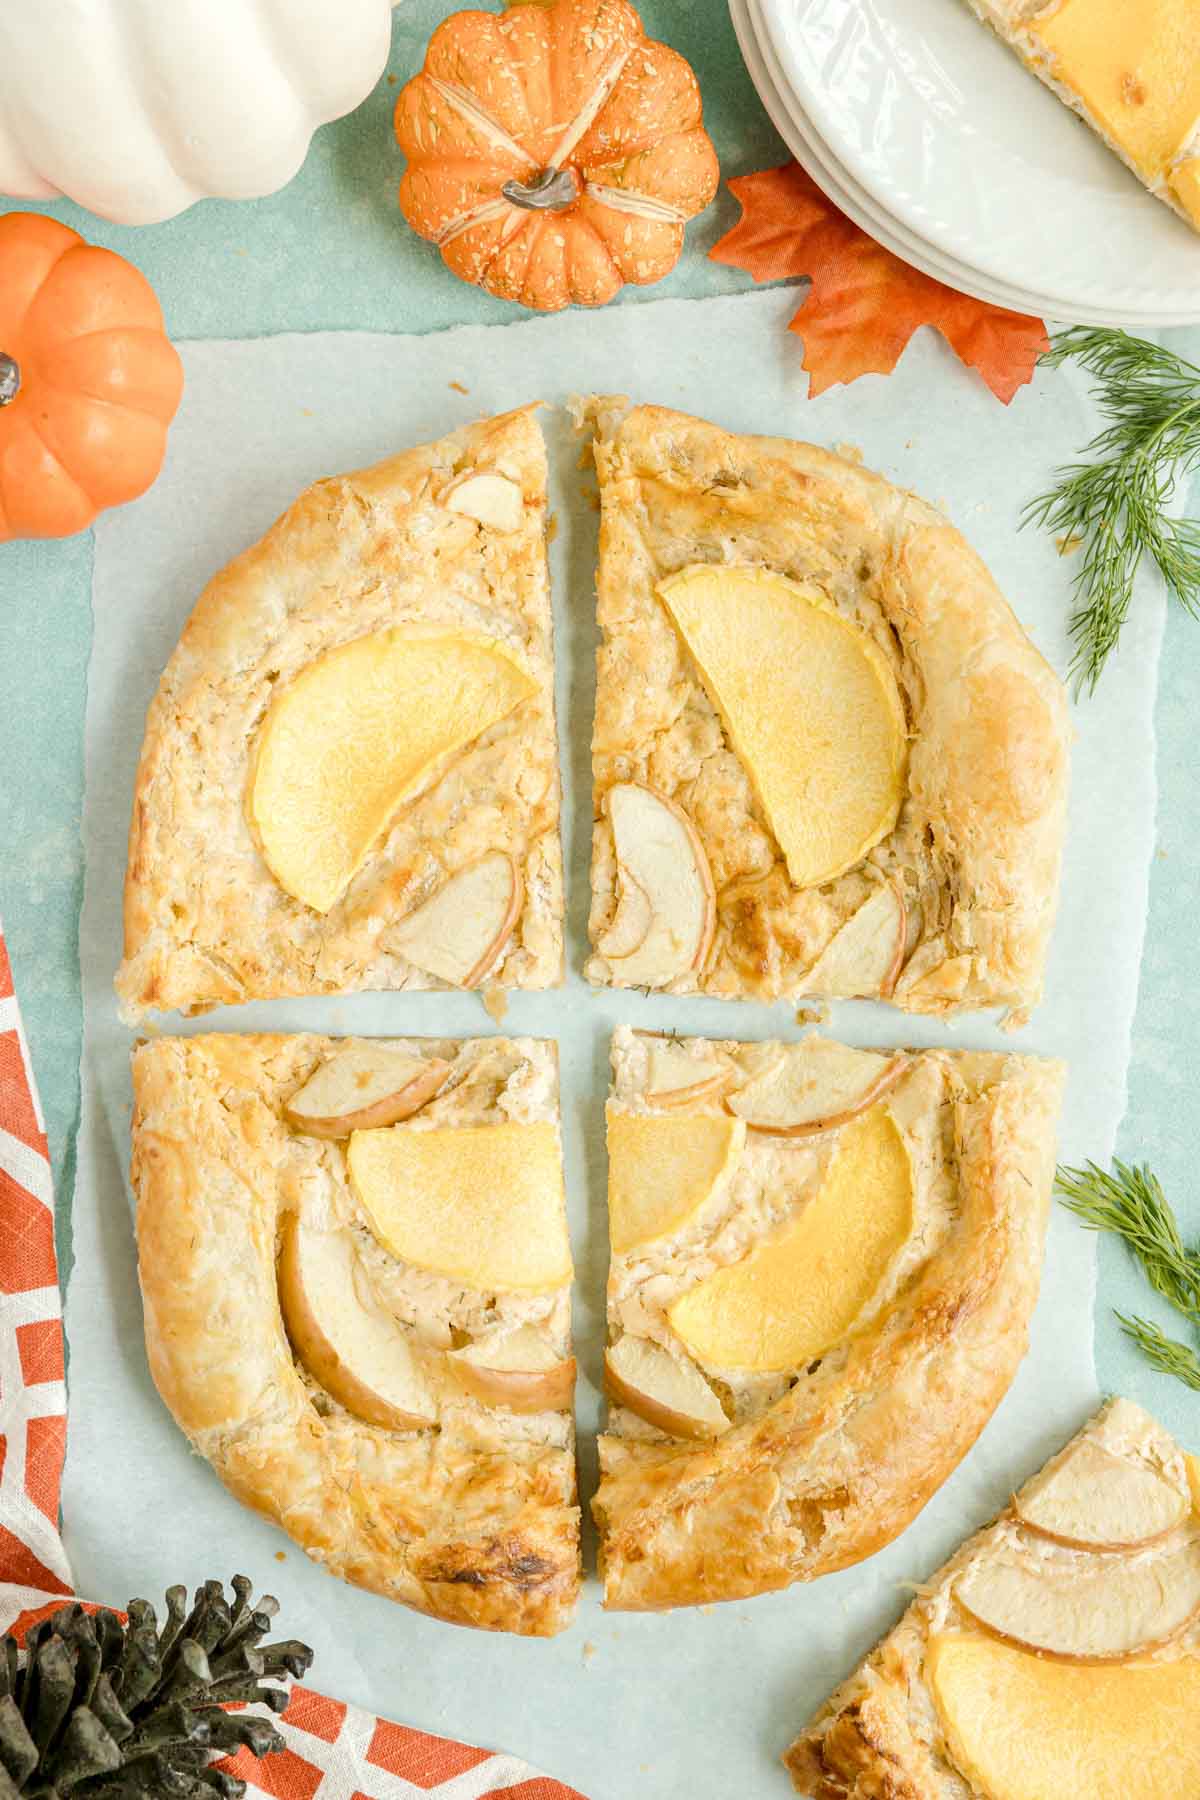
- Allow to sit for several minutes to cool before slicing and serving warm.
Tip!
If you want an additional layer of sweetness, drizzle the cooked pastry with either some regular honey or some hot honey before slicing.
Other Combinations to Try
I preferred the combination of butternut squash and apple the most but you can try out these combinations as well!
- Mushrooms and asparagus – this will give you more of an herby and earthy flavor than the fall flavors of the squash and apple.
- Acorn squash or kombucha squash with apple – these are softer squashes and may cook a little quicker than the butternut.
Just make sure that whatever you use you slice thinly. Also, any vegetable denser than a beet will not bake through on the galette. If you want to use something denser, you can partially cook the veggies before adding them onto the galette.

How to Store And reheat
This is one of those recipes that has to be stored in the fridge. Place any leftovers you have in an airtight container to keep the pastry from drying out and keep it in the fridge for up to three days. Any longer and the pastry will be too dry.
Everyone has their own preferences for reheating things. You can heat this however you prefer, but it’s best when heated in the oven.
Place remaining pieces on a baking sheet and heat at 350 degrees until the pastry is crunchy again and the cream cheese is warmed through. This should take no longer than 10 minutes in a preheated oven, but timing can vary depending on the size of the piece.
How to make ahead of time
Save time by prepping the pastries with everything but the sliced squash and apples. Tightly wrap the pastries in plastic wrap and store in the fridge for up to 24 hours. Top and bake as directed in the original recipe.
You can also prep the various layers the day before, then assemble and bake when ready.
Recipe FAQs
Why are the edges all puffed up when baking?
Don’t worry about the puffy edges as it bakes. As it cools, they will fall flat on their own, or you can gently push them into place.
What other vegetables work well with this?
I had success with an acorn squash, mushrooms, and asparagus. You can mix it up or try something new; just make sure the slices are very thin.
Why didn’t my vegetables cook all the way through?
It was likely too thick to cook entirely in the time it takes to bake the pastries. If you are worried about not having thin enough vegetables, you can partially cook them in the oven for 10 minutes before adding them to the top of the pastry and baking again.

More Fall Appetizers
If you’re looking for other elegant fall appetizers, any of these would be a good fit!
- Apple cheddar bundles – a great way to use any of those leftover apples, thesee little bites are the perfect bite of all!
- Butternut squash soup with pumpkin seeds – a creamy fall soup topped with crispy spiced pepitas!
- Pumpkin cheese dip – the easiest fall dip that’s savory instead of sweet!
- Pumpkin shaped rolls – filled with cheese and bacon, these are a fun and festive fall snack!
- Buffalo chicken sliders on Hawaiian rolls – our viral buffalo chicken dip turned into a fall snack!
Butternut Squash and Apple Galette
Ingredients
- 8 ounces cream cheese softened
- ½ cup sour cream
- 8 ounces Gruyere cheese shredded
- 2 tsp fresh dill chopped
- 1 tsp garlic powder
- ½ tsp paprika
- ¼ tsp salt
- 2 packages puff pastry 4 total sheets
- 1 butternut squash thinly sliced
- 1 apple thinly sliced
- 1 egg
Instructions
- Preheat the oven to 400 degrees and line two baking sheets with parchment paper.
Make The Filling
- In a small bowl combine cream cheese and sour cream until smooth.8 ounces cream cheese, ½ cup sour cream
- Add in shredded gruyere cheese until evenly combined.8 ounces Gruyere cheese
- Add the dill, paprika, salt, and garlic powder to the cheese mixture, stir until everything is combined.2 tsp fresh dill, 1 tsp garlic powder, ½ tsp paprika, ¼ tsp salt
Assemble Pastries
- On a clean surface lay one sheet of puff pastry, gently flattening it and rolling out any bumps until it is roughly 1 inch longer on each side.2 packages puff pastry
- Spread roughly ¼ of the cream cheese mixture onto the center of the puff pastry, in a circle. Make sure to leave at least ½ an inch of raw pastry around the edges. (putting a circle in a square will leave uneven edges and thats okay, you’ll fold over the edges in a bit.)
- Add a layer of thinly sliced apples and butternut squash over the cream cheese mixture, try to not overlap them.1 butternut squash, 1 apple
- Fold over the raw edges onto the cream cheese mixture to create a rough circle that resembles a large danish.
- Transfer the galette to one half of a baking pan.
- Repeat the steps with the remaining 3 puff pastries.
- Make an egg wash by whisking the egg with a splash of water.1 egg
- Brush the raw edges of the puff pastry with egg wash.
Bake And Serve
- Bake in the oven for 20-22 minutes until the edges are golden brown. (don’t worry if the centers puff up, they will deflate when they cool)
- Remove from the oven and allow to cool until easily handled.
- Serve whole or sliced into six sections with a pizza cutter.
Tips & Notes:
- It is essential that you use thinly sliced toppings. The size and shape don’t matter as long as it is thin so it will cook through in the time.
- Don’t stress about the shape of the danish; it’s meant to be rustic. If you find it easier to create a rectangle, that works too! The important part is that you leave at least 1/2 an inch of dough to be folded over.
- If you are not a fan of baked apples, add more squash and leave it off. You can also add whatever vegetables you want.
- Any vegetable denser than a beet will not bake through. The beet was still tough when I tried it. However, if you really want to, you could partially cook the vegetables before putting them on.
- Taste the mixture before baking; some cheeses are saltier than others, so you might want to add 1/4 tsp of salt after tasting it.
- For an additional layer of sweetness, lightly drizzle hot pastries with honey or hot honey.












Leave a Reply