
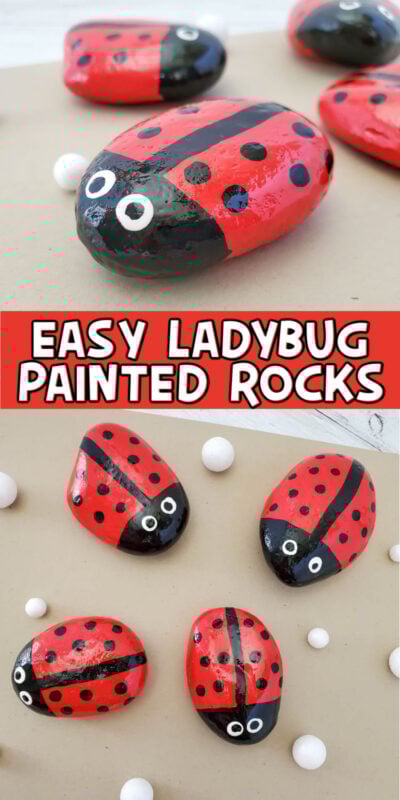
These fun ladybug rocks are super easy to make and an adorable addition to any garden, walking path, or backyard! Whether you’ve painted tons of rocks in the past or just getting started, this simple ladybug rock painting activity is a fun activity for the spring or summer! And both kids and adults will love making their very own ladybug painted rocks because they’re as cute as can be!

Want to save this Idea?
Enter your email below and we’ll send this idea straight to your inbox (plus you’ll receive tons of fun weekly ideas from us!)
My kids are always asking me to paint rocks (after we found some kindness rocks on our neighbor scavenger hunt) but their painting rocks typically means globs of paints and crazy designs painted on a rock that ends up thrown away a few days later.
So this year I thought it would be fun to paint ladybugs on rocks with them instead – making these hand-painted rocks is the perfect activity for the entire family because the design is super simple to make!
And if you have little kids, you can even break up the process and have younger kids paint the entire rock red (no way to mess it up) and then have older kids or teens add the details in the middle of the rock!
Making a cute ladybug that you can put in your yard is such a fun activity and perfect to add to your summer bucket list!
Here’s how to make your own adorable ladybug painted rocks.
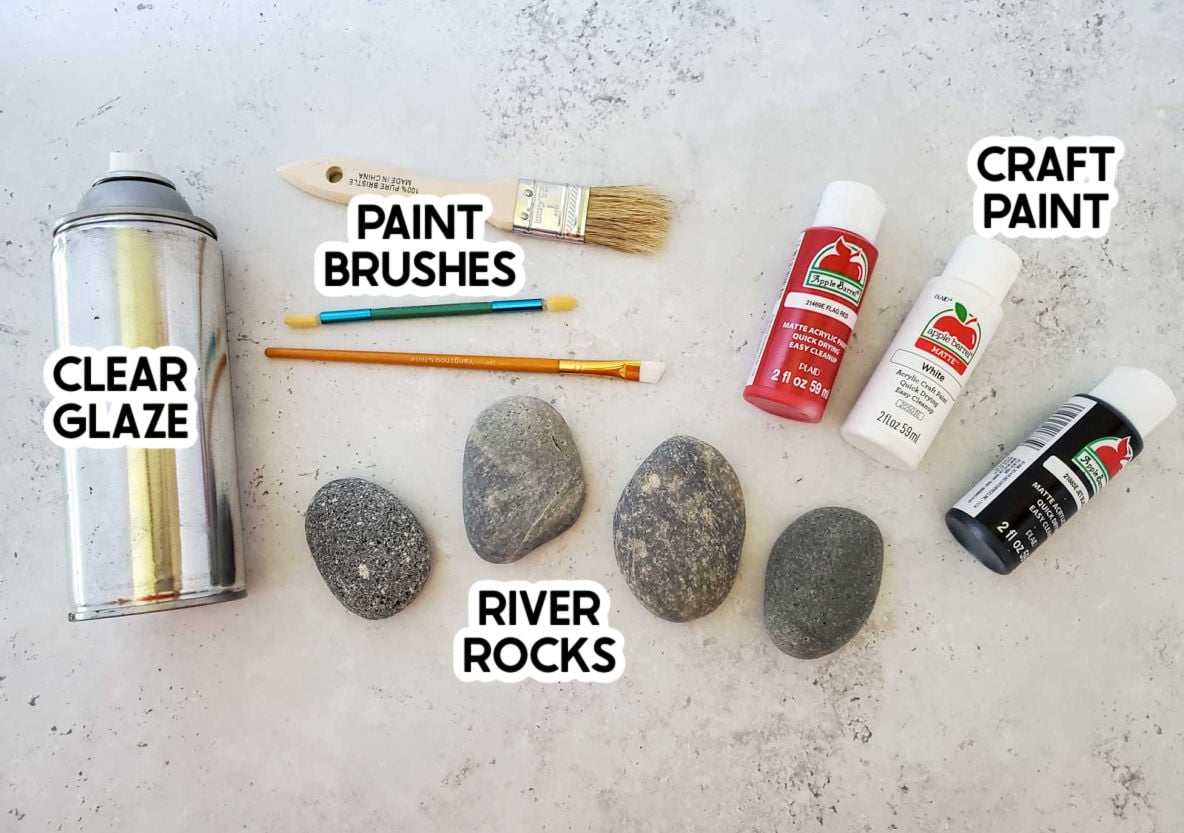
Supplies to Paint ladybugs on rocks
Supply Notes
- River rocks – if you’re going to go out and find your own stones to paint, make sure they’re flat rocks, not round rocks. You want the backs to be flat for these lady beetles! Kids will have so much fun going on a walk to find their rocks but if you’d rather just buy them, this pack of river rocks (or any pack of smooth rocks) is a great option.
- Craft paint – if you want to make traditional ladybugs, you’ll need black paint, red paint, and white acrylic paint. The craft acrylic paint is the best kind of paint because it’ll stay on the rocks even if they get wet, unlike washable kid paint. Save money by picking up the colors of paint at dollar stores or it’s even cheap at craft stores.
- Paint brushes – for this craft, I used three different paint brushes to make the ladybug designs – a regular paint brush to make the entire rock, a 1/4″ flat angled brush (or similar size), and a foam craft applicator to make the dots.
- Clear glaze – I used this Krylon clear glaze, this is important to seal the paint into the rock after painting. It will also help protect it from the outdoor elements and give it that nice finished shine.
If you’d rather use googly eyes instead of painted on eyes, you can do that as well. Just know that googly eyes do not hold up to outside weather conditions very well, which is why I recommend painting the rocks instead!
How to do ladybug rock painting
These ladybug rocks are so simple to make! There’s a reason they are a fun and easy craft project for the whole family!
1 – Wash and Dry the Rocks
- Start by washing the rocks to get rid of any dirt or anything else on the surface. Once they’ve been washed, dry them completely before you start painting.
Note!
If you bought your rocks at the store, you’re probably good to go without washing, but other rocks will likely have some dirt or other film on them so this step helps give you a smoother coating!
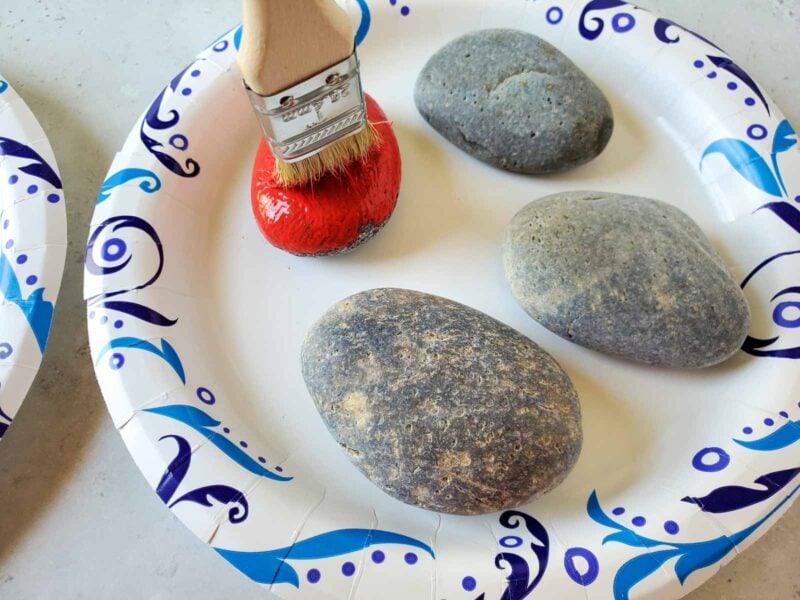
2 – Paint the rock red
- Paint the entire rock red including the top and bottom. This will give these cute little bugs the base coat they need.
- Let the rock dry completely and do another coat and finally a third coat if you think you need it, making sure to let the red paint dry completely before moving onto the next coat.
Tip!
If you’re in a hurry, you can use a blow dryer to help speed up the drying process. I recommend waiting until it’s dried a bit before using a blow dryer so it doesn’t accidentally streak the paint all over the rock, but it can help with speeding up the final steps of the paint drying.
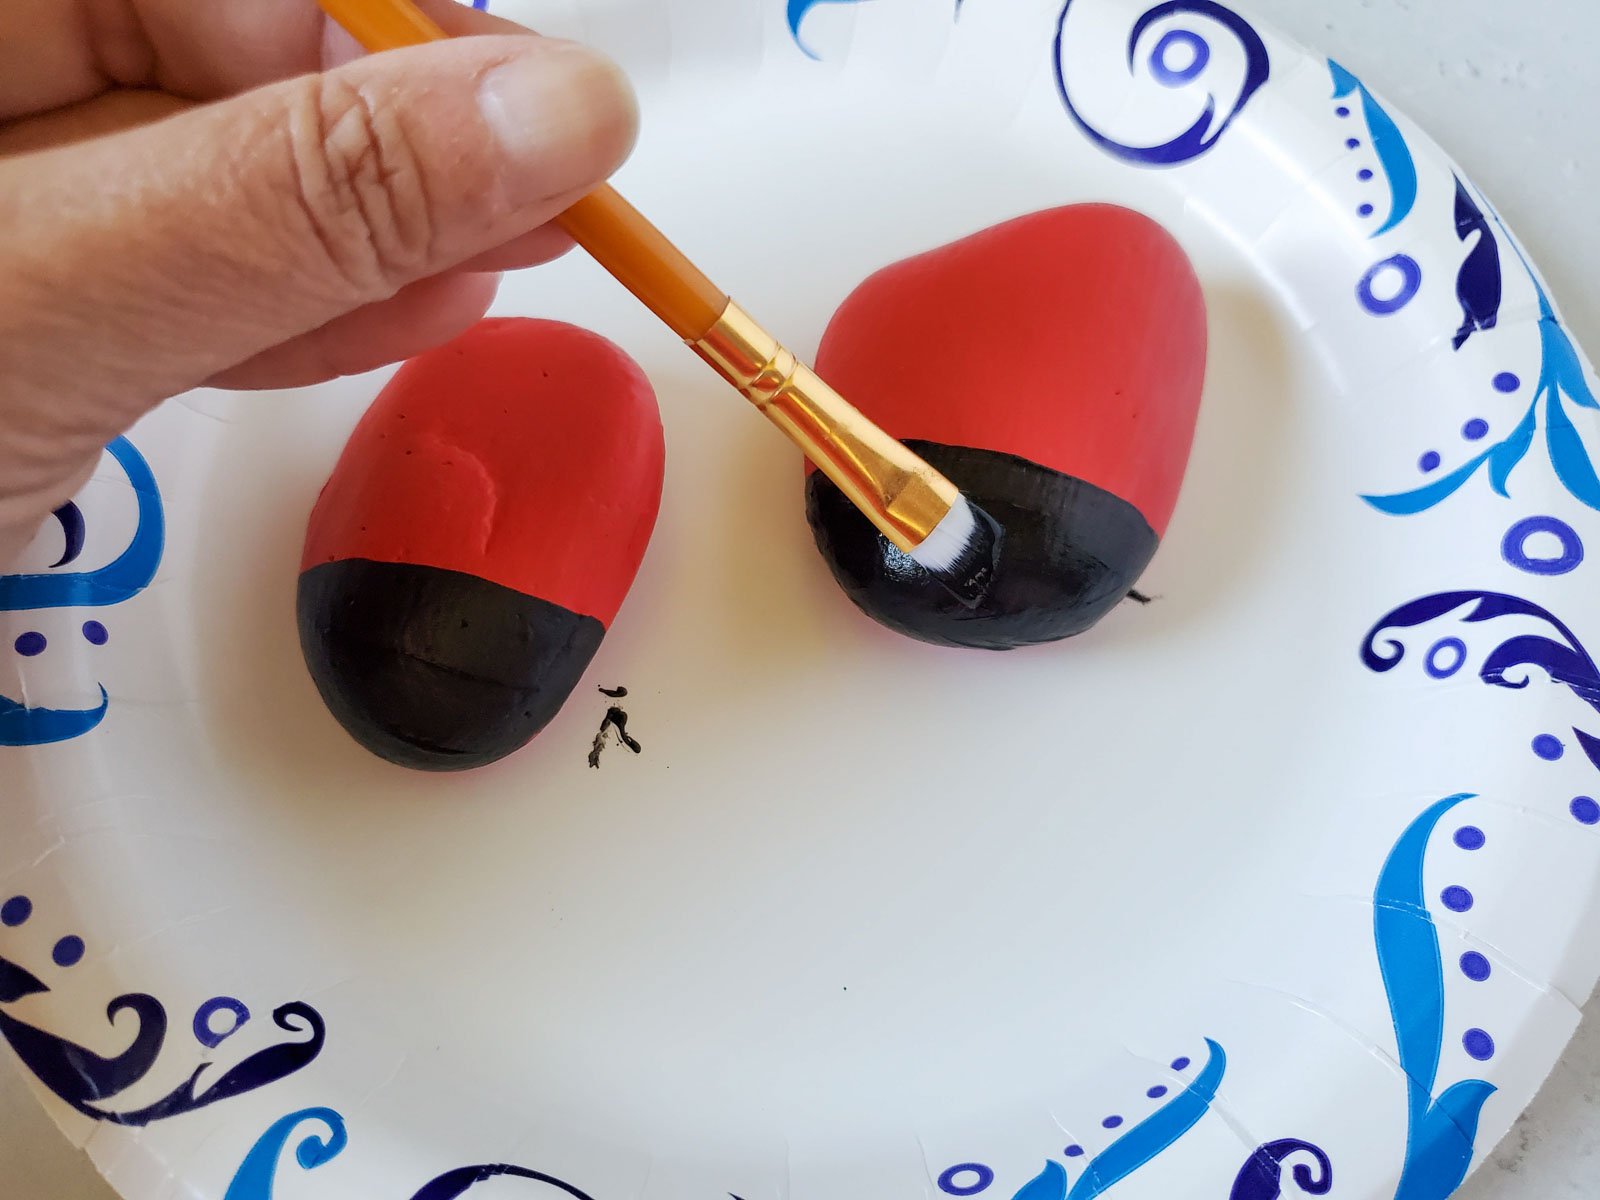
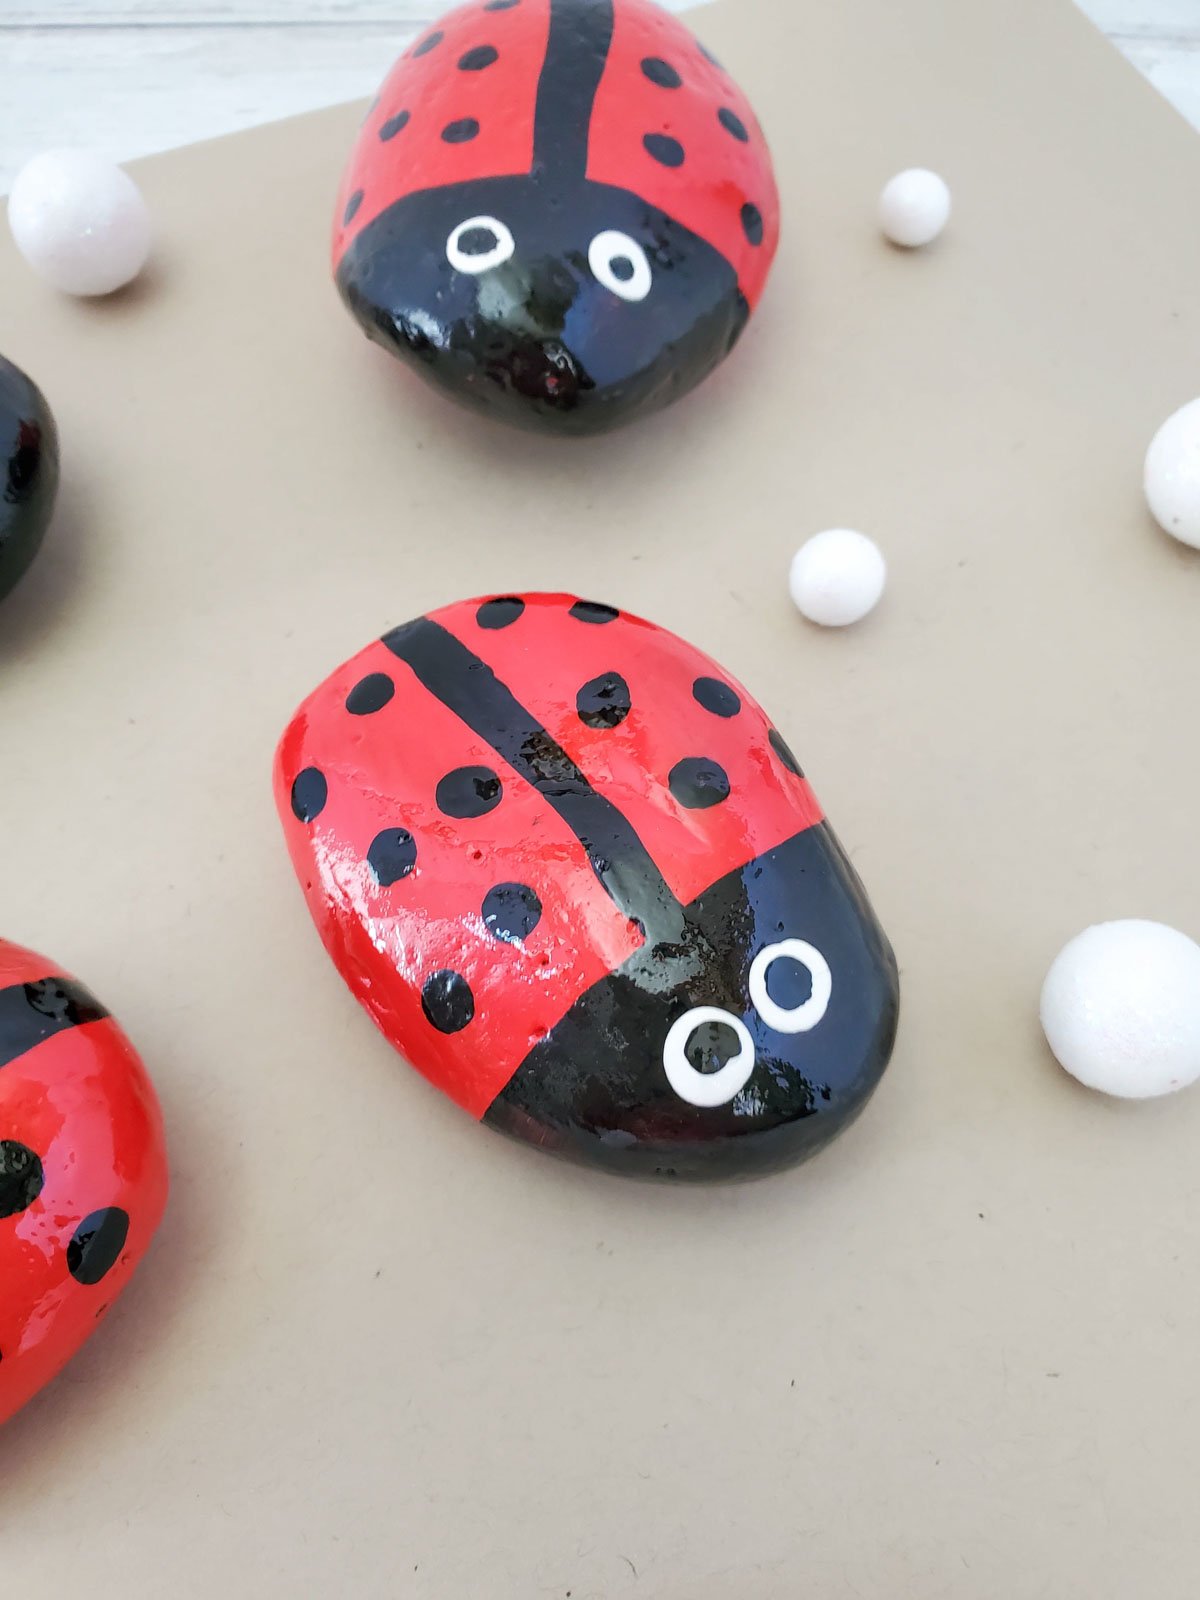
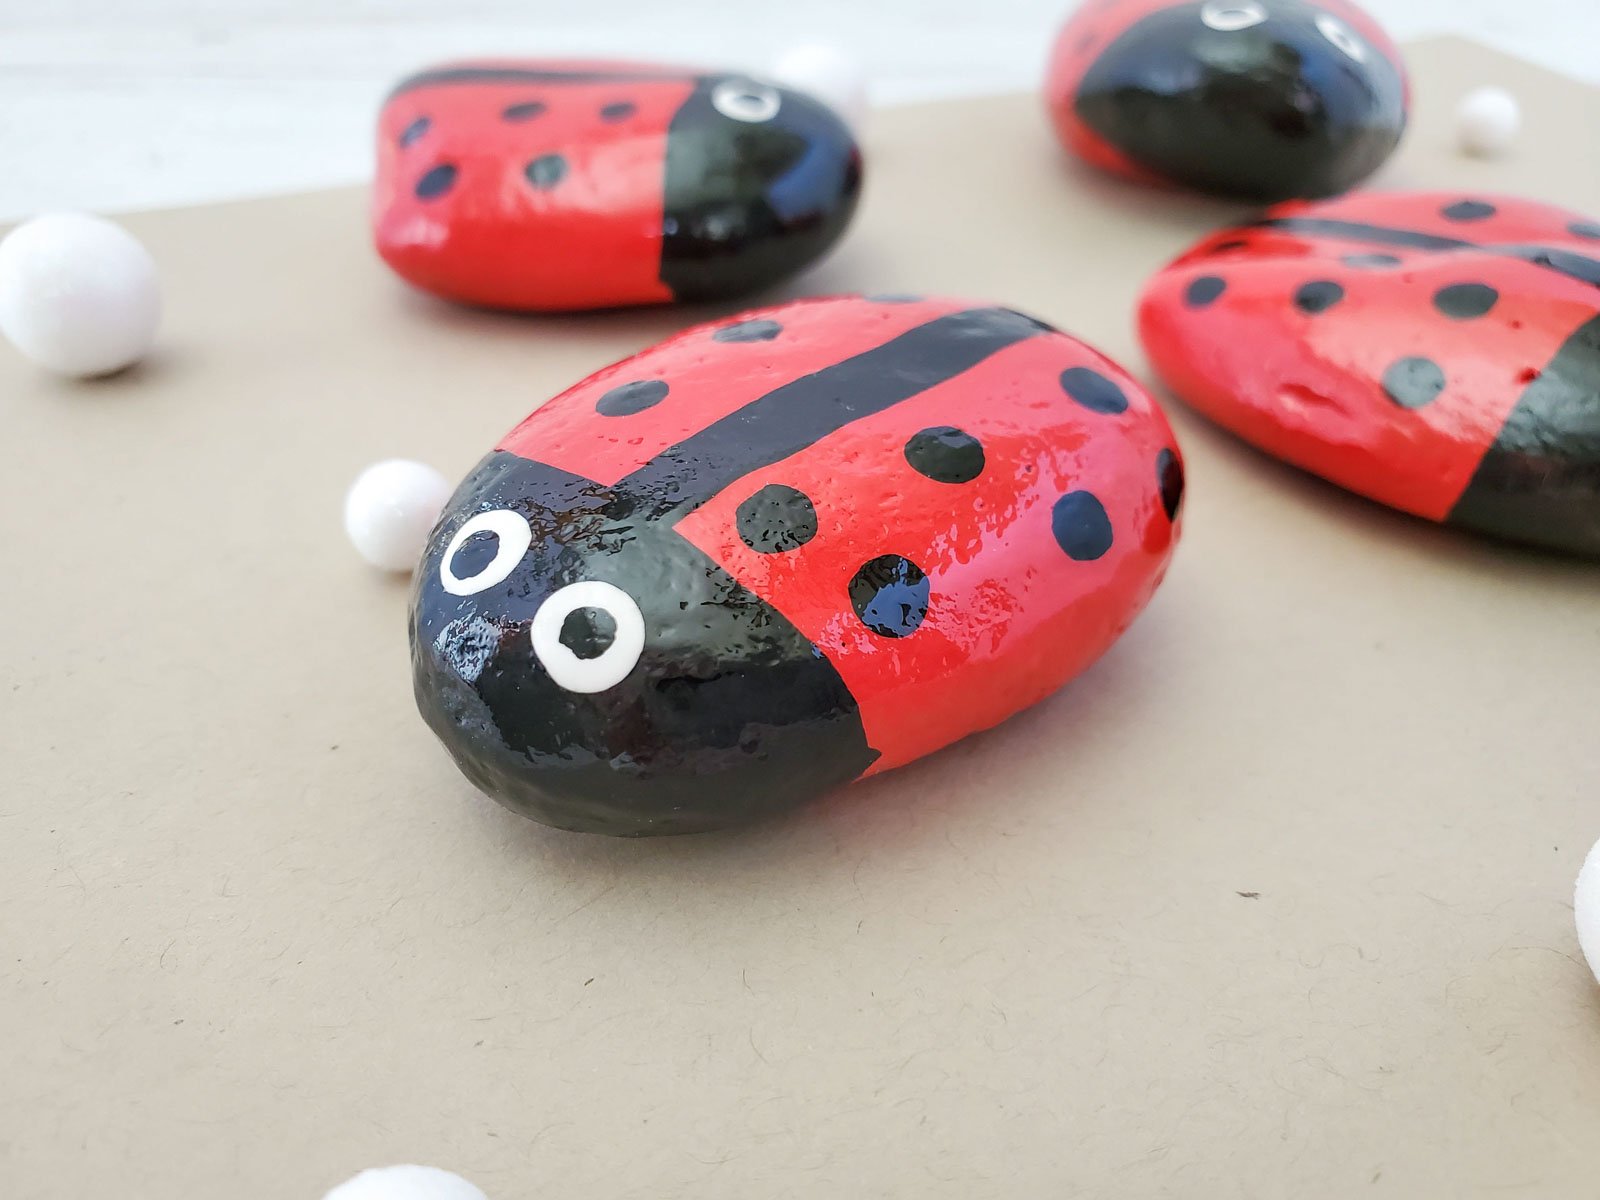
3 – Add the Face and Back
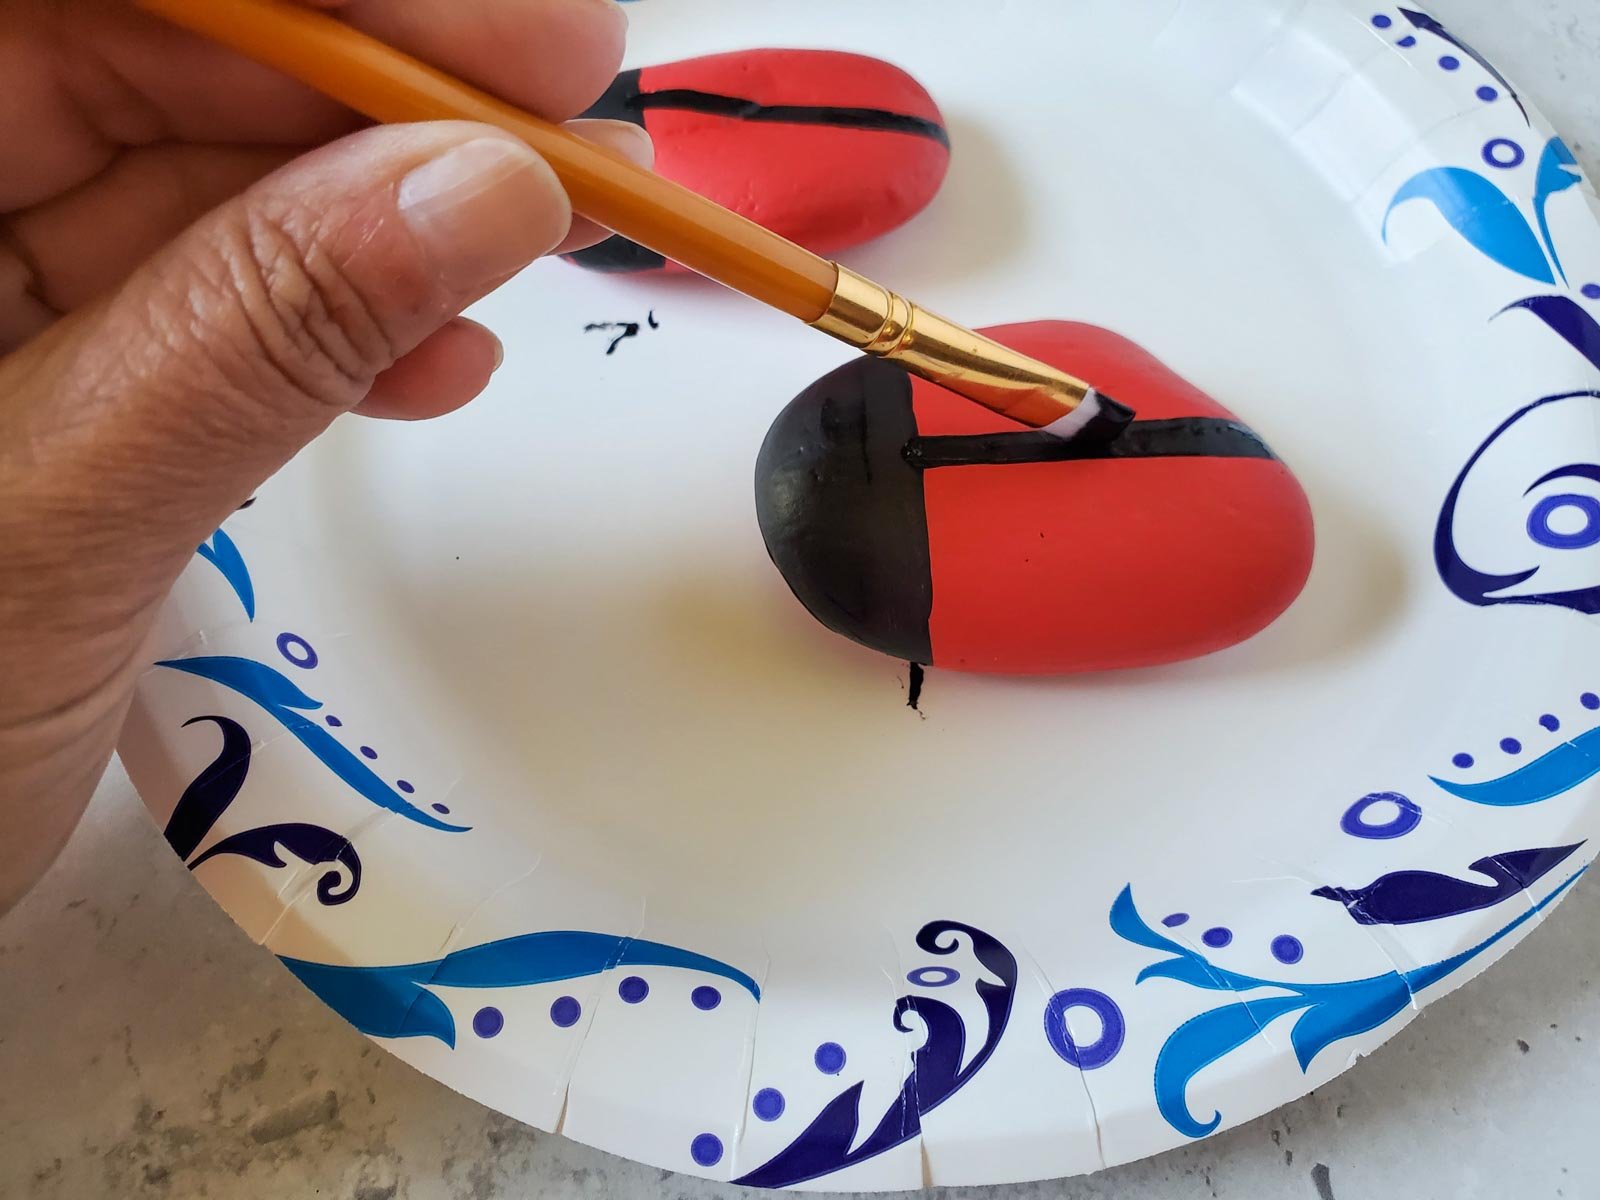
- Use the flat part of the angled brush and the black paint to head the top of the rock black to be the head of the ladybug. I painted about a third of the rock black, but it can be a little bigger or smaller if you’d like.
- Use the angled section of the brush to paint a black line down the center of the body to create that iconic dividing line on your ladybug pet rock. It’s okay if the dividing line down the back isn’t a perfectly straight line, a little bit of character is what makes these ladybug character art.
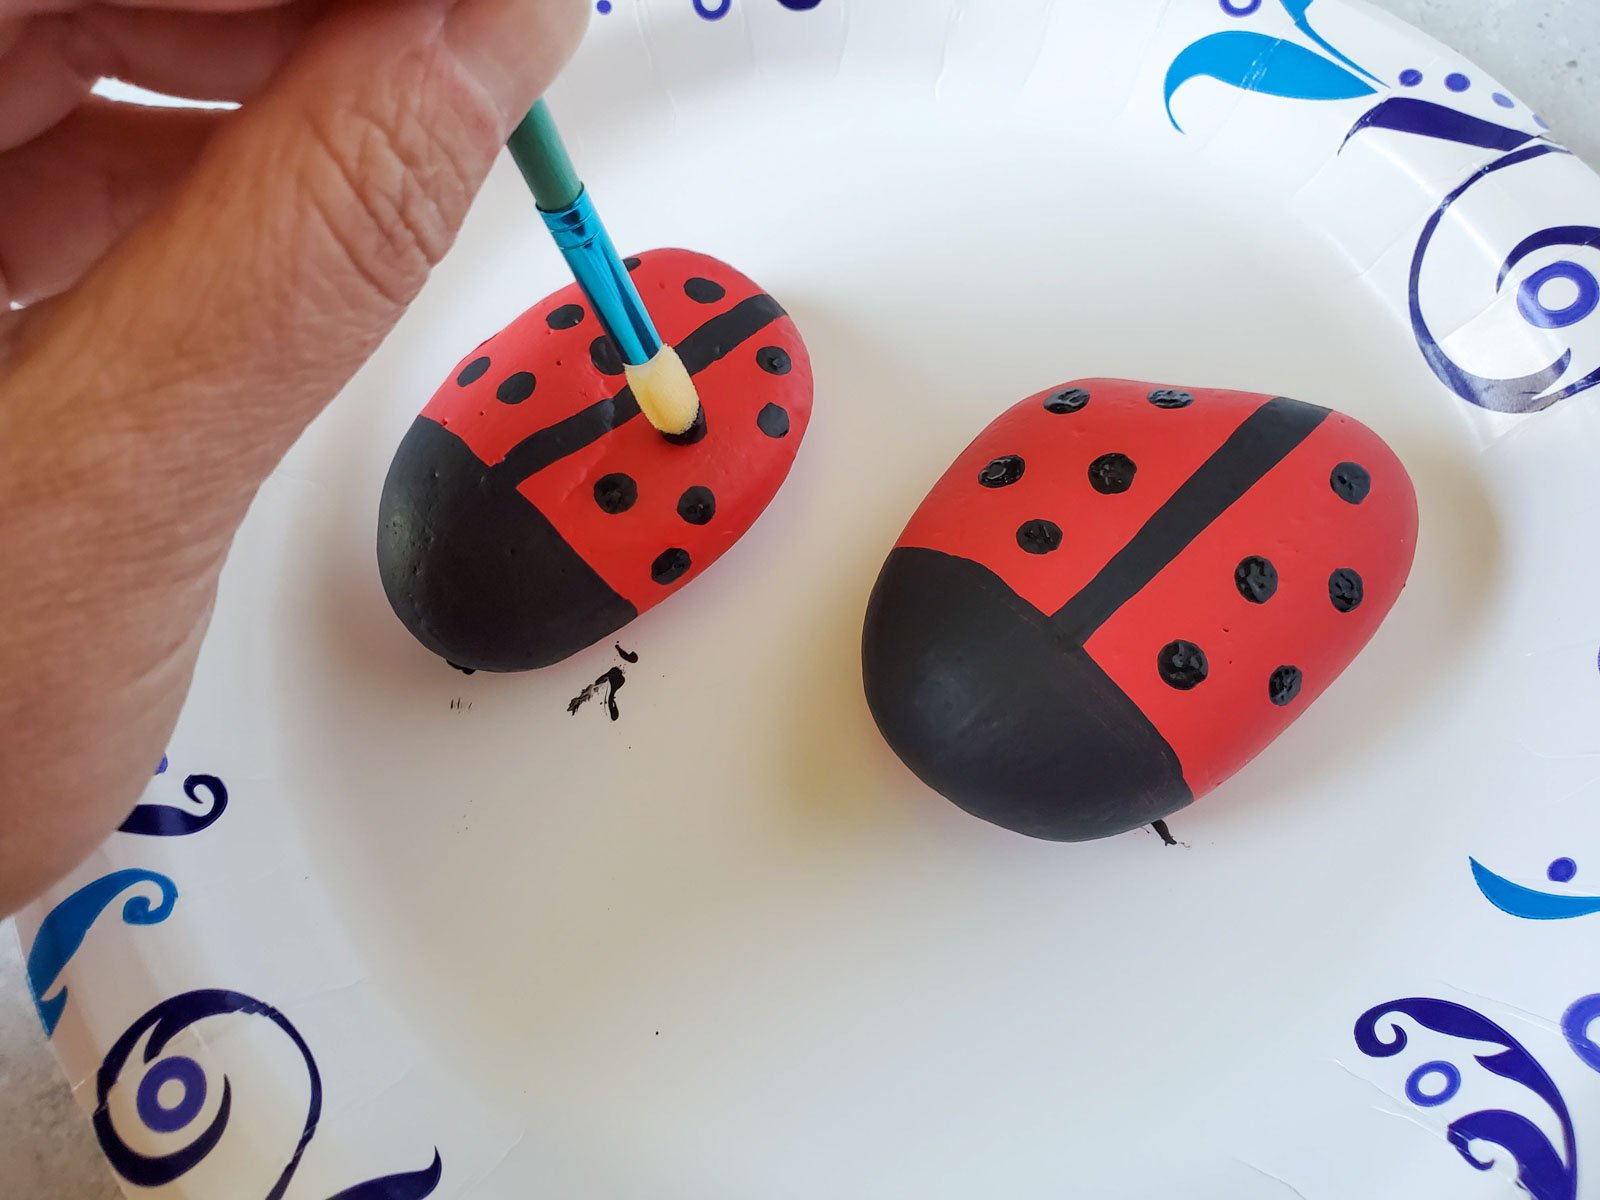
4 – Add the Dots
- Use the foam dabber to add black dots throughout the back of the ladybug’s body. I like to try to make them somewhat even, but they don’t need to be perfectly lined up or anything – that’ll actually make it look less than a ladybug than you actually want.
- Let the black paint dry completely before moving onto the next step of adding the white eyes. If you’re careful, you can paint all of the black sections of the ladybug without drying in between, but make sure to let the black eyes dry first.
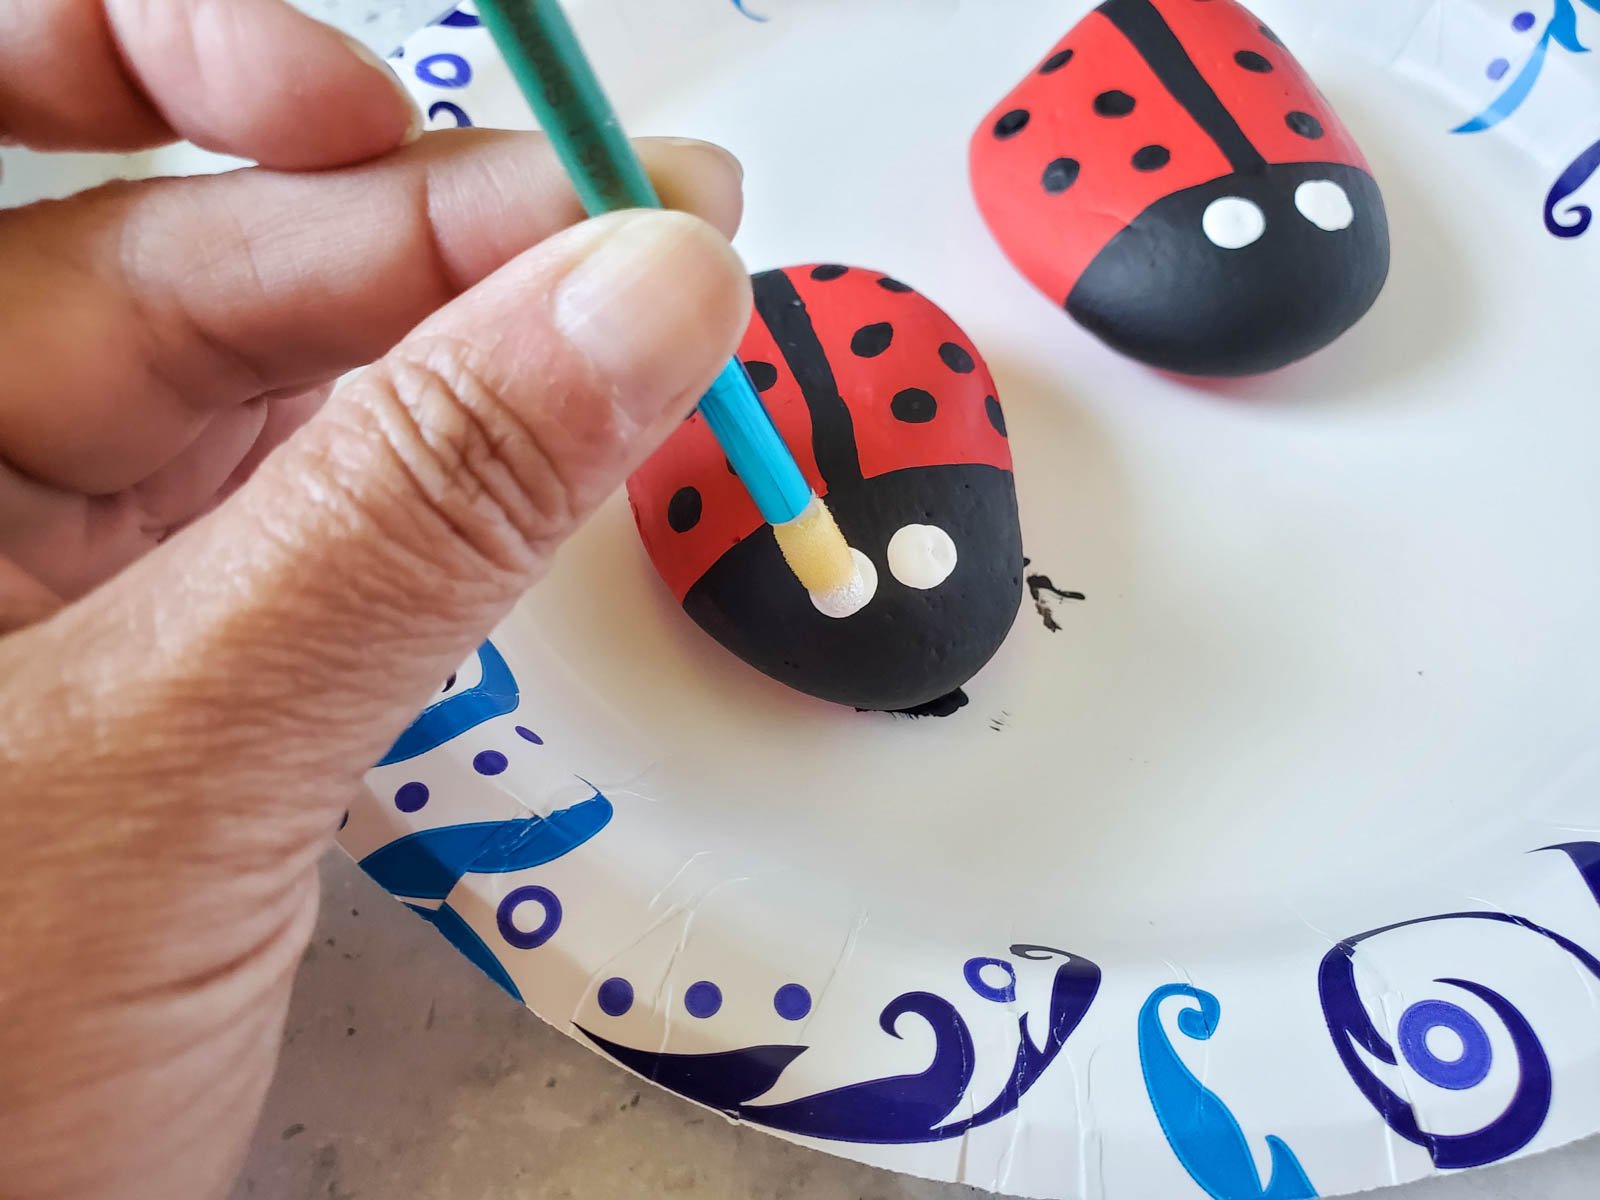
5 – Add the Eyes
- Once the black has dried, use the foam dabber or a toothpick to add two small dots of white paint on the black face to create the eyes.
- Allow this to dry then add a smaller dot of black paint on top of the white dot to finish off the ladybug’s eyes.
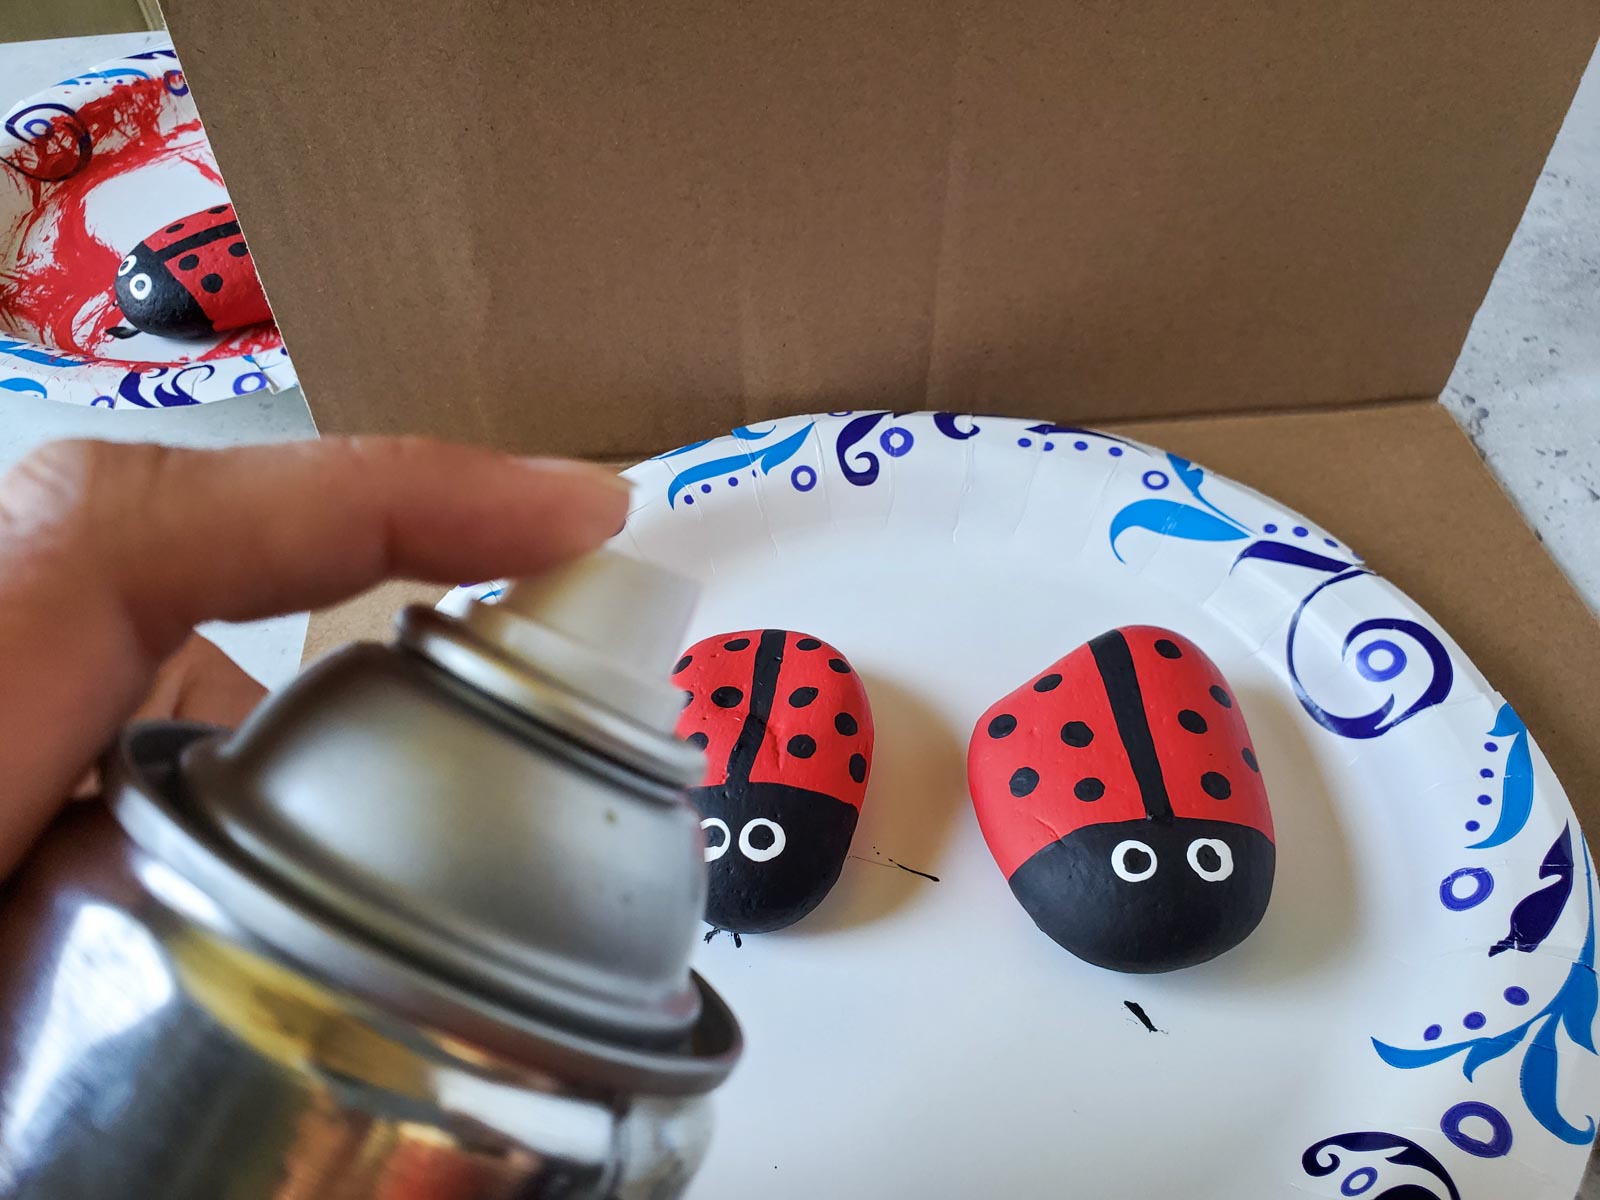
6 – Finish the ladybug rocks with Spray
If you want these for outdoor use to put in a fairy garden, yard, or anything else, make sure not to skip this step.
- Once the painted has dried completely, spray the rock completely with Krylon Clear Glaze to seal the paint. This will also help keep these adorable little ladybugs still looking like ladybugs if a rainstorm hits! The seal will help keep the final product looking like you want for a long time!
7 – Enjoy and Display
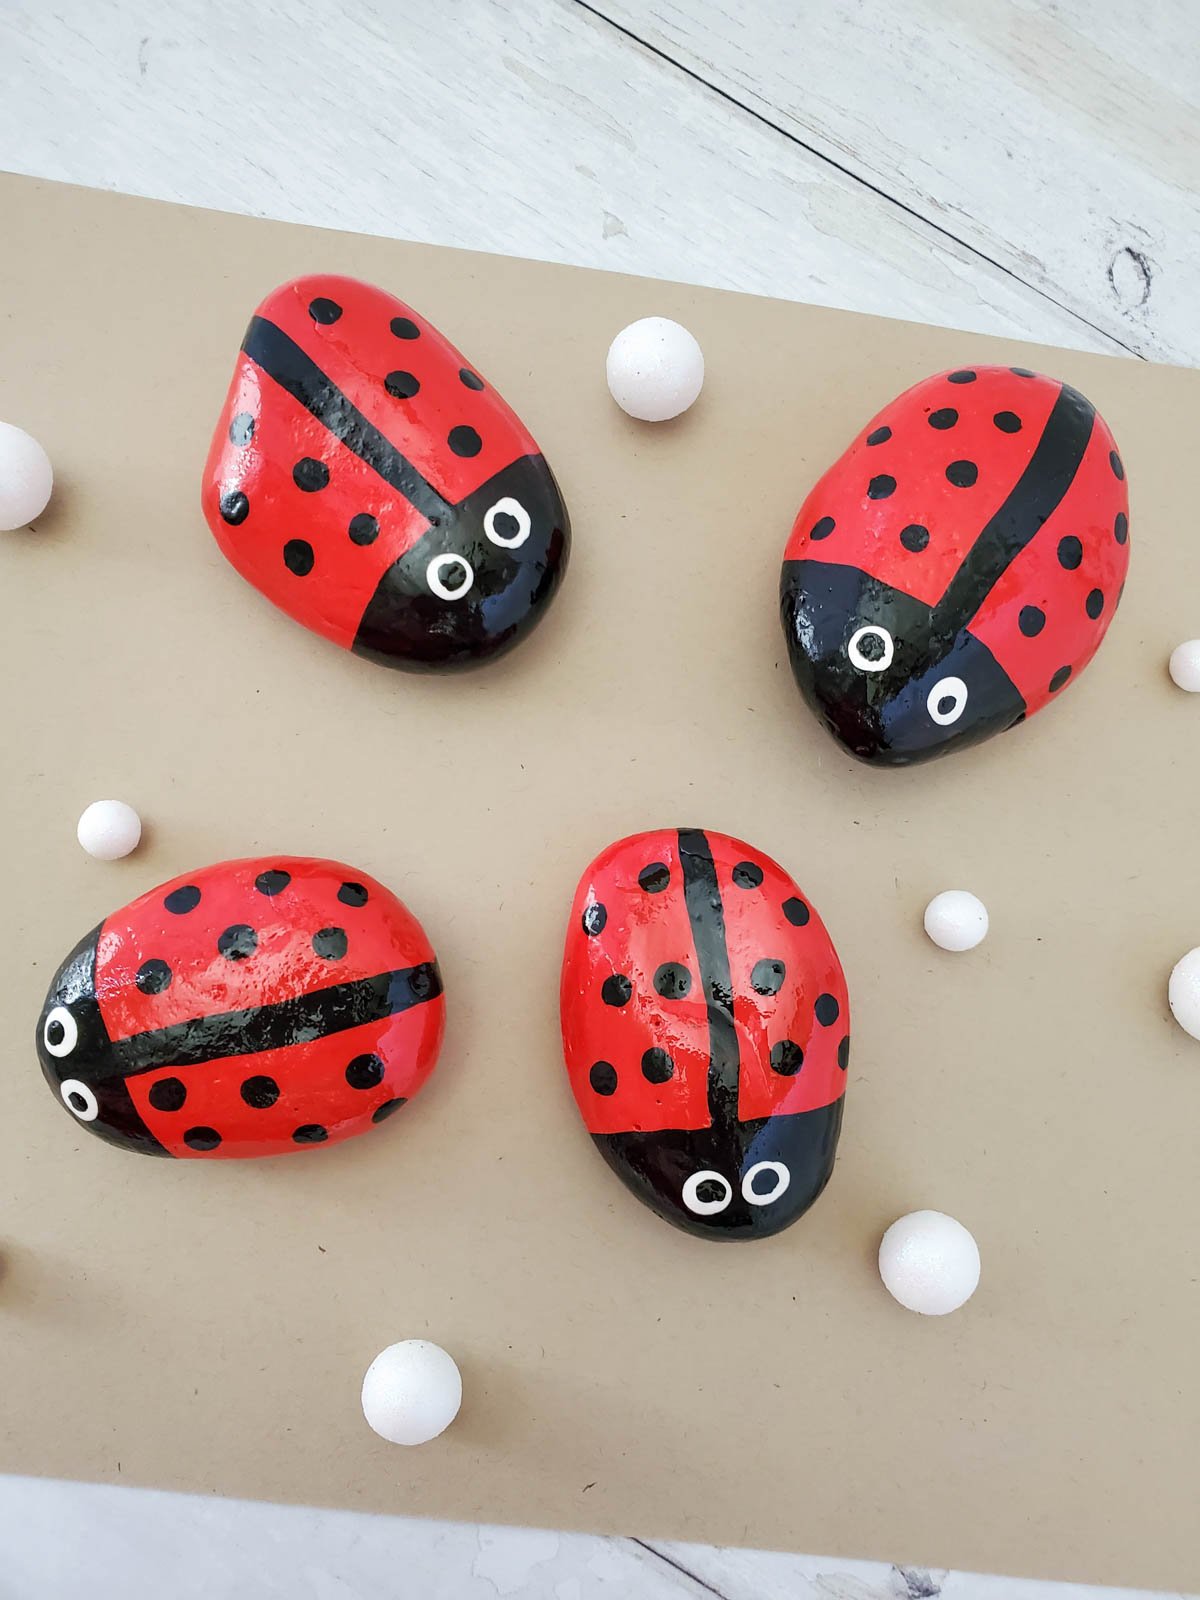
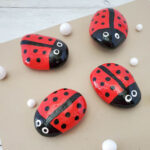
Once they’re sprayed, your ladybugs are finished and ready to be displayed. Add them to your flower beds, put them out on your next nature walk, add them to flower gardens at the school or a local park so everyone can enjoy these charming rocks!
These would also make really fun gifts for someone who loves ladybugs or loves spring!
Tips & tricks
Use different colors of paint to create different colored ladybugs. While I personally love the classic red, white, and black look – you can easily bring in any of your favorite colors as well!
Add other details to your ladybugs such as antennae, wings, or even a smile to make them even more personalized. This is a simple way to let kids get creative and make these simple rocks an actual ladybug rocks craft!
Make sure the rocks are smooth and clean before you start painting. If you try to paint rocks with dirt, the base coat of red paint won’t paint on smoothly. Having a smooth and clean base will help make the painting process smoother (pun intended).
Craft FAQs
What kind of paint should I use?
Picking the right paint for your painted ladybugs is important. Acrylic craft paint is going to be your best bet for a paint that will coat the rocks well and also dry reasonably fast. You can get craft paint at any craft stores, dollar stores, and more.
What kind of rocks should I use?
Smooth rocks will work best for making ladybug rocks because you really want to be able to showcase the iconic back of a ladybug with the polka dot design. You can either find your own smooth stones outside (often by a river or creek) or you can order smooth river rocks online or find them in craft stores.
How can I keep the paint from chipping or getting messed up?
Spraying the painted ladybugs with a clear sealant like the Krylon Clear Glaze mentioned in the post will help the paint from getting chipped regardless of if the rocks get kicked, rained on, or otherwise bothered.
More Fun Spring Ideas
Love these ladybug rocks? Try one of these other fun spring ideas next!
- Tissue paper butterflies – this easy and colorful tissue paper craft is fun for kids and adults!
- Decoupage Easter eggs – transform plain eggs into stunning decor with napkins and decoupage!
- Dyed Easter eggs – get ready for spring with these colorful DIY dyed eggs made with just food coloring!
- DIY colored doilies – add a touch of elegance to your spring decor with these beautiful colored doilies!
- Jelly bean cupcakes – jump into spring with these sweet and colorful jelly bean cupcakes!
Ladybug Painted Rocks
Ingredients
- 8 smooth river rocks
- 1 bottle red craft paint
- 1 bottle black craft paint
- 1 bottle white craft paint
- 1 can Krylon Clear Glaze or other clear paint sealant
Instructions
- Start by washing the rocks to get rid of any dirt or anything else on the surface. Once they’ve been washed, dry them completely before you start painting.8 smooth river rocks
- Paint the entire rock red including the top and bottom. Let the first coat dry completely then paint a second coat and then a third if necessary.1 bottle red craft paint
- Use the flat part of the angled brush and the black paint to head the top of the rock black to be the head of the ladybug.1 bottle black craft paint
- Then use the angled section of the brush to paint a black line down the center of the body to create that iconic dividing line on your ladybug pet rock.
- Use the foam dabber to add black dots throughout the back of the ladybug’s body. Let the black paint dry completely.
- Once the black has dried, use the foam dabber or a toothpick to add two small dots of white paint on the black face to create the eyes. Allow this to dry then add a smaller dot of black paint on top of the white dot to finish off the ladybug’s eyes.1 bottle white craft paint
- Spray the rock completely with Krylon Clear Glaze to seal the paint.1 can Krylon Clear Glaze
Tips & Notes:
Want More Fun Ideas?
Want more fun ideas like this one? Enter your first name and email address in the form below to join the Play Party Plan community! You’ll receive weekly recipes, party ideas, games, and more directly to your inbox!


Leave a Reply