
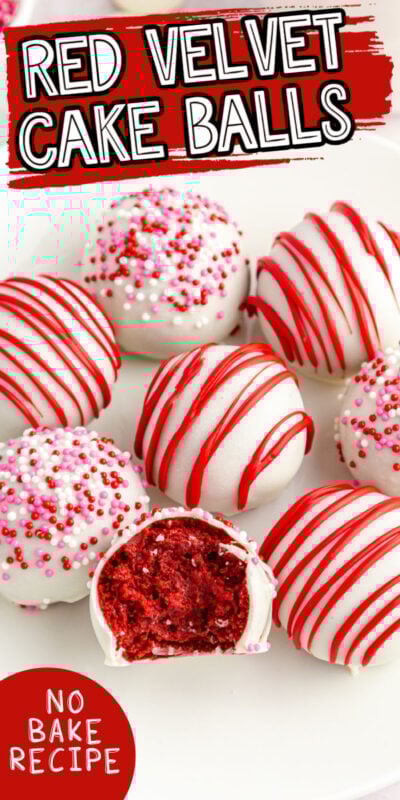
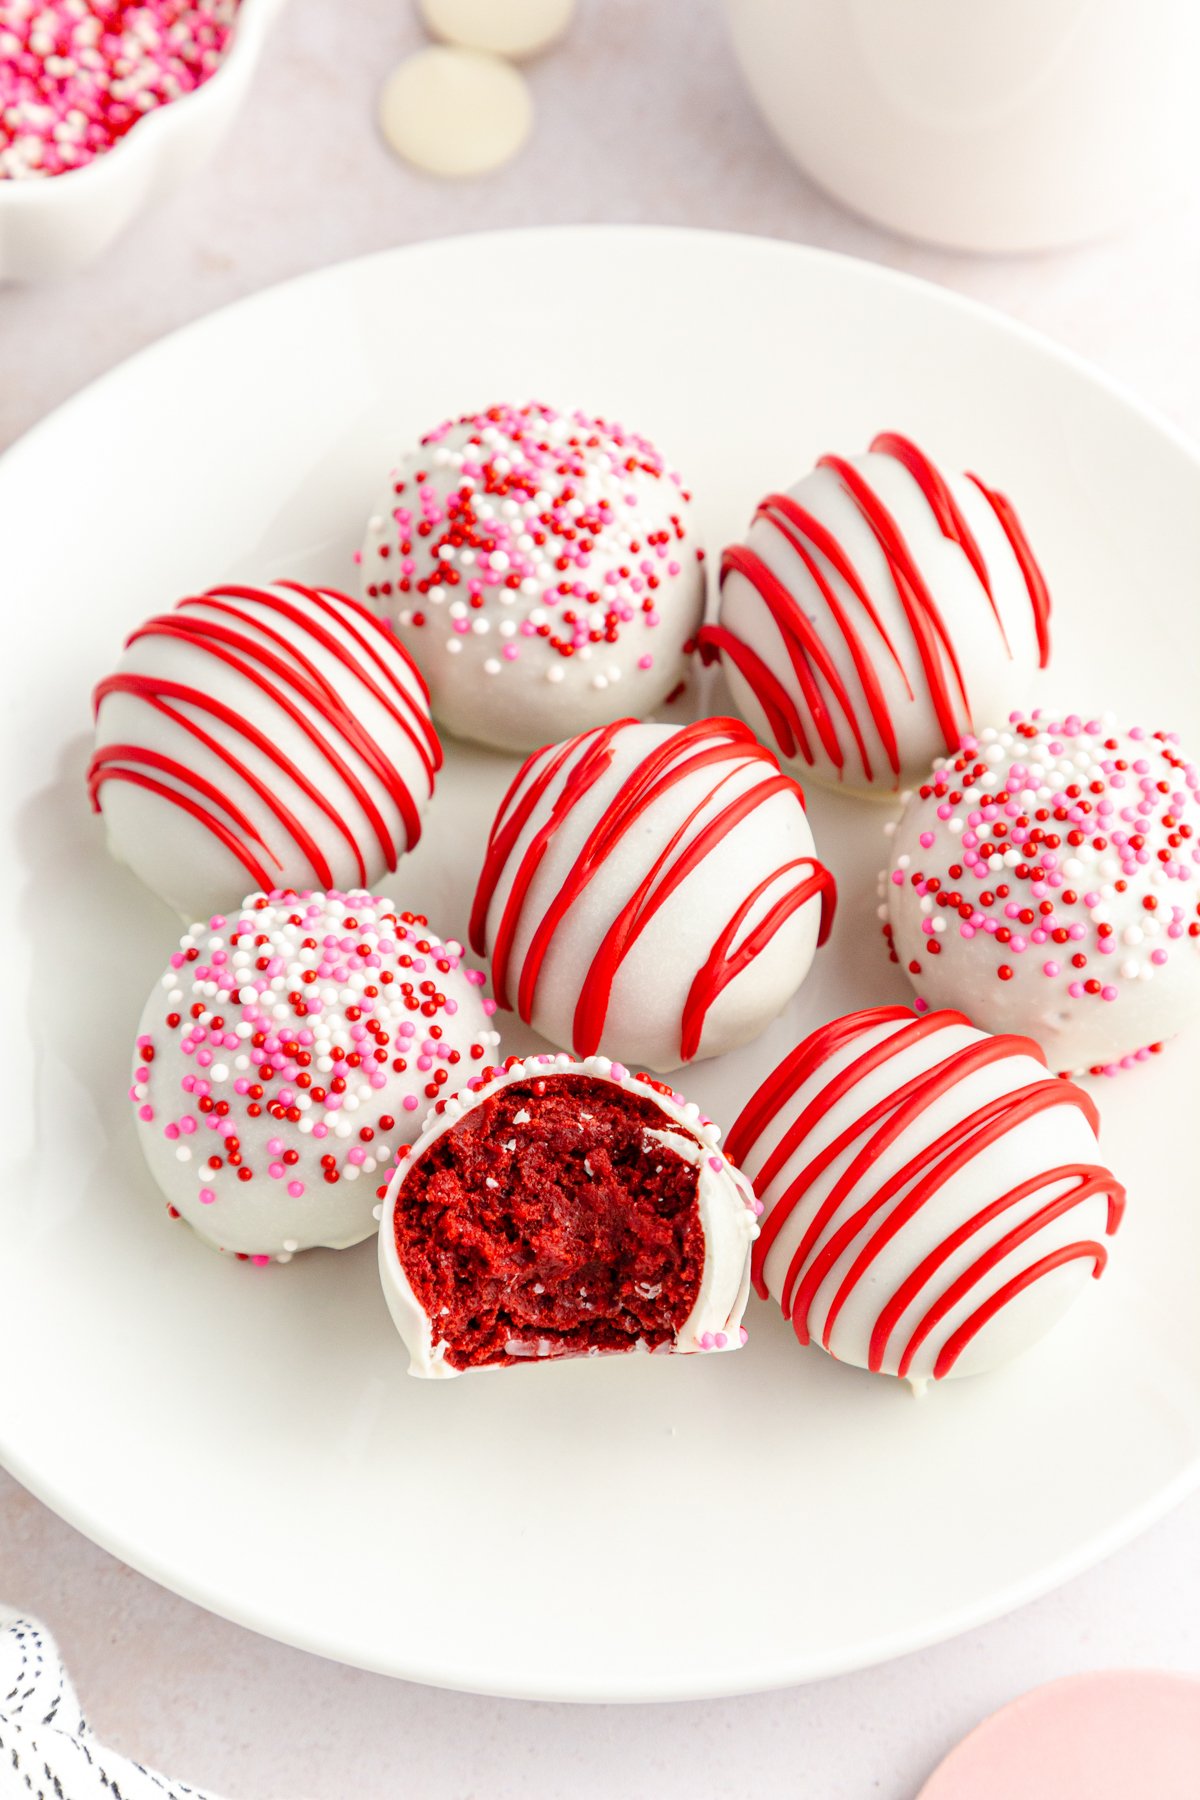
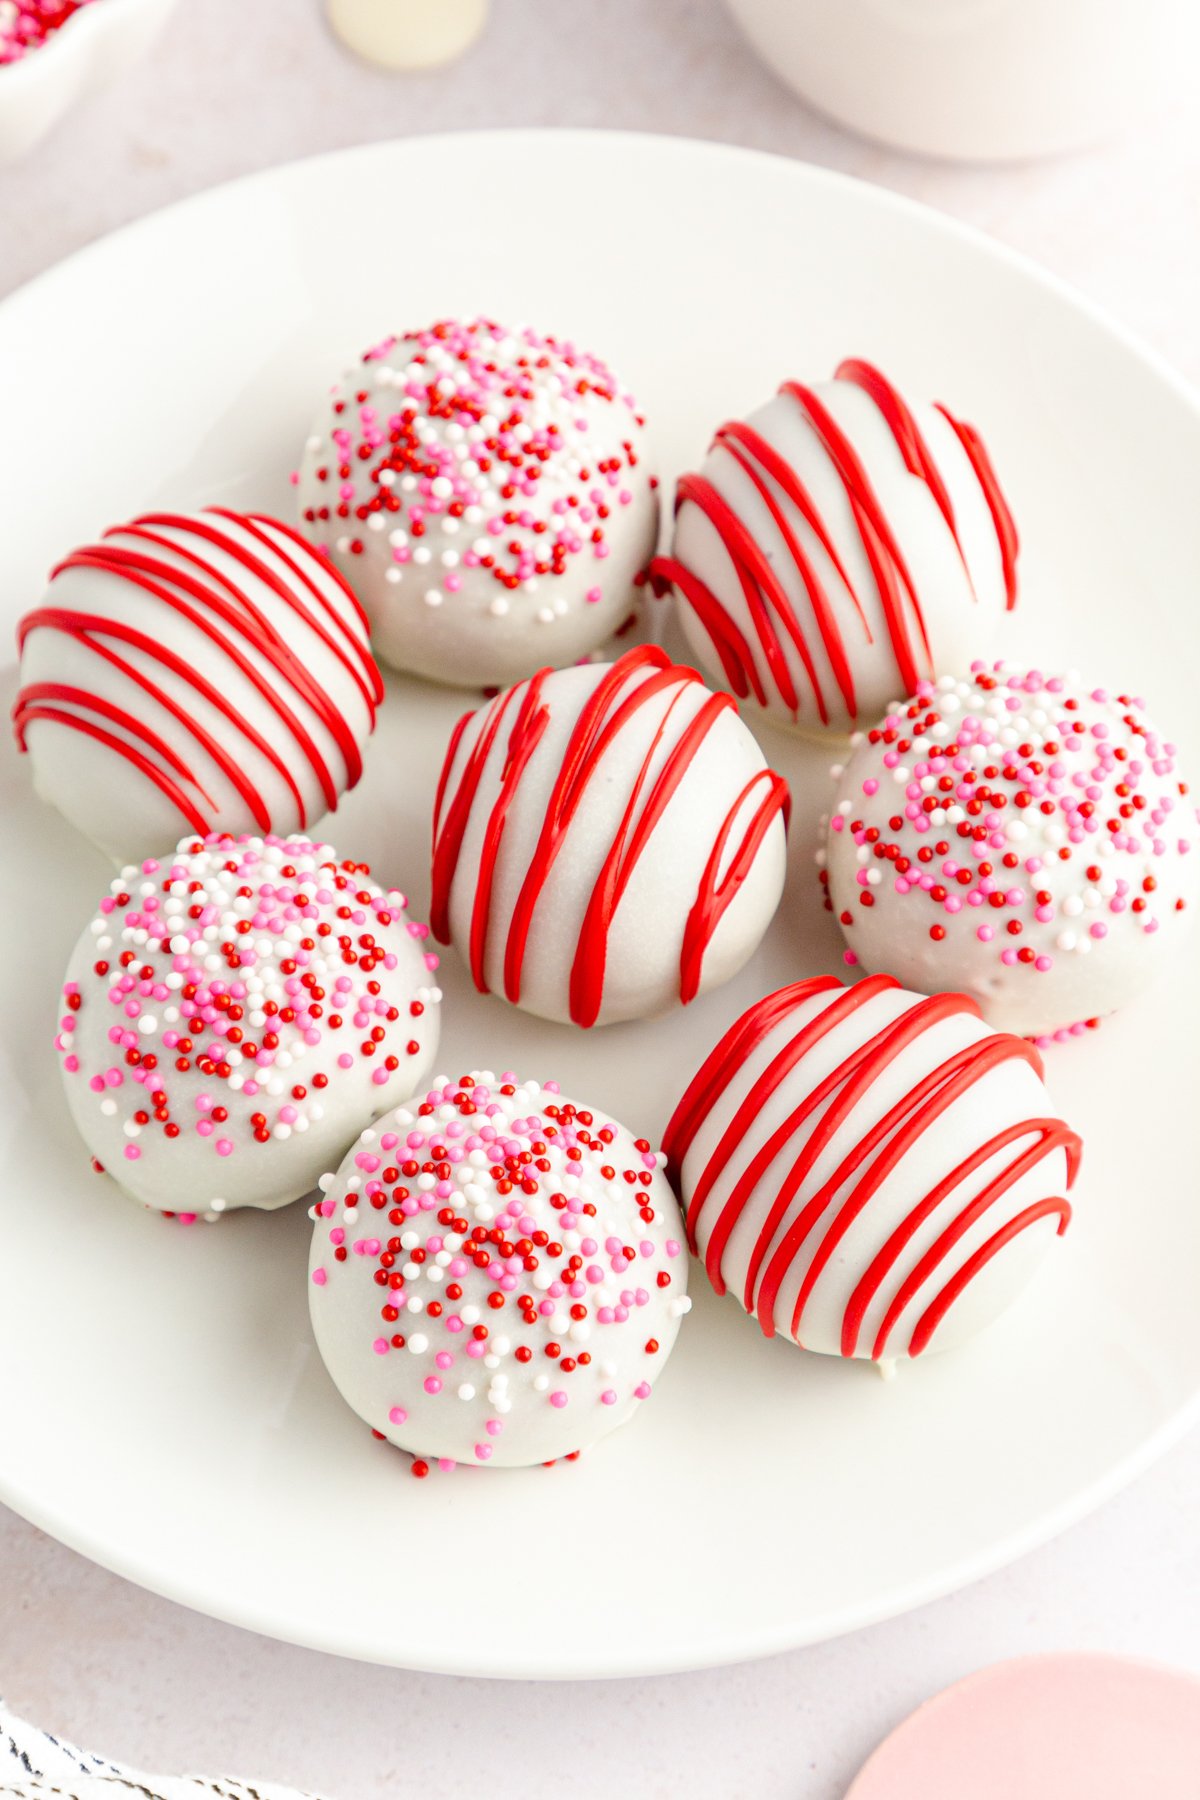
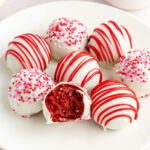
These fun no bake red velvet cake balls combine red velvet cake with cream cheese in a delicious and decadent treat that is perfect for any holiday! These red velvet cake bites will be a huge hit with both kids and adults!

Want to save this recipe?
Enter your email below and we’ll send this idea straight to your inbox (plus you’ll receive fun weekly ideas from us too!)
I love miniature treats like Oreo truffles and sugar cookie bites.
I also love red velvet desserts like red velvet cake and red velvet cookies.
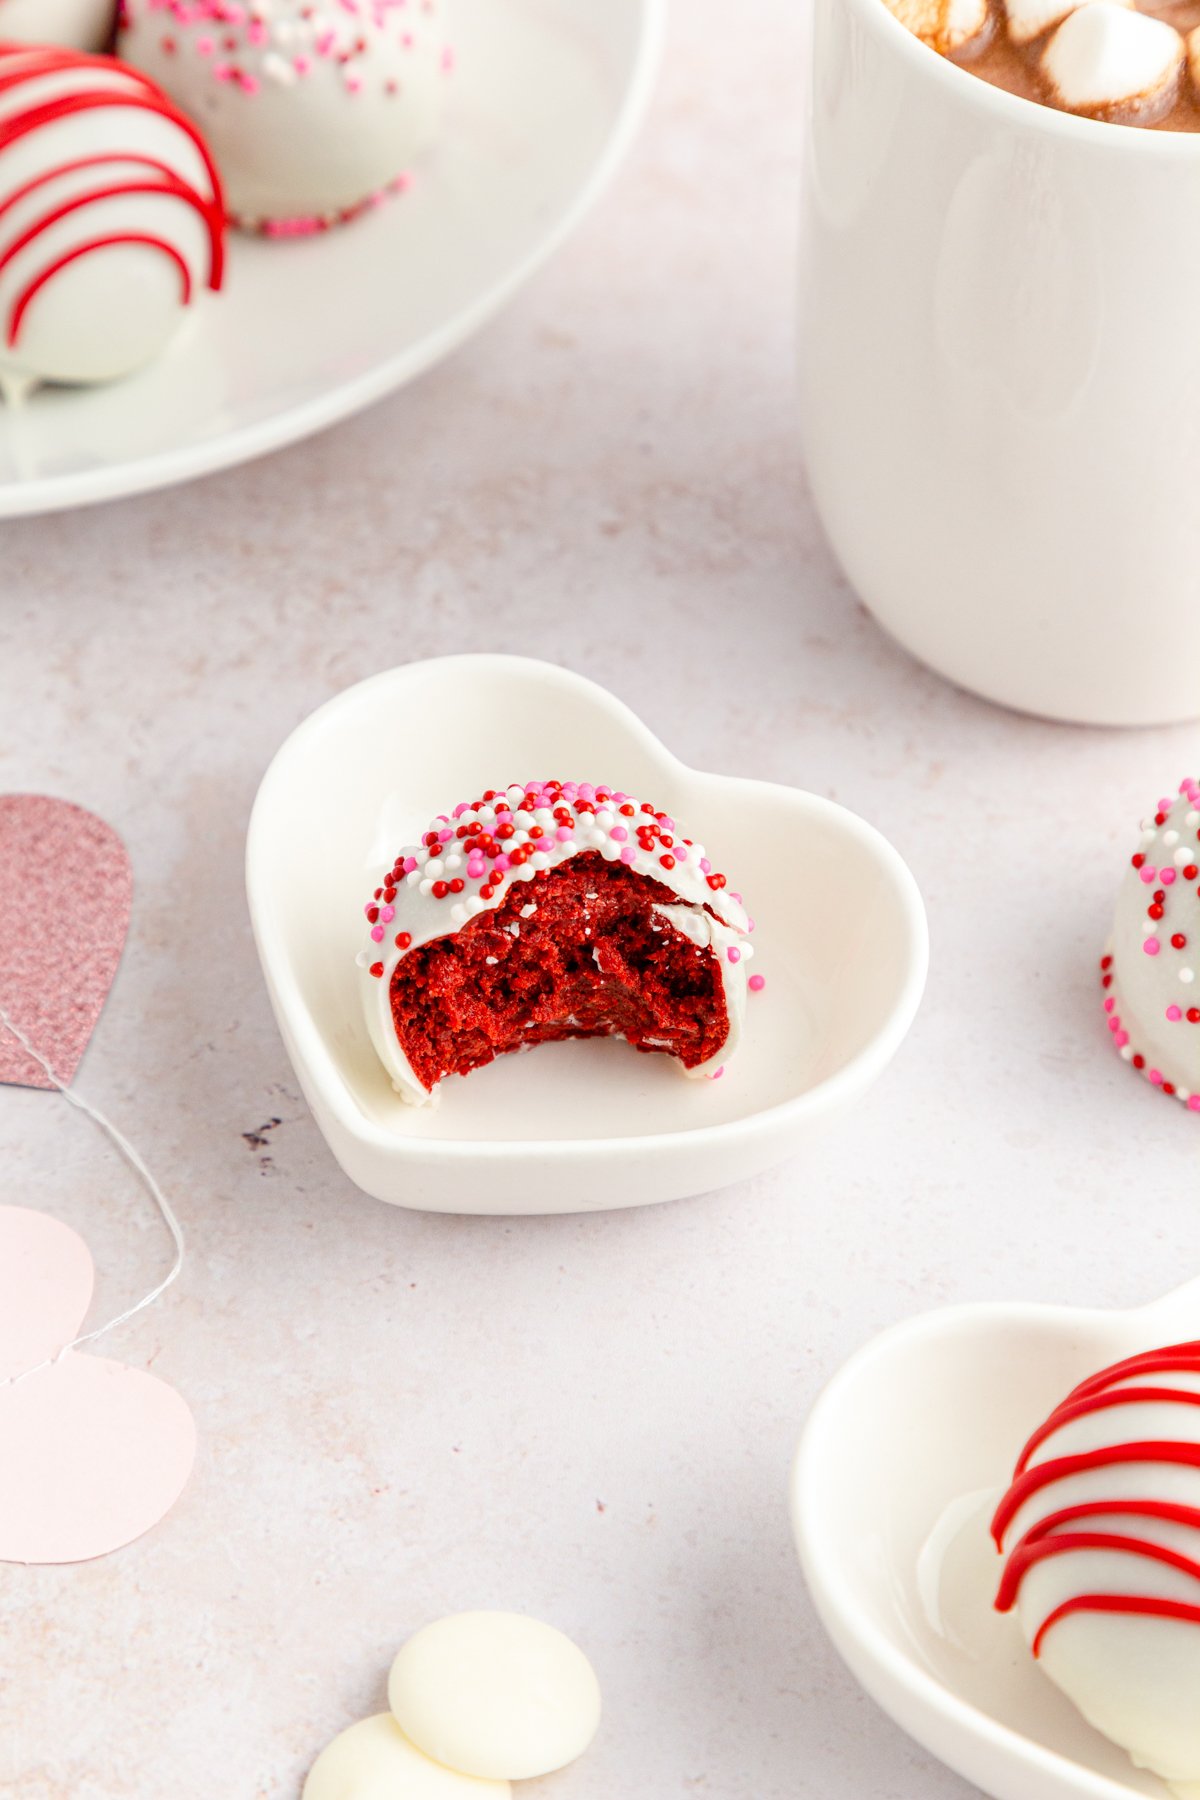
These red velvet cake balls are the perfect combination of both. Small little sweet treats that have an amazing red velvet cake flavor that’s moist, rich, and delicious.
And while I’m sharing them for Valentine’s Day because they make the perfect Valentine’s Day treat, you can change the color of the sprinkles or frosting on top and use these for any holiday you want.
Add red, white, and blue sprinkles (like on these 4th of July rice krispies), and they’re great for 4th of July. Add Christmas sprinkles, and guess what – you have Christmas cake balls!
Why You’ll Love This Recipe
- No-bake recipe – while I recommend that you heat treat the cake mix and that can be done in the oven, these don’t actually require any baking. You can also do it in the microwave or if you’re willing to risk it, not at all. That means, unlike a lot of the red velvet cake pops or cake ball recipes out there, you don’t have to wait for a cake to bake!
- Mix it up – want to take these this red velvet cake balls recipe and make them into cake pops? All you need are some lollipop sticks! Want to make different shapes like hearts or stars or whatever? Just mold these red velvet treats into whatever you want them to be!
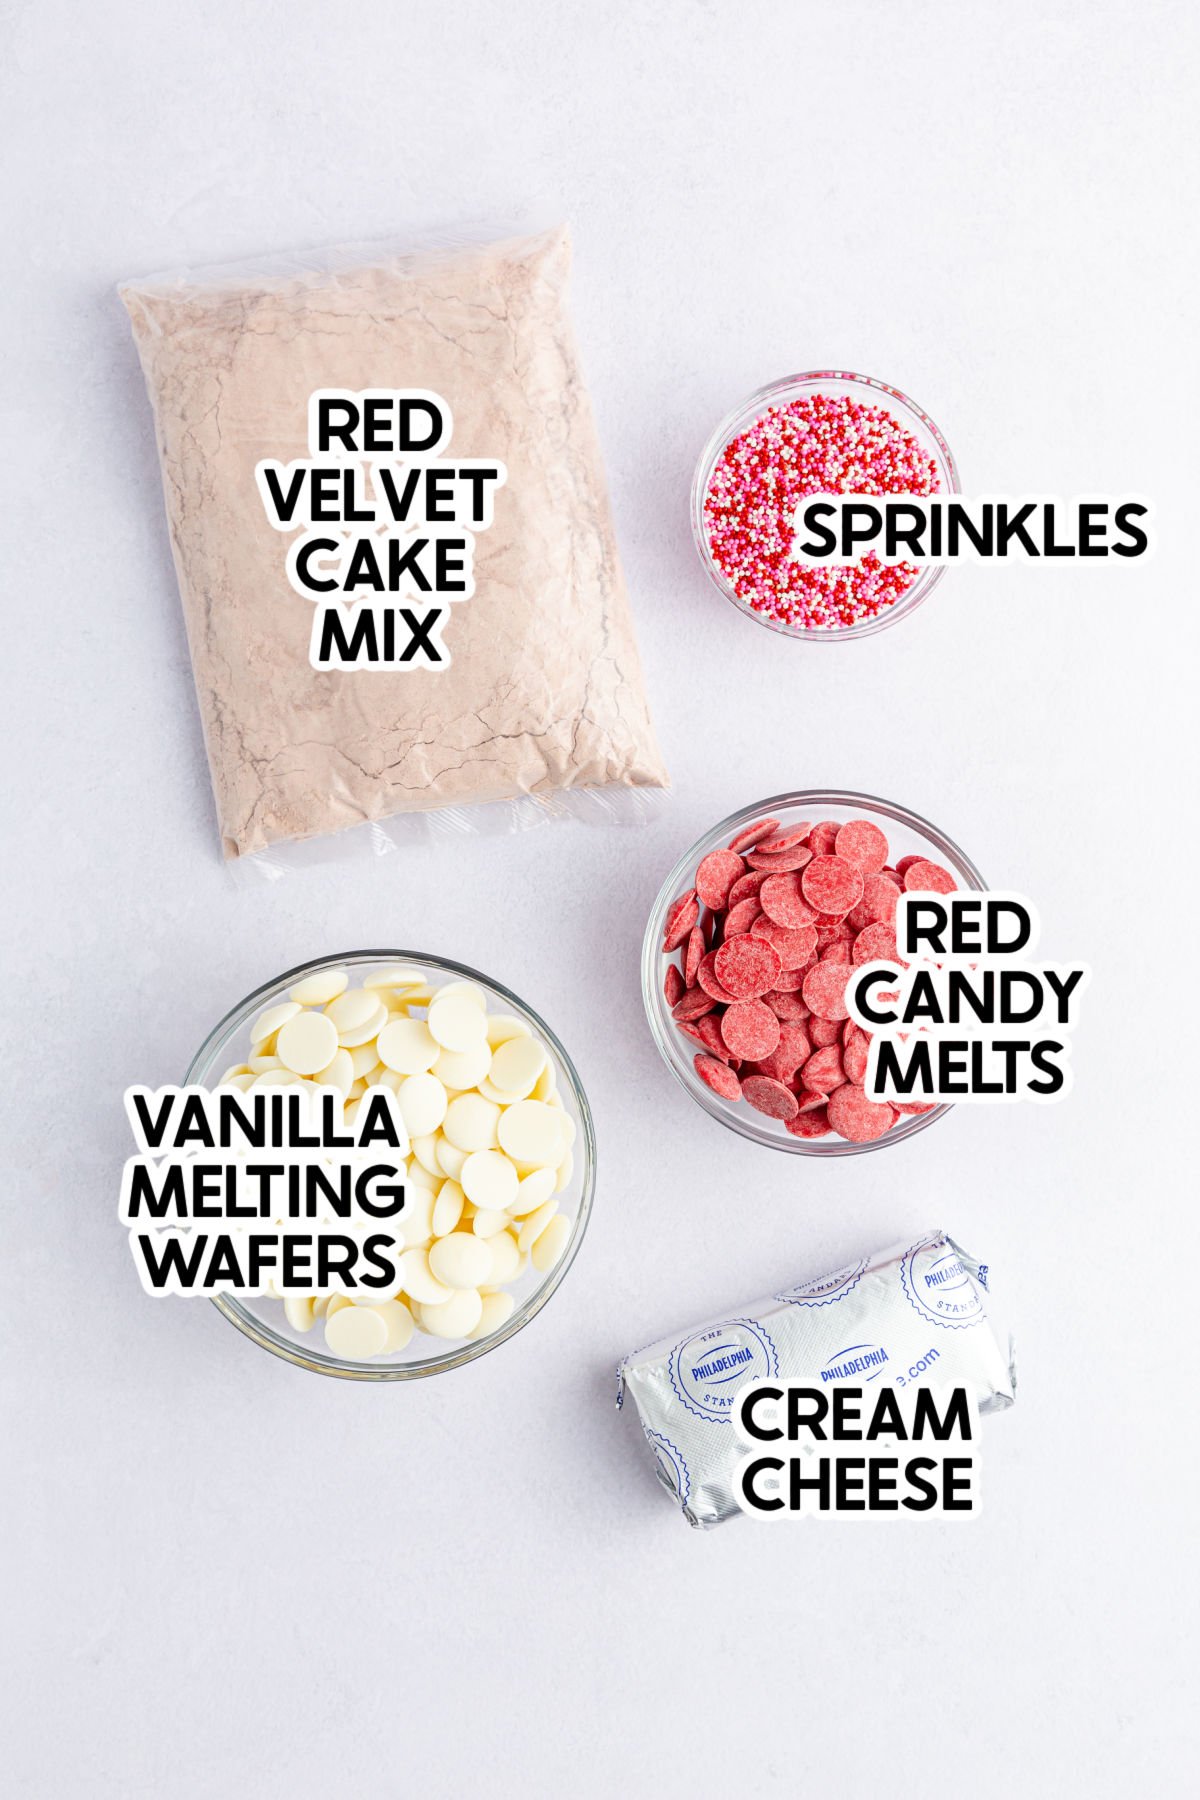
- Only 3-ingredients – technically this recipe only requires three ingredients to make these no bake cake balls. If you want to decorate them, you’ll need a few more things like sprinkles and melting wafers (or chocolate) but those are just a bonus!
Ingredients
Ingredient Notes
- Red velvet cake mix – I used Betty Crocker but pretty much any red velvet cake mix works. It needs to be a boxed cake mix though, not homemade red velvet cake, because you’re not going to be actually making the cake, just using the dry cake mix.
- Cream cheese – make sure you are using full-fat cream cheese and that the cream cheese is softened to room temperature. If it’s still cold or chilled, it won’t combine with the cake mix as well. I know some people use cream cheese frosting, but I personally prefer the taste of the real cream cheese.
- Vanilla melting wafers – I used white vanilla melting wafers but you could also use a high-quality white chocolate, white chocolate chips, white chocolate candy melts, or Ghirardelli white chocolate melting wafers (my personal preference – I just didn’t have any on hand). You just want some sort of white chocolate that will melt well.
- Red candy melts – these are totally optional, I used them to decorate the cake balls after. They have a nice bright color, which I love for Valentine’s Day! You could use any other color or sprinkles instead. Or mix it up and do a bunch with sprinkles and a bunch with drizzled candy melts.
How to Make Red Velvet Cake Balls
These red velvet cake balls (or some people might call them red velvet cake truffles) aren’t hard to make, but they do take a bit of time because you’re mixing, chilling, rolling, and dipping. And anytime you have to roll and dip a bunch of little things, it’s going to take a while.
That being said – it’s totally worth it because these cake balls are delicious!
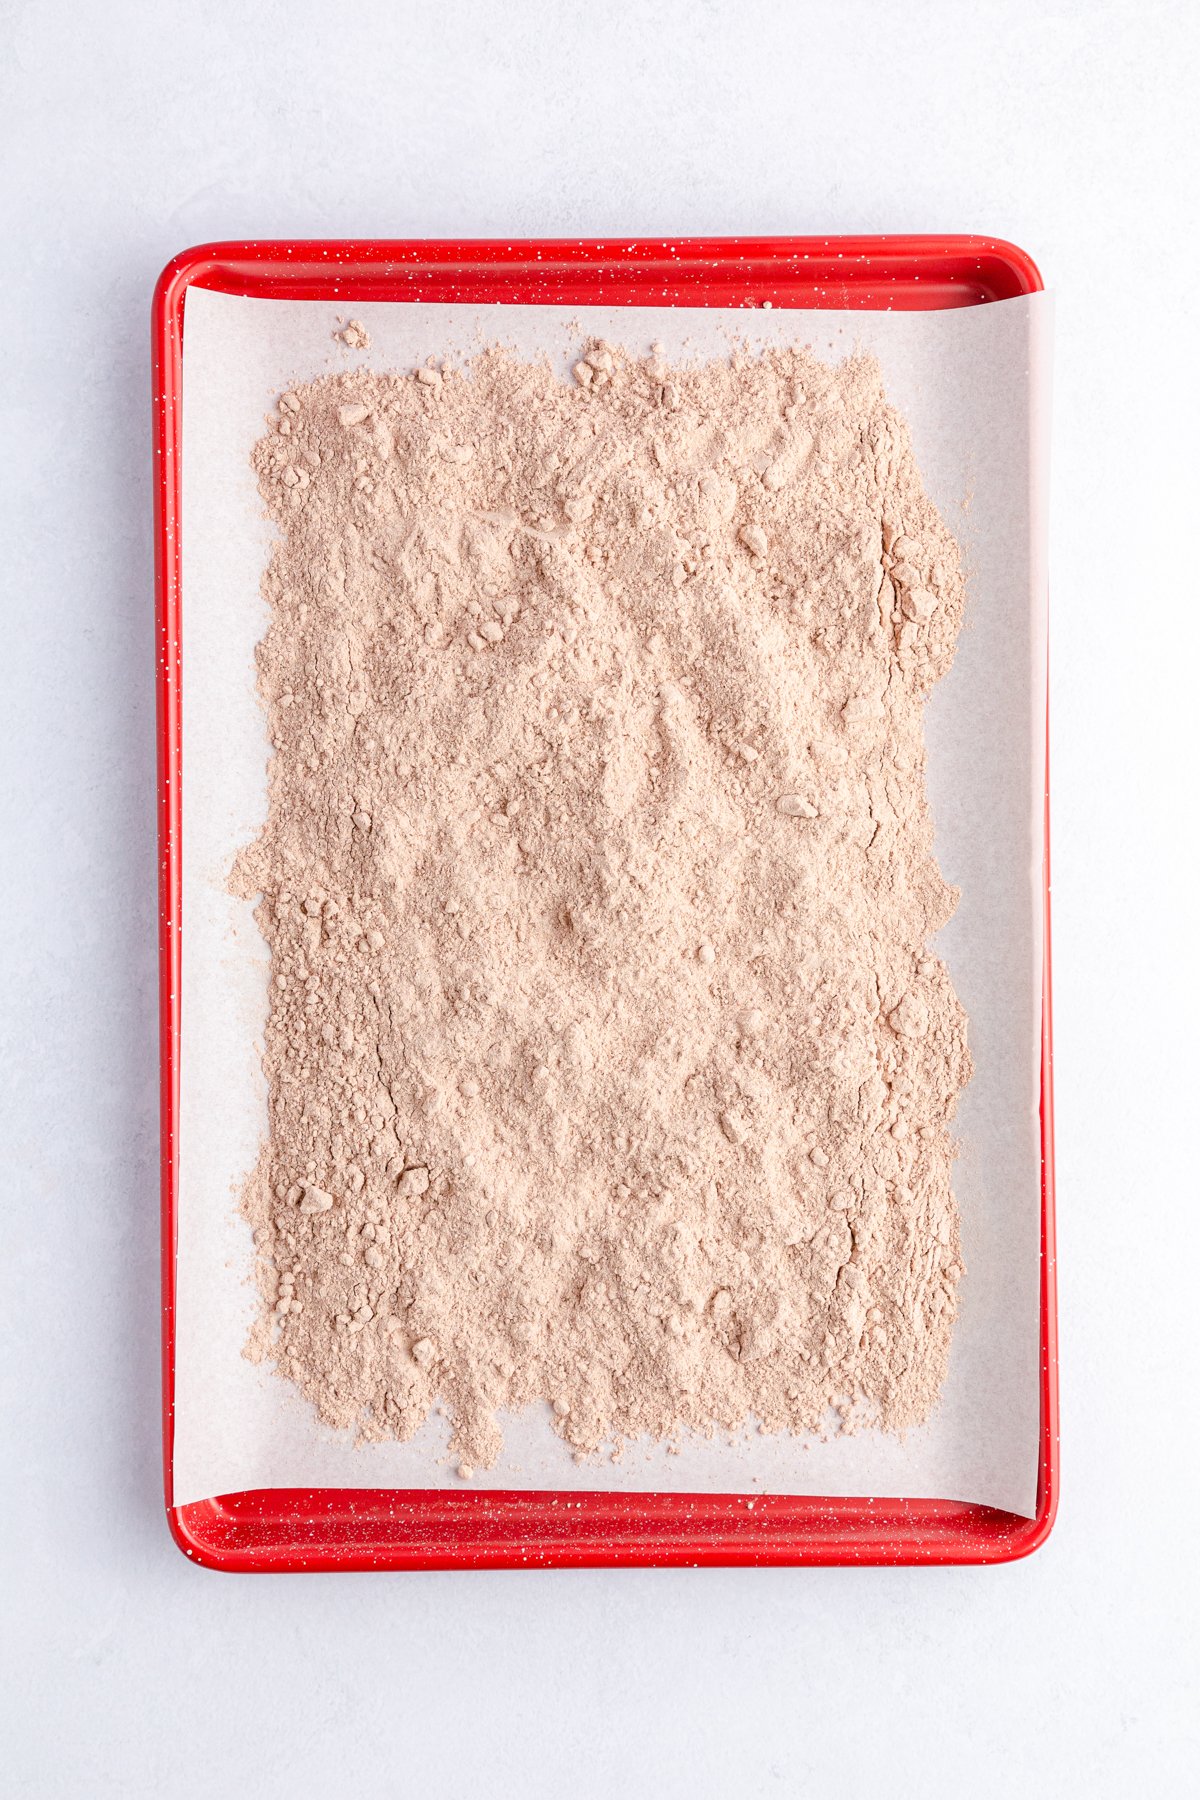
1 – Heat Treat the Cake Mix
Before you use the raw cake mix, you need to heat treat it to kill the bacteria that can be in the raw flour in the cake mix.
Preheat the oven to 350 degrees. Line a baking sheet with parchment paper and pour the dry cake mix onto the paper, spreading it out evenly on the baking sheet.
Bake for about five minutes in the preheated oven or until the cake mix reaches 165 degrees.
You can also do this in the microwave by adding to a microwave safe bowl and cooking for three minutes, and stirring every 30 seconds to avoid hot spots.
I personally prefer the oven because I think it’s easier to make sure it’s evenly heated and all of the cake mix has been heat treated properly, but you can also use the microwave.
Microwave version!
You can also do this in the microwave by adding to a microwave safe bowl and cooking for three minutes, and stirring every 30 seconds to avoid hot spots. Once the temperature of the cake mix reaches 165 degrees, stop microwaving and allow to cool completely.
2 – Make the Red Velvet Mixture
While the cake mix is being heat treated in the oven, whip the cream cheese in a medium bowl with a hand mixer until it is a smooth consistency. It should only take one to two minutes on medium high speed as long as the cream cheese is already soft.
If the cream cheese is not soft, it’ll take longer and likely not get quite as smooth.
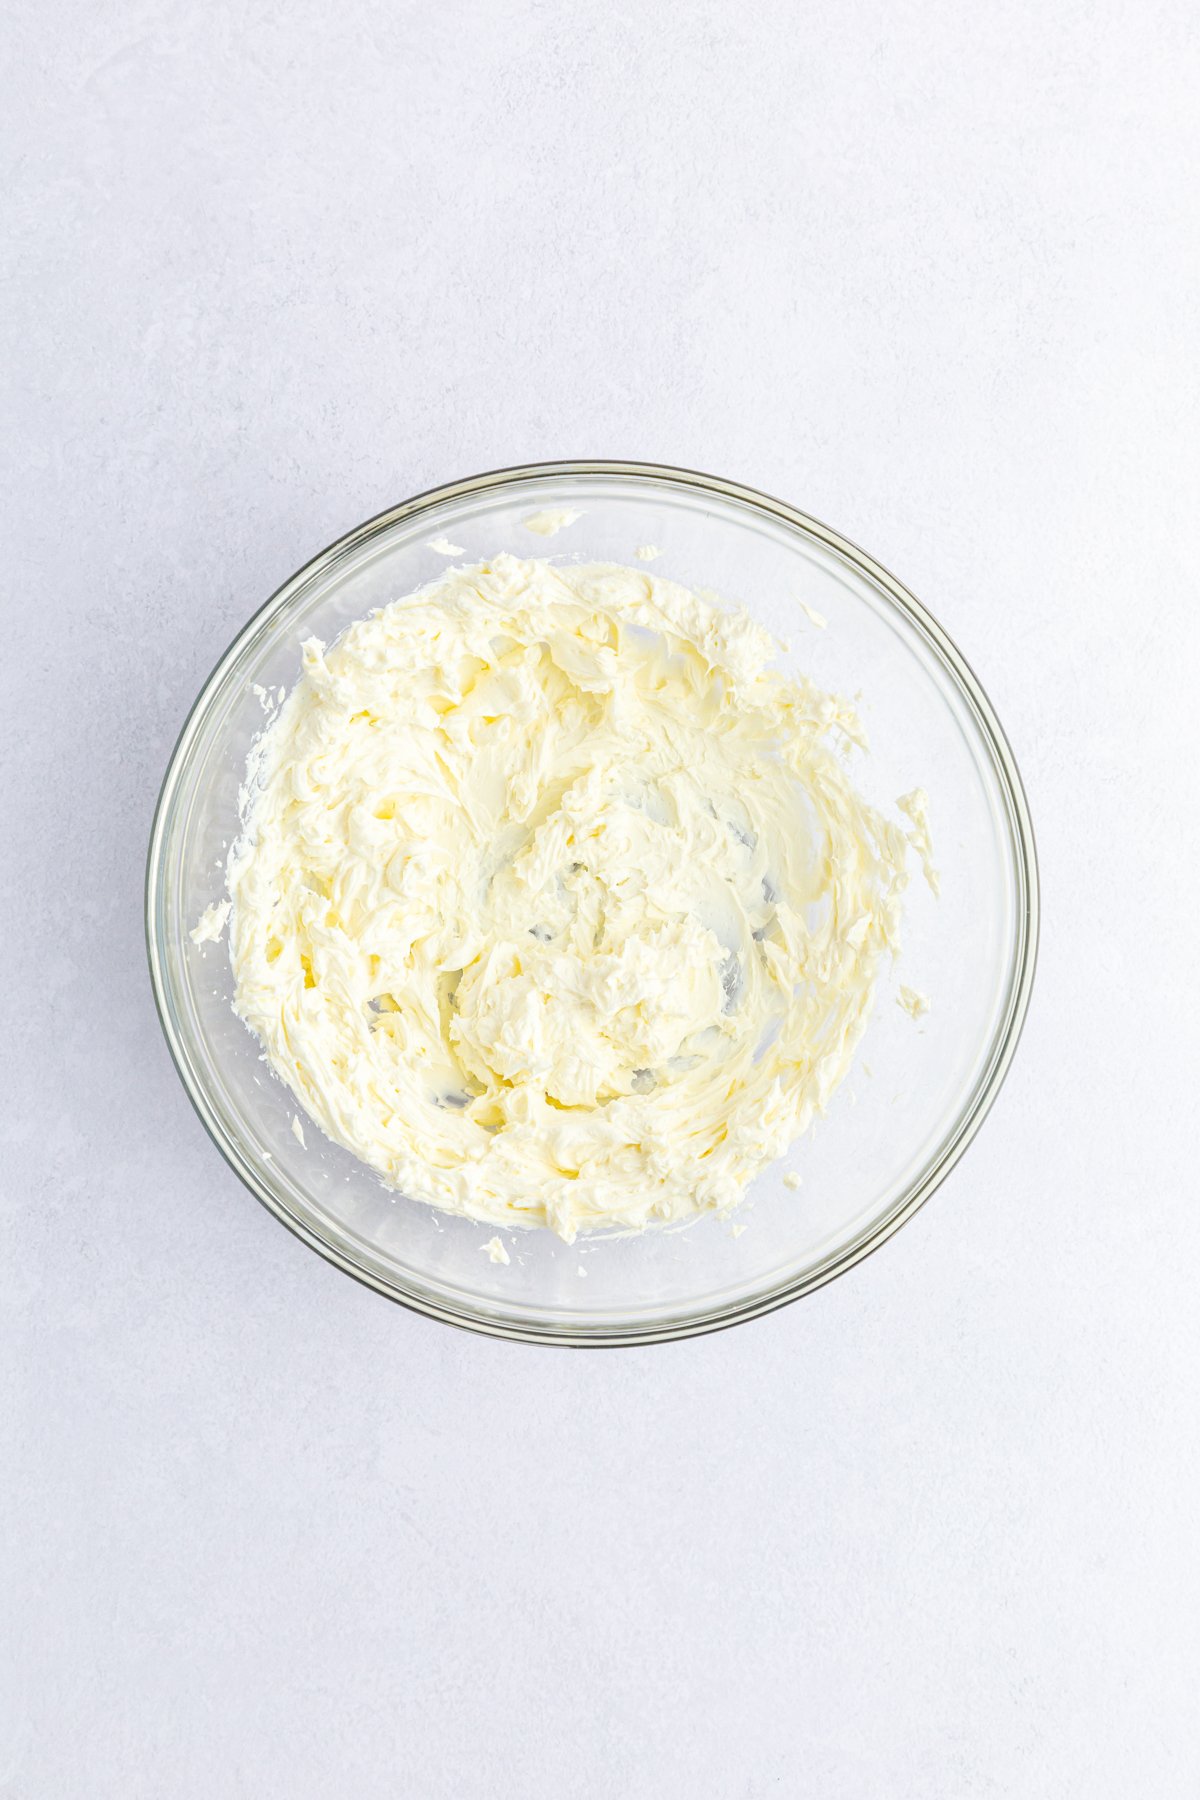
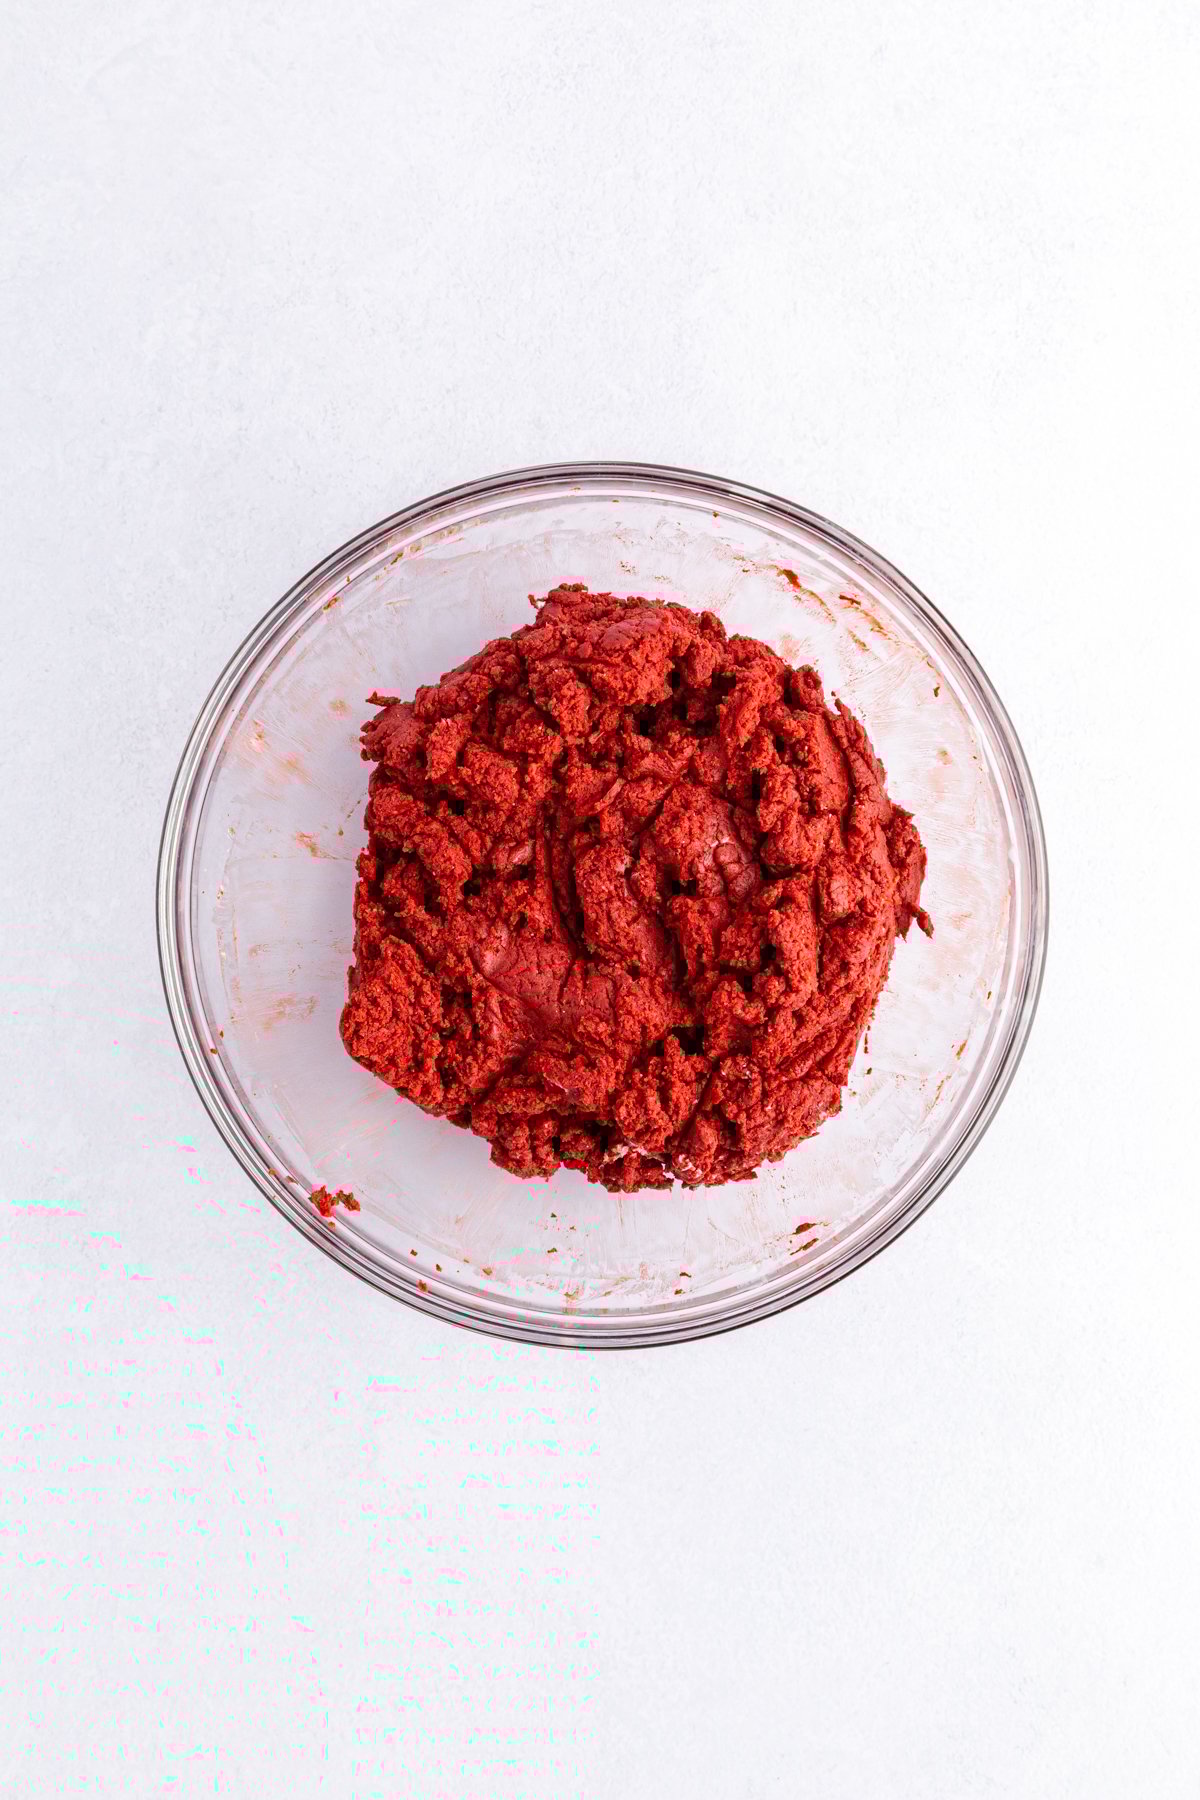
Once the dry cake mix has cooled, add it into the whipped cream cheese and beat again on medium high with an electric mixer (or you can do this in a stand mixer as well).
Mix until the red velvet cake crumbs and cream cheese have mixed together into almost a cookie dough texture. If you need to, scrape the side of the bowl a couple of times to make sure it all gets mixed together.
Cover the bowl and place it on the refrigerator for 2 hours. The dough will be easier to form after it has chilled. If you try to roll it right now, the mixture will all just stick to your hands.
Speed It Up!
If you don’t have time to wait for two hours, you can put it in the freezer for 20-30 minutes and try rolling after that instead. I recommend chilling in the fridge but sometimes you’re in a hurry and the freezer can speed up the chilling process.
3 – Roll the Cake Balls
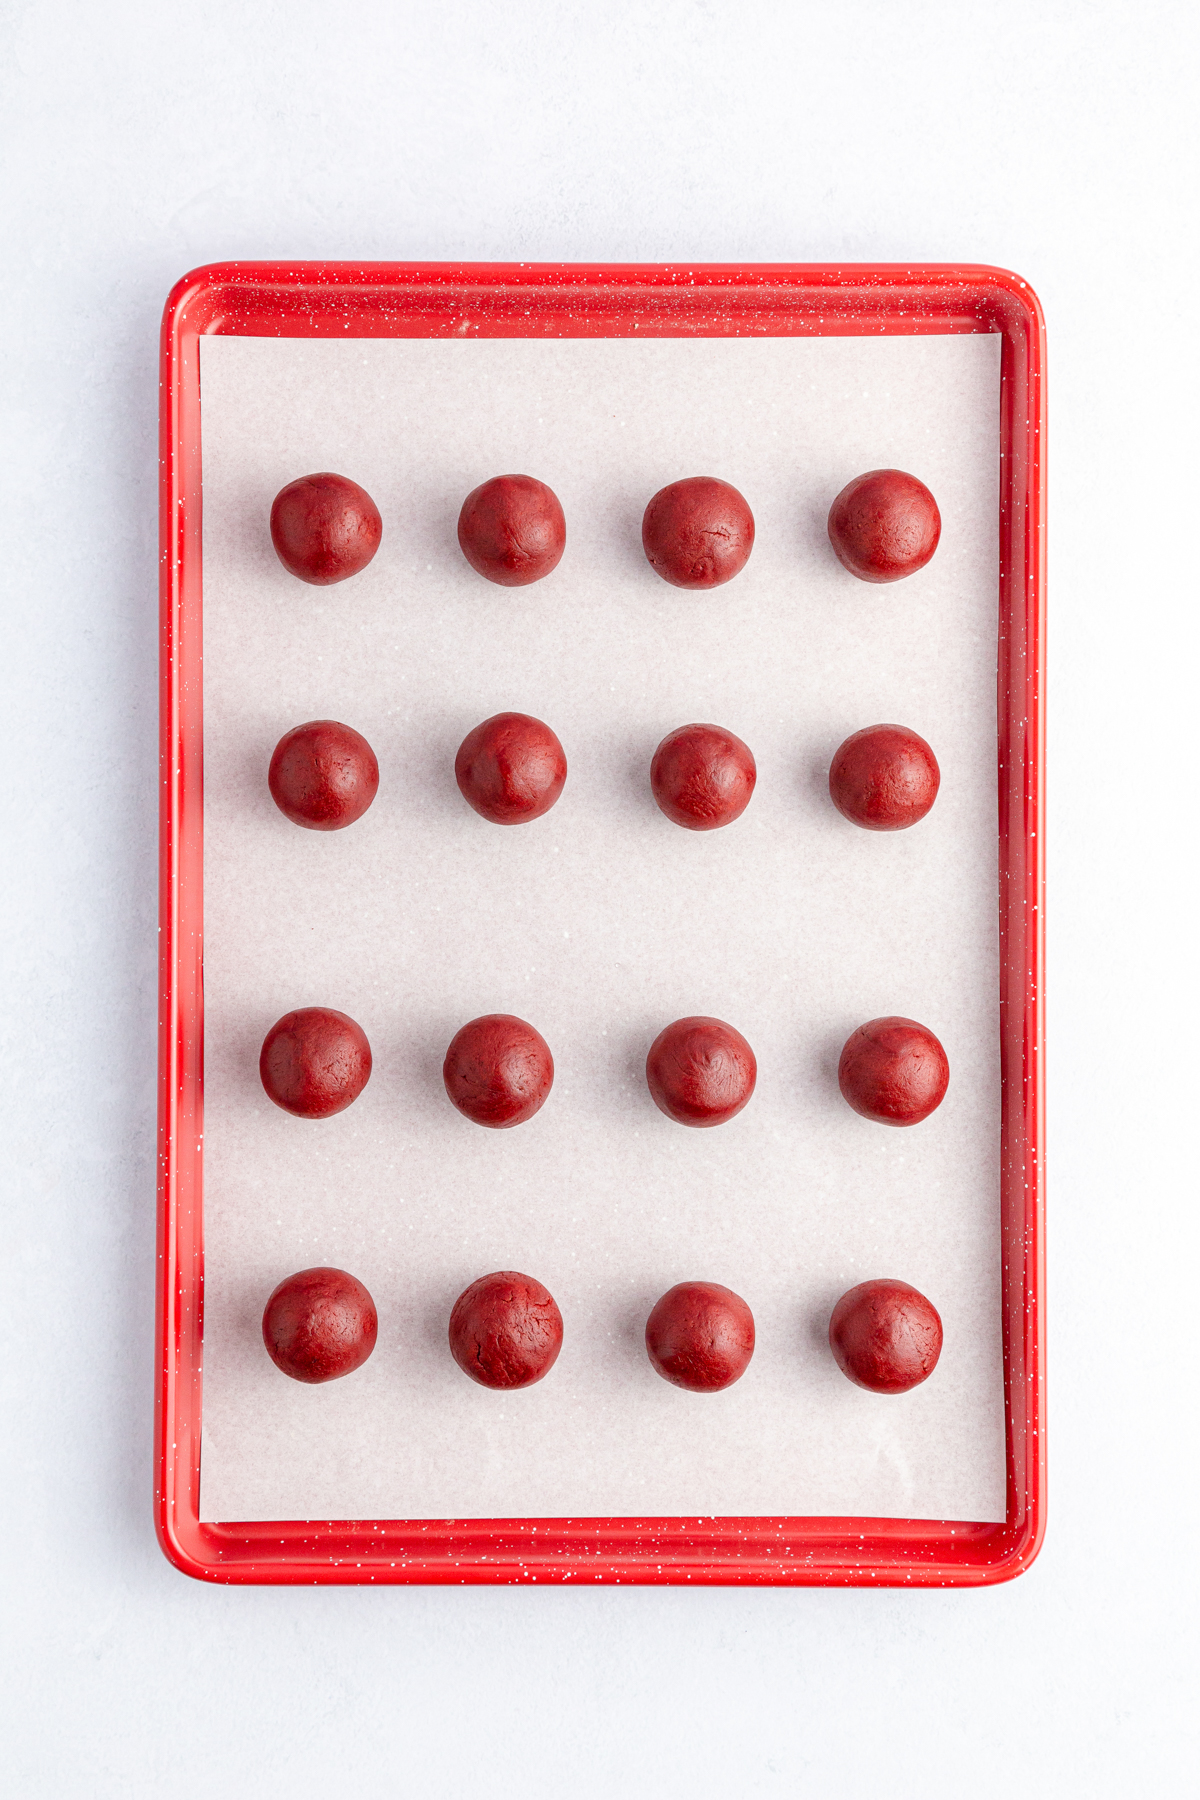
Next, line a large baking sheet, two actually, with a piece of parchment paper or wax paper.
Use a 1 1/2 tablespoon cookie scoop to get a portion of the cake ball dough and roll mixture into a ball. Place the ball onto the baking sheet.
Repeat, leaving a little space in between each little ball, until you’ve rolled out all the balls.
Let the dough set at room temperature for 15 minutes. This will allow the dough to expand a little and is the best way to prevent cracking in future steps.
4 – Dip the Red Velvet Cake Balls
Melt your white chocolate by either using a double boiler on the stove or by placing them into a large bowl that is microwave safe and placing in the microwave for 30 seconds on high. Once the 30 seconds is up, stir, then place back in the microwave for another 30 seconds.
Repeat this until the white chocolate is completely melted.
If the bowl you’re using isn’t very deep, transfer the melted chocolate into a container that is deep with a wide mouth (so you have room to dip cake balls in and pull them out without hitting the sides).
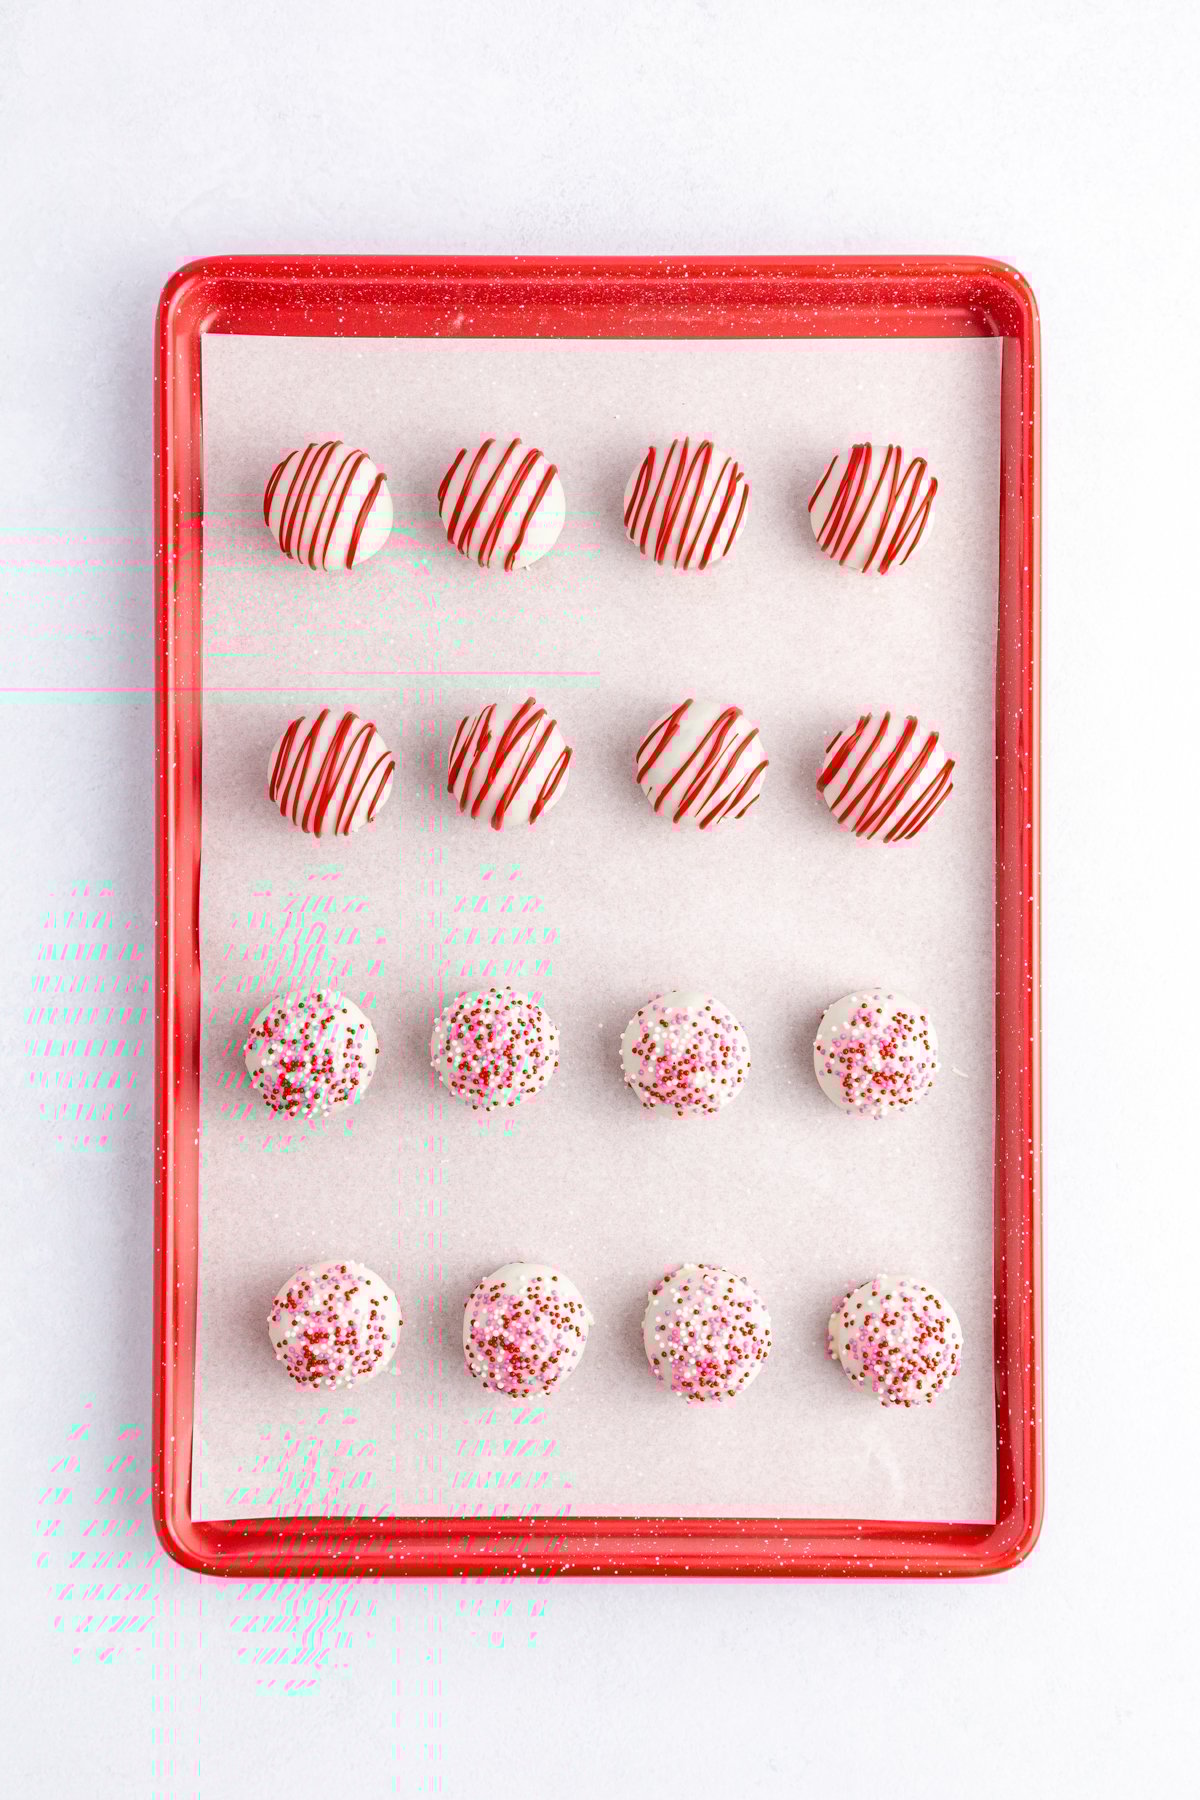
Dip each of the balls of dough into the melted wafers. The best way way to do this is to use put the ball of dough onto a fork then roll it around in the chocolate making sure to coat the whole ball of dough.
Tap any excess chocolate off at the top of the bowl then place back onto the parchment paper to allow the chocolate to harden.
5 – Decorate and Enjoy
If you’re planning to add sprinkles, add them while the white chocolate is still wet so that they have something to stick to.
If you’re planning to add other colors of chocolate, you can add those after the white chocolate has hardened completely. Melt them the same way you melted the white chocolate and then you can either just drizzle on if you don’t care about looks or add them to a piping bag to drizzle on a little more carefully.
Once all the cake balls are coated and decorated, let the white chocolate coating and the melted candy coating (if using) harden on the outside.
Serve at room temperature or you can chill and serve chilled!
Expert Tips & Storage Info
Make sure to add the sprinkles before the white chocolate coating hardens or the sprinkles won’t stick. I typically like to dip one ball, add the sprinkles, then move onto the next. Or the perfect way to do this is actually with a partner (my kids love to help) – you dip while the kiddos add sprinkles on top!
Store in an airtight container in the refrigerator for up to five days since these have raw cream cheese mixed into the balls! If you’d prefer that they be served at room temperate (and not chilled), take them out about 15 minutes before serving to allow them to thaw a bit before serving.
Mix it up with the same process but different cake mixes and different chocolates. Chocolate cake with dark chocolate melting wafers is always a safe choice and reminds me a bit of these chocolate truffles!
Recipe FAQs
What can be used instead of candy melts?
You can use almond bark, chocolate chips, chocolate melting wafers, and even baking chocolate in place of the candy melts. If you want colored chocolate, you can add red food coloring or any color of food coloring to the melted chocolate.
How do you keep cake balls from falling apart?
Chilling the dough before you roll the balls helps keep the cake balls from falling apart. I like to chill in the refrigerator for about two hours before I actually roll the balls. This solidifies (rather than softens) the cream cheese and helps keep the cake balls together during the dipping process.
More Delicious Desserts
If you need another delicious dessert recipe to satisfy your sweet tooth (or just to enjoy with these red velvet cake balls), try one of these! They’re perfect for a special occasion, or really any day!
- Green velvet cupcakes – this delicious treat has a fun surprise inside, and it’s not just cocoa powder!
- Mini Fruit Tart – these mini treats start with sugar cookie dough then get filled with lots of delicious fruit!
- Homemade nutter butters – homemade peanut butter cookies get filled with a delicious peanut butter frosting that’s made with peanut butter, maple syrup, and a secret ingredient!
- Hot chocolate cupcakes – chocolate cupcakes combined with marshmallow and even more chocolate makes these a rich and decadent treat!
- Dr Pepper cake – a delicious chocolate cake topped with chocolate fudge frosting and filled with Dr. Pepper flavor!
No Bake Red Velvet Cake Balls
Ingredients
- 15.25 OZ Red velvet cake mix
- 8 oz block cream cheese softened
- 20 oz vanilla melting wafers
- sprinkles optional
- ½ Cup red candy melts optional
Instructions
- Preheat the oven to 350 degrees. Line a baking sheet with parchment paper and pour the dry cake mix onto the paper, spreading it out evenly on the baking sheet.
- Bake for about five minutes in the preheated oven or until the cake mix reaches 165 degrees. Let it cool completely.15.25 OZ Red velvet cake mix
- Whip the cream cheese in a medium bowl with a hand mixer until it is a smooth consistency.8 oz block cream cheese
- Once the cake mix has cooled, add it into the whipped cream cheese and beat again on medium high until fully combined. Mix until the red velvet cake crumbs and cream cheese have mixed together into almost a cookie dough texture.
- Cover the bowl and place in the refrigerator to chill for 2 hours.
- Line two baking sheets with parchment paper. Use a 1 1/2 tablespoon cookie scoop to get a portion of the cake ball dough and roll mixture into a ball. Place the ball onto the baking sheet. Repeat, leaving a little space in between each little ball, until you’ve rolled out all the balls.
- Let the dough set at room temperature for 15 minutes.
- Melt your white chocolate by either using a double boiler on the stove or by placing them into a large bowl that is microwave safe and placing in the microwave for 30 seconds on high. Once the 30 seconds is up, stir, then place back in the microwave for another 30 seconds. Repeat this until the white chocolate is completely melted.20 oz vanilla melting wafers
- Dip each of the balls of dough into the melted wafers. Tap any excess chocolate off at the top of the bowl then place back onto the parchment paper to allow the chocolate to harden.
- Add sprinkles while the coating of the cake balls is still wet. If adding additional candy melt drizzles on top, melt the candy melts in the same way you melted the chocolate earlier in the microwave then drizzle on top of the candy balls either by hand or with a piping bag.sprinkles, 1/2 Cup red candy melts
- Let the chocolate set completely then serve!


Leave a Reply