

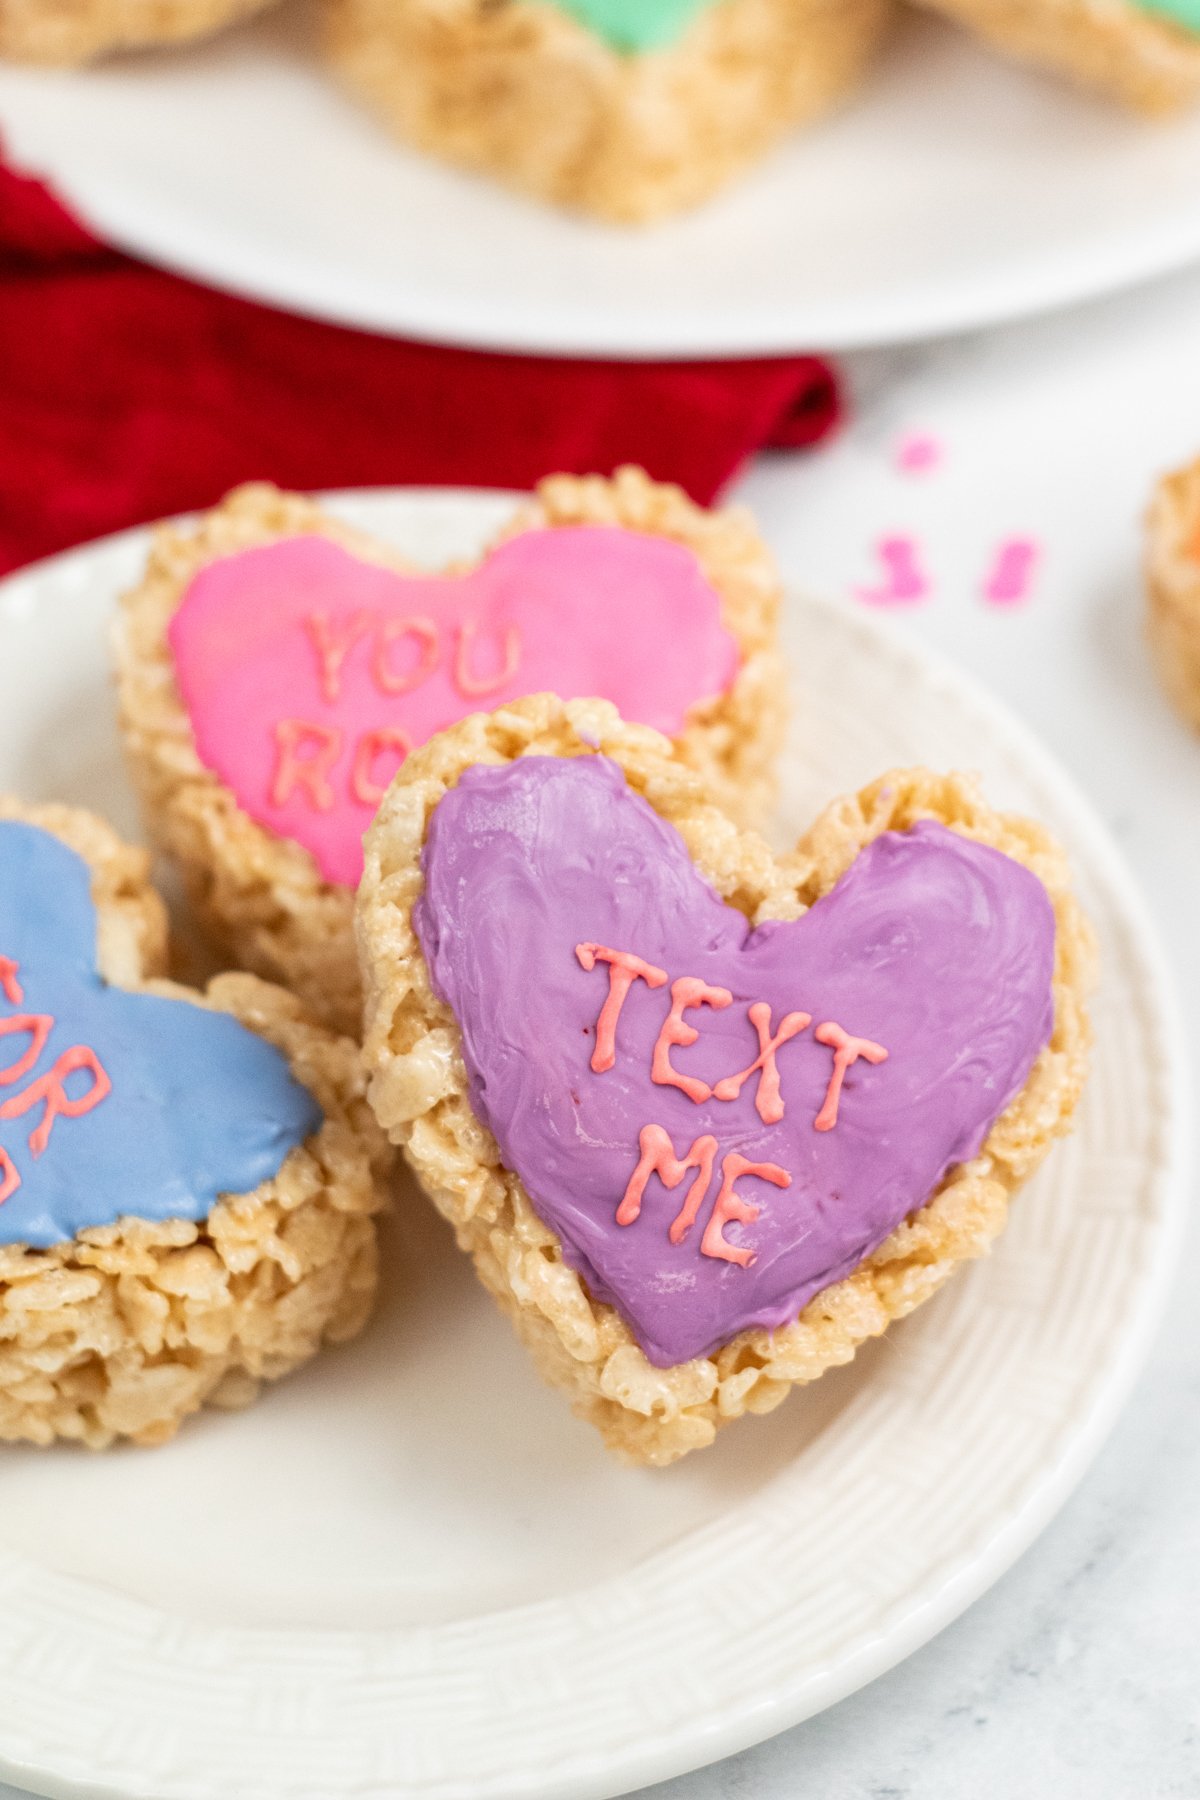
These fun Valentine’s Day rice krispy treats looks just like the classic conversation hearts, just in treat form! They’re simple to make and an adorable Valentine’s Day treat that both kids and adults will enjoy!

Want to save this recipe?
Enter your email below and we’ll send this idea straight to your inbox (plus you’ll receive fun weekly ideas from us too!)
When you think of Valentine’s Day candy, what’s the first thing you think of?
I’m guessing it’s not chocolate truffles or gummy hearts. I’m guessing it’s those classic conversation hearts that are really fun to get but not that fun to eat.
Honestly, I personally think they’re kind of gross. But they are really fun to play Valentine’s Day minute to win it games with!
And they’re a lot of fun to give to people just because of the fun sayings on them.
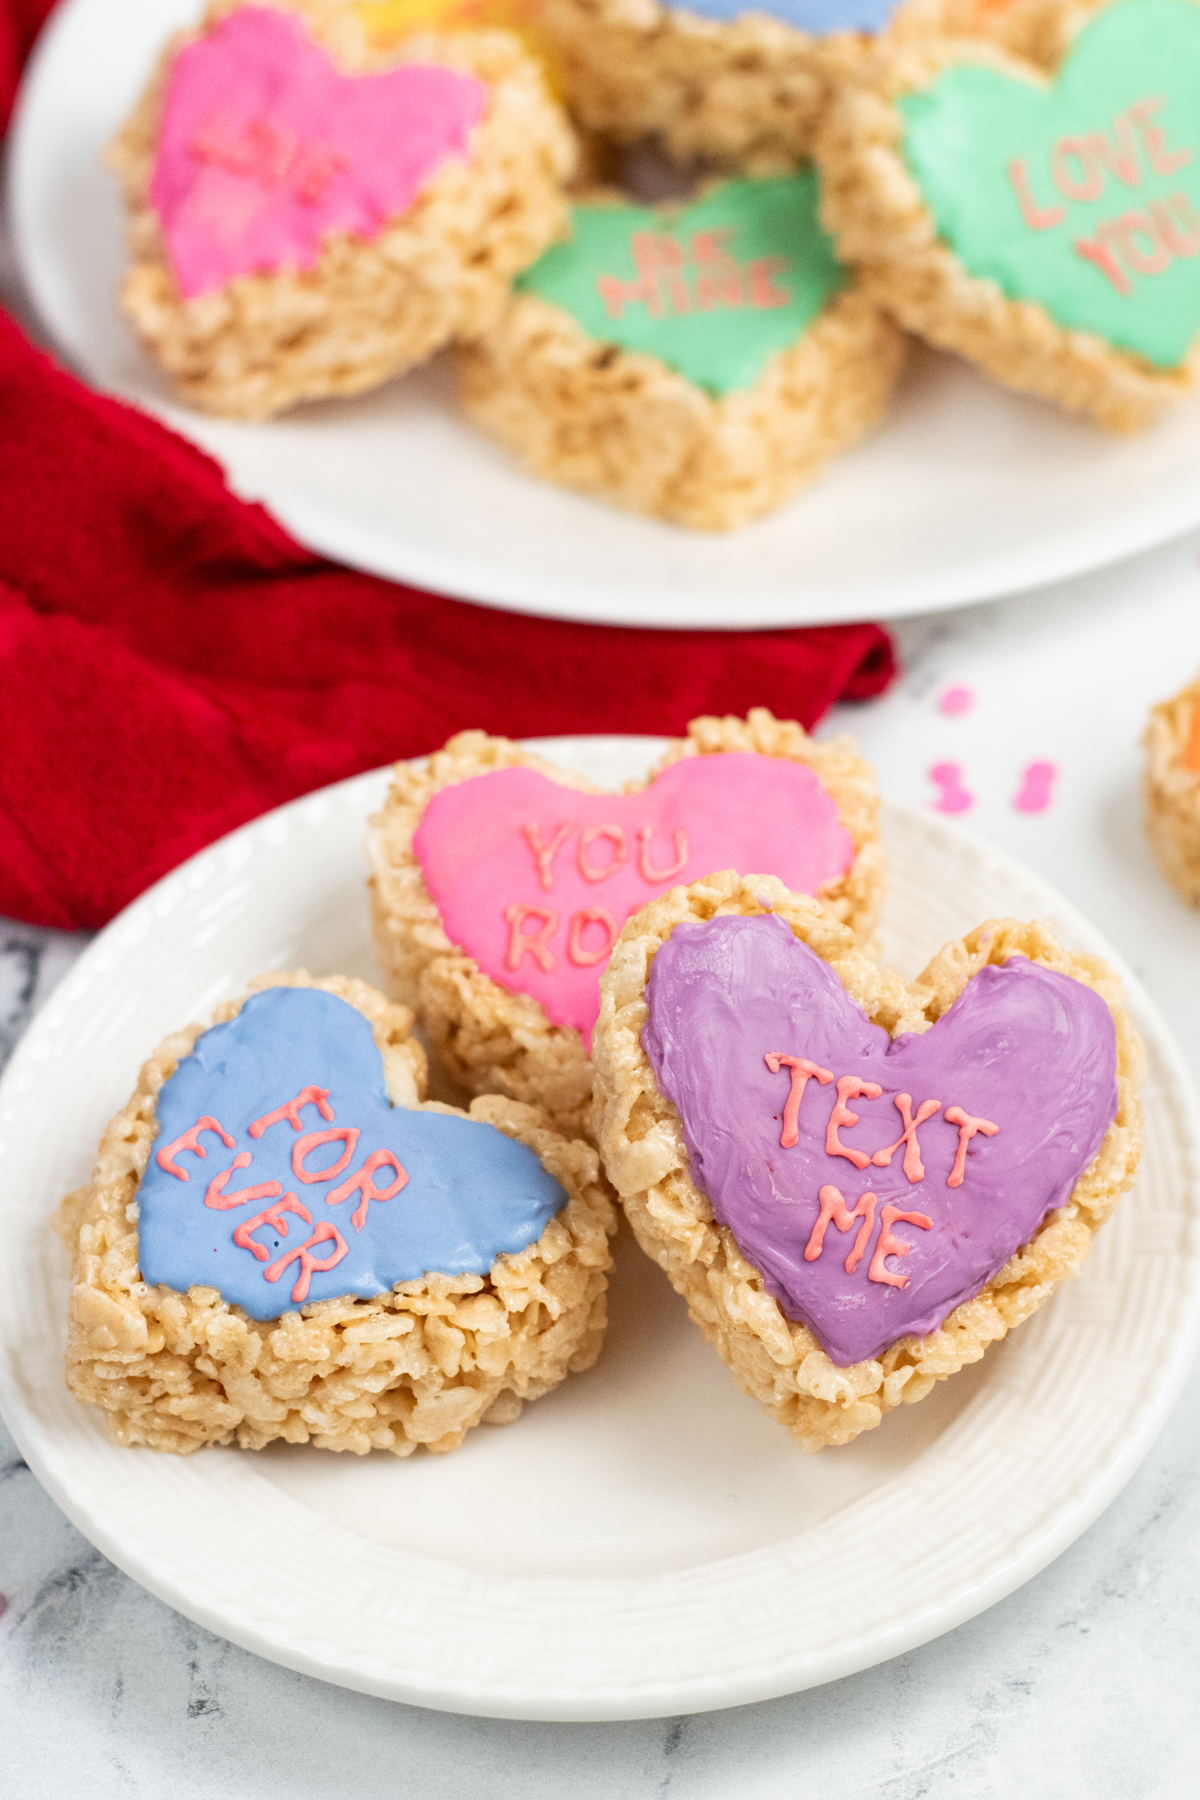
These Valentine’s Day rice krispy treats are designed to look like conversation hearts but they taste good. And you can customize the sayings to be whatever you want – traditional Valentine’s Day sayings or something specific to the people who are eating these!
These would be really fun to put at the end of a Valentine’s Day scavenger hunt or to send in for a classroom party! You could even wrap them up and put into Valentine’s Day gift baskets!
Why You’ll Love This Recipe
- Easy – if you’ve ever made rice krispy treats, you can make these. They’re even easier to make than my chocolate dipped rice krispy treats!
- Customizable – make these say what you want, be any color you want, and any size you want. They’re the most versatile Valentine’s Day treat ever!
- Fast – these come together in under 20 minutes, making them a great last-minute dessert idea!
Ingredients
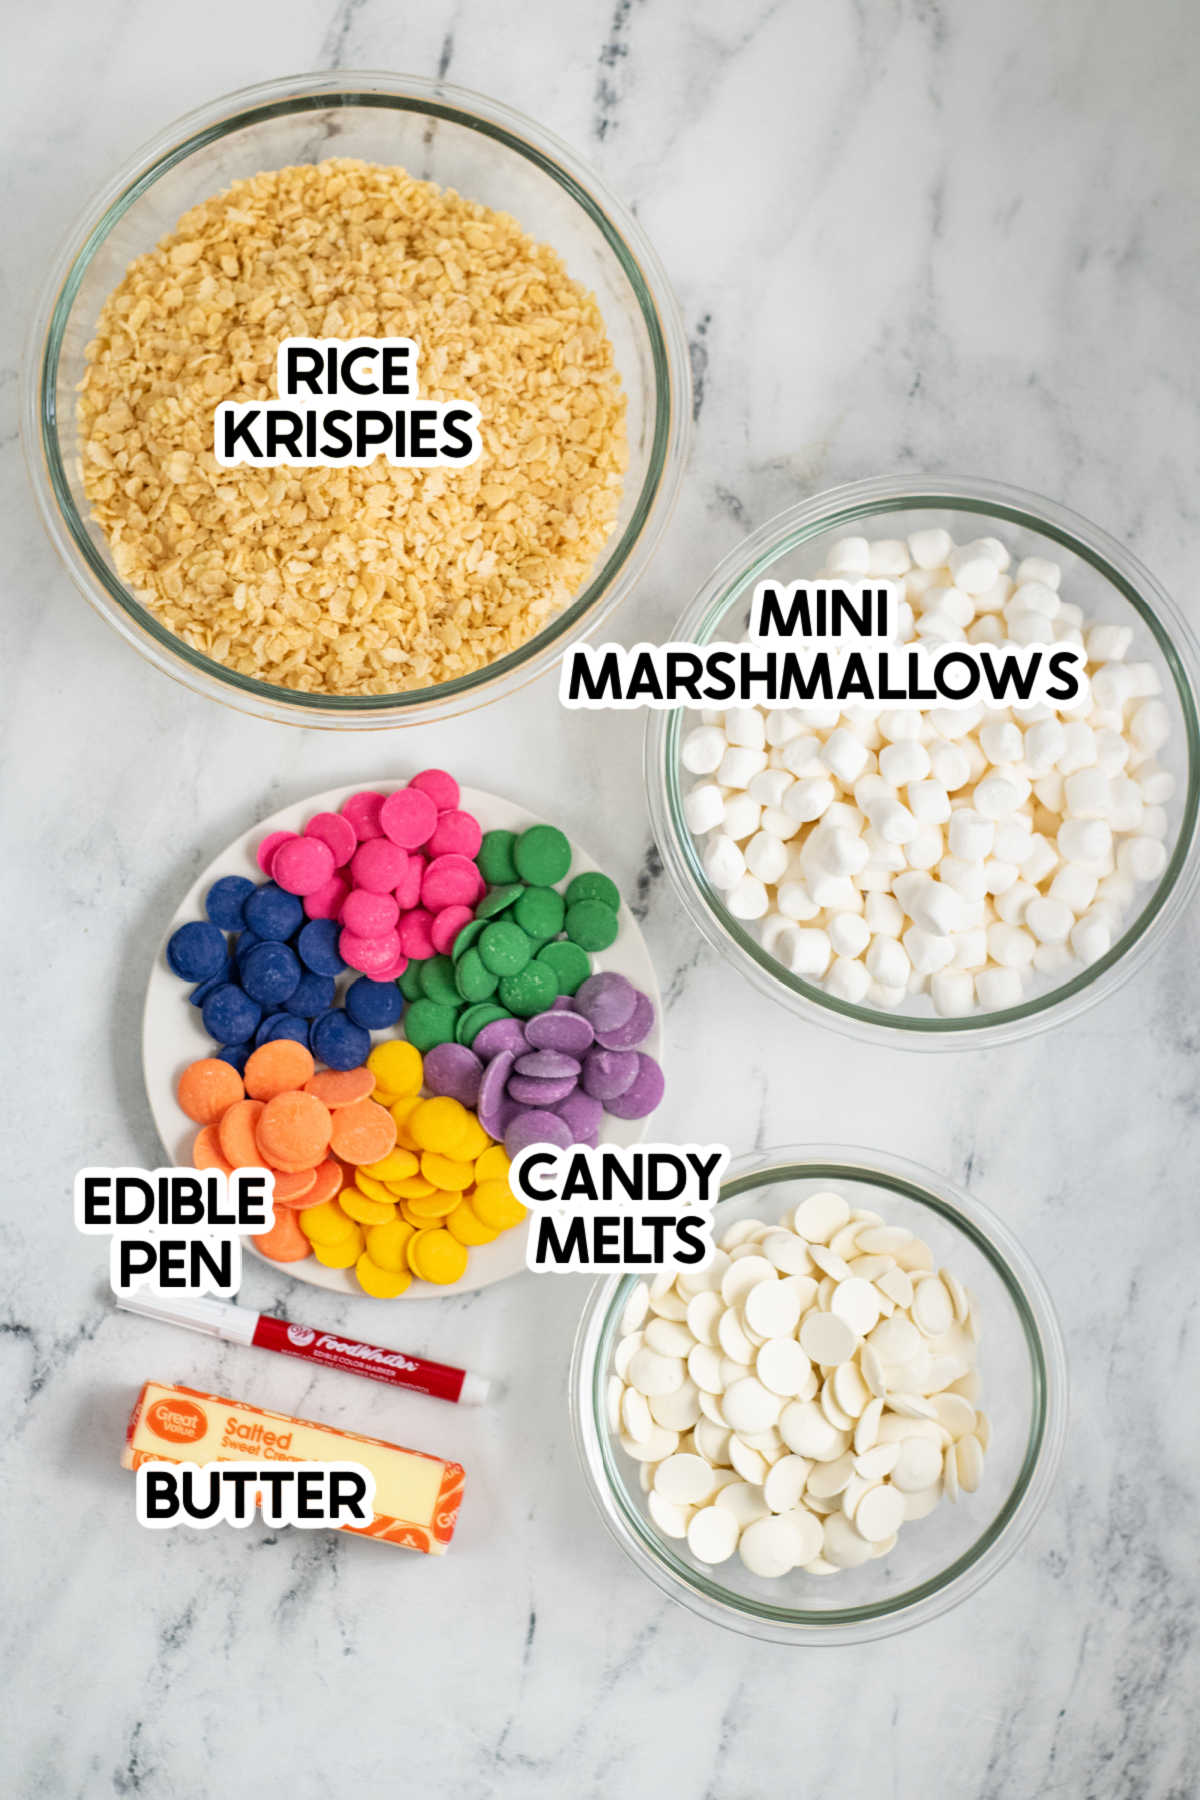
Ingredient Notes
- Mini marshmallows – I always recommend using mini marshmallows for rice krispy treats because they melt faster but if you don’t have mini marshmallows, regular size ones work as well. I’ve included a conversion for the number of regular marshmallows you’ll need in the recipe card at the bottom of this post.
- Candy melts – candy melts are the best for this because they melt and harden quickly! Plus, they come in all sorts of different colors, which makes for really fun Valentine’s Day conversation heart look a likes!
- Edible Pen – this is optional but recommended. You’ll use it to write a draft of the words on your hearts because piping on the actual words. You can also just free hand it if you’re up for it and skip the edible pen. I recommend a fine-tip one like this.
How to Make Valentine’s Day Rice Krispy Treats
These are simple to make, especially if you’ve ever made rice krispy treats in the past (and most of us have).
You basically are going to make your treats, cut them into heart shapes, add some melted candies, and then write on your sayings!
I recommend coming up with your sayings ahead of time so you can just go through this process once without stopping a bunch of times to come up with ideas.
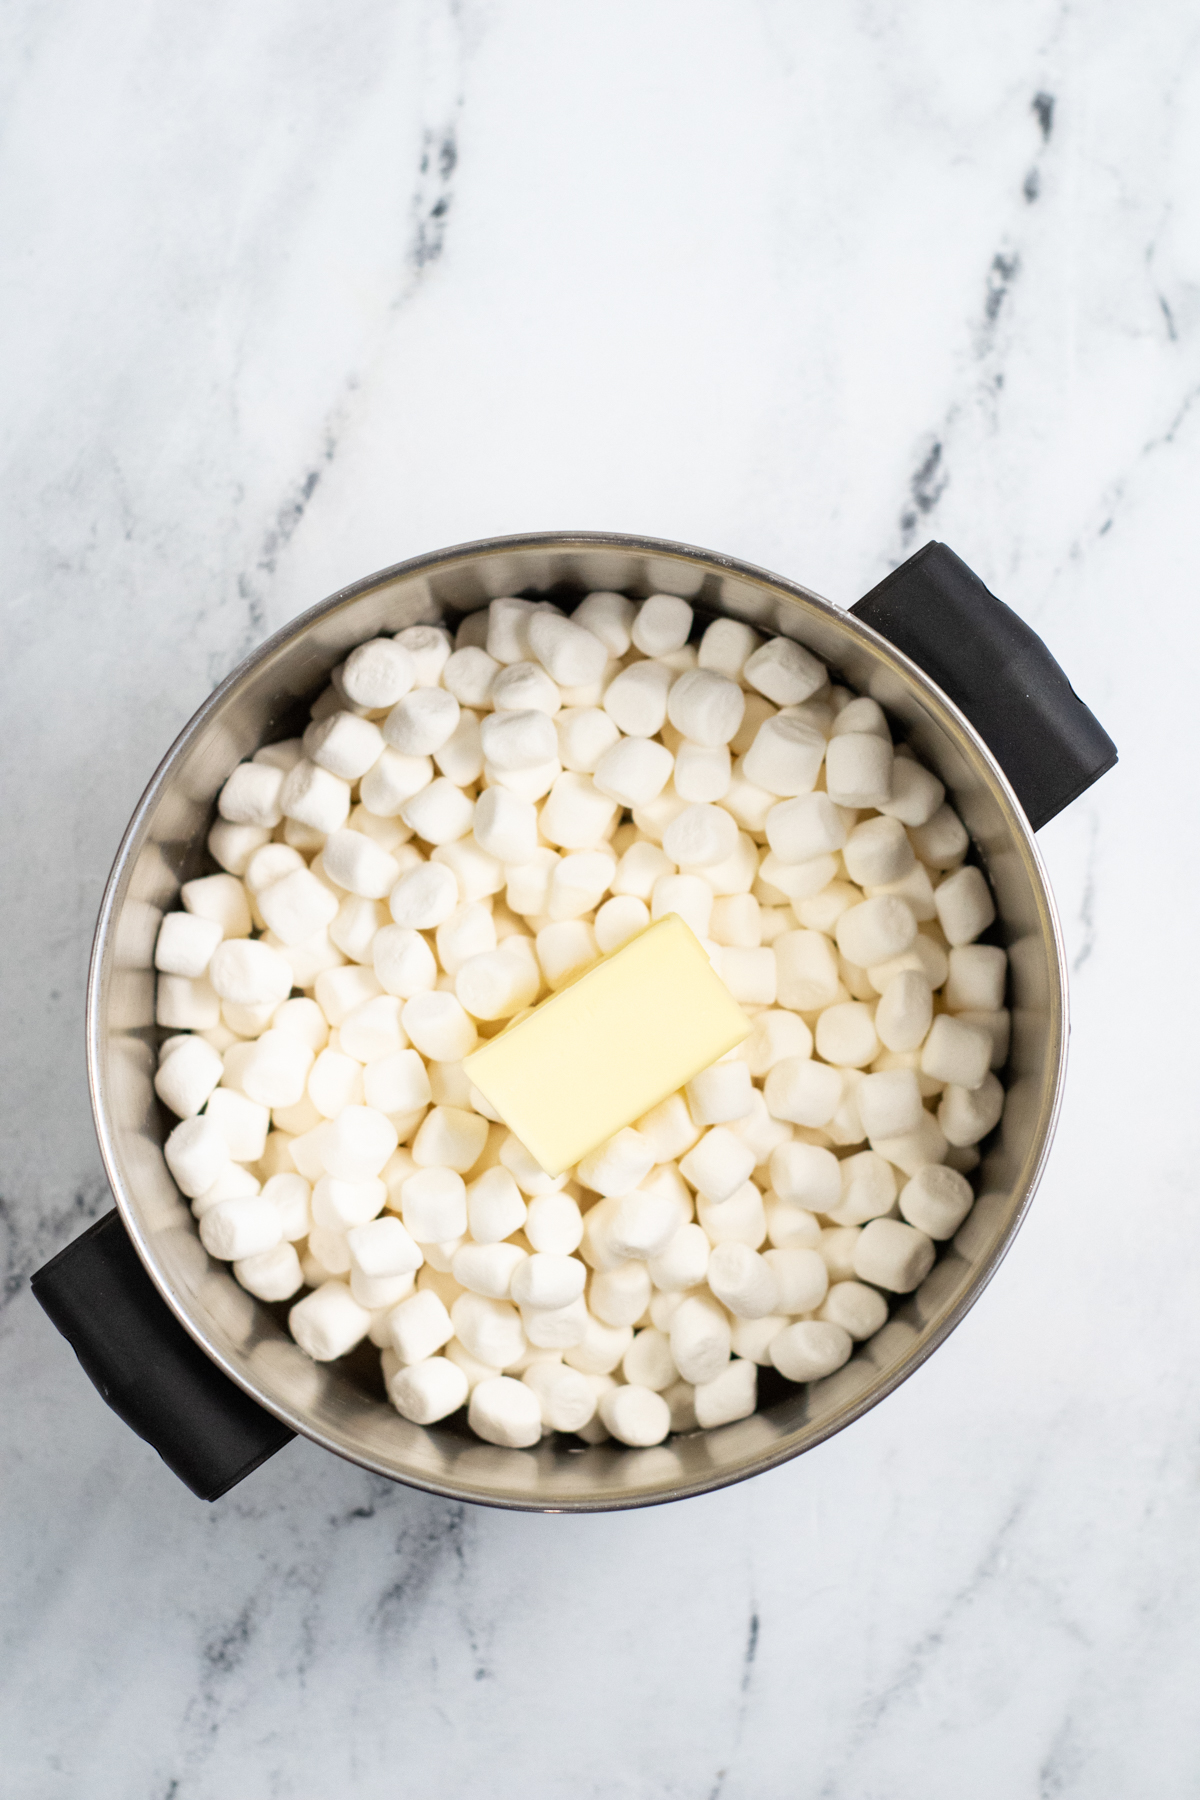
1 – Make the Rice Krispy Treats
Start by placing marshmallows and butter in a large pot on low heat. Low heat will keep the butter from browning, which can give you hard treats instead of the soft ones you’re looking for.
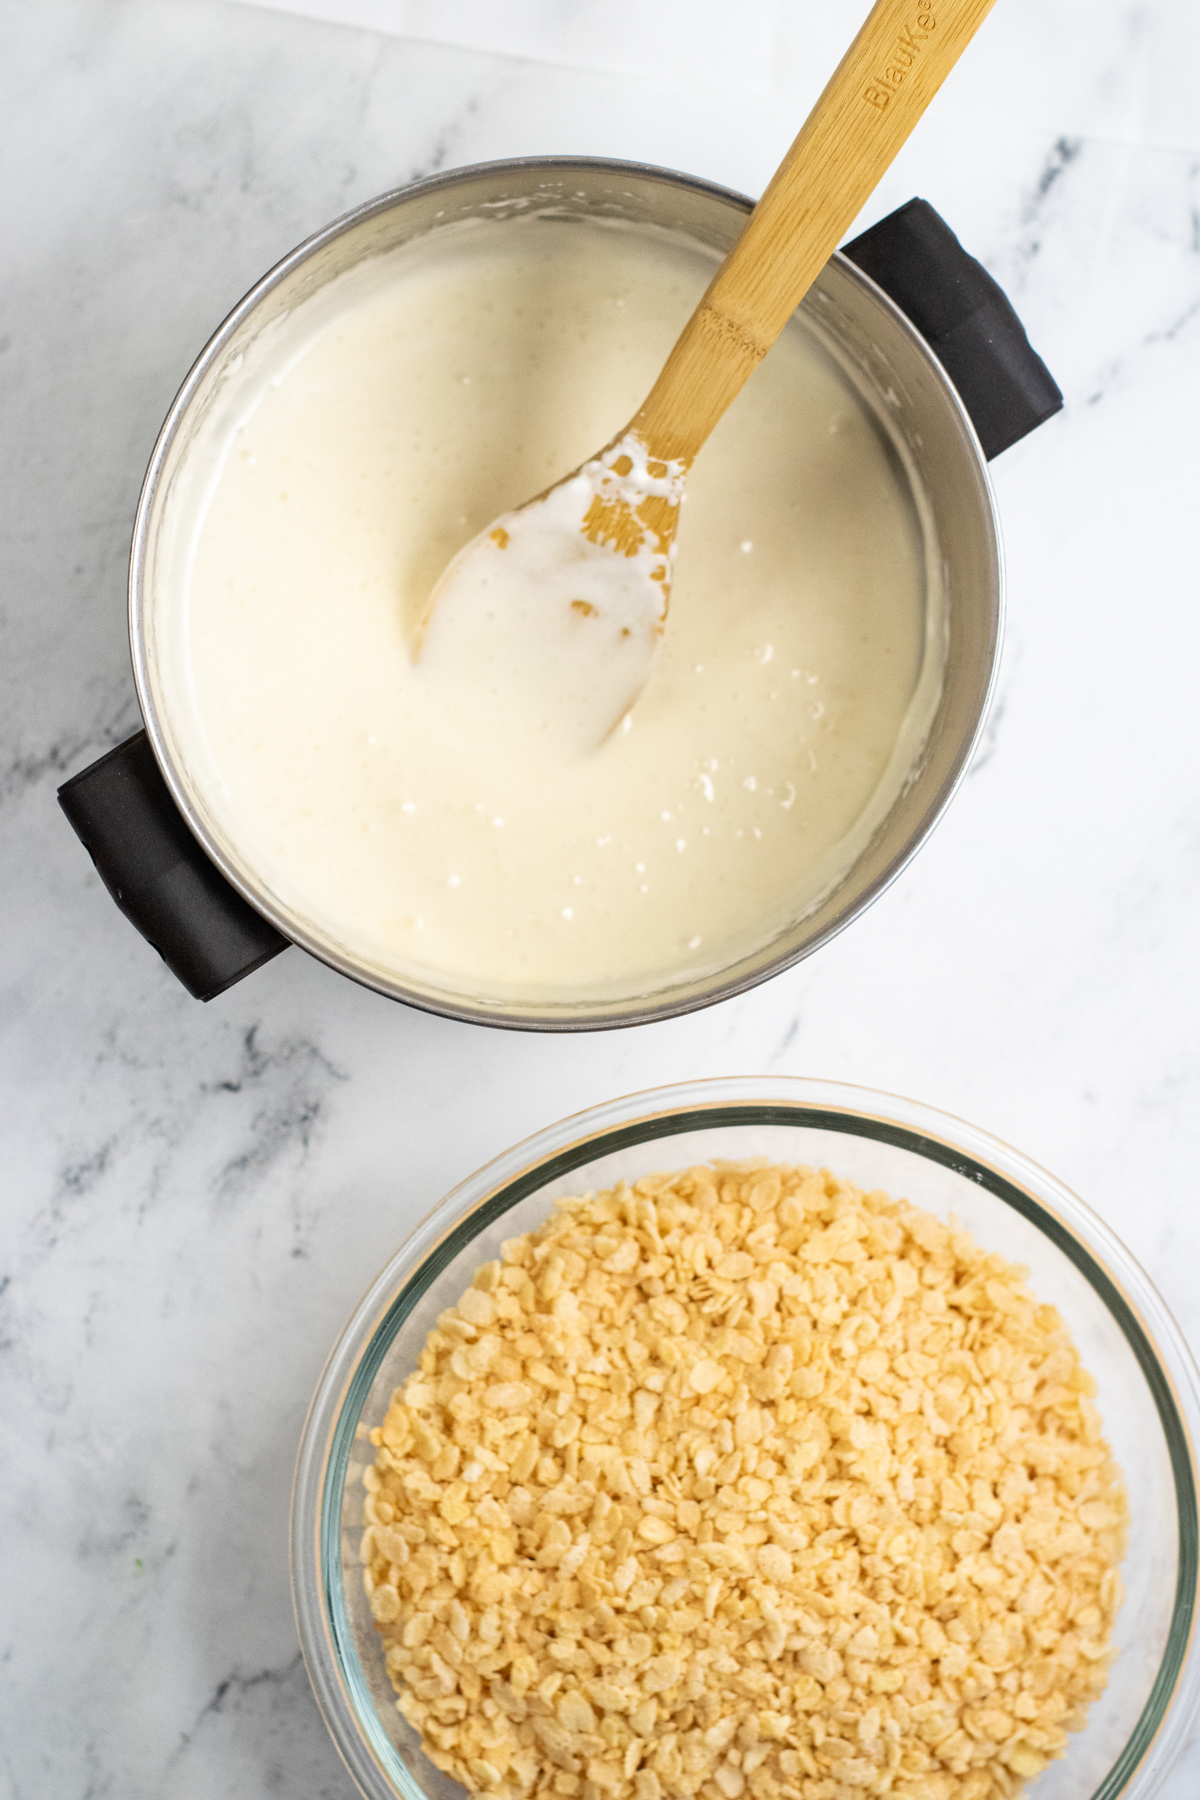
Stir constantly until marshmallows are completely melted and smooth, then remove from heat.
Add cereal to the melted marshmallows and mix until cereal is well coated.
2 – Make the Conversation Hearts
Once your marshmallow mixture is completed, you have two choices for making your hearts.
One option is to press the mixture into a 9″ x 13″ pan lined with parchment paper, allow to cool completely, then remove from the pan and cut out with heart shaped cookie cutters.
Or a second option is to use buttered hands and cookie cutters to shape the rice krispy treats individually.
To do this, press the warm mixture directly into the heart shaped cookie cutter to form the heart. Carefully remove the cookie cutter then place the shaped treat on parchment paper to cool.
I personally prefer the second option because you don’t waste any of the rice krispy treats (well, waste may not be the right word, but you can use them all in the hearts).
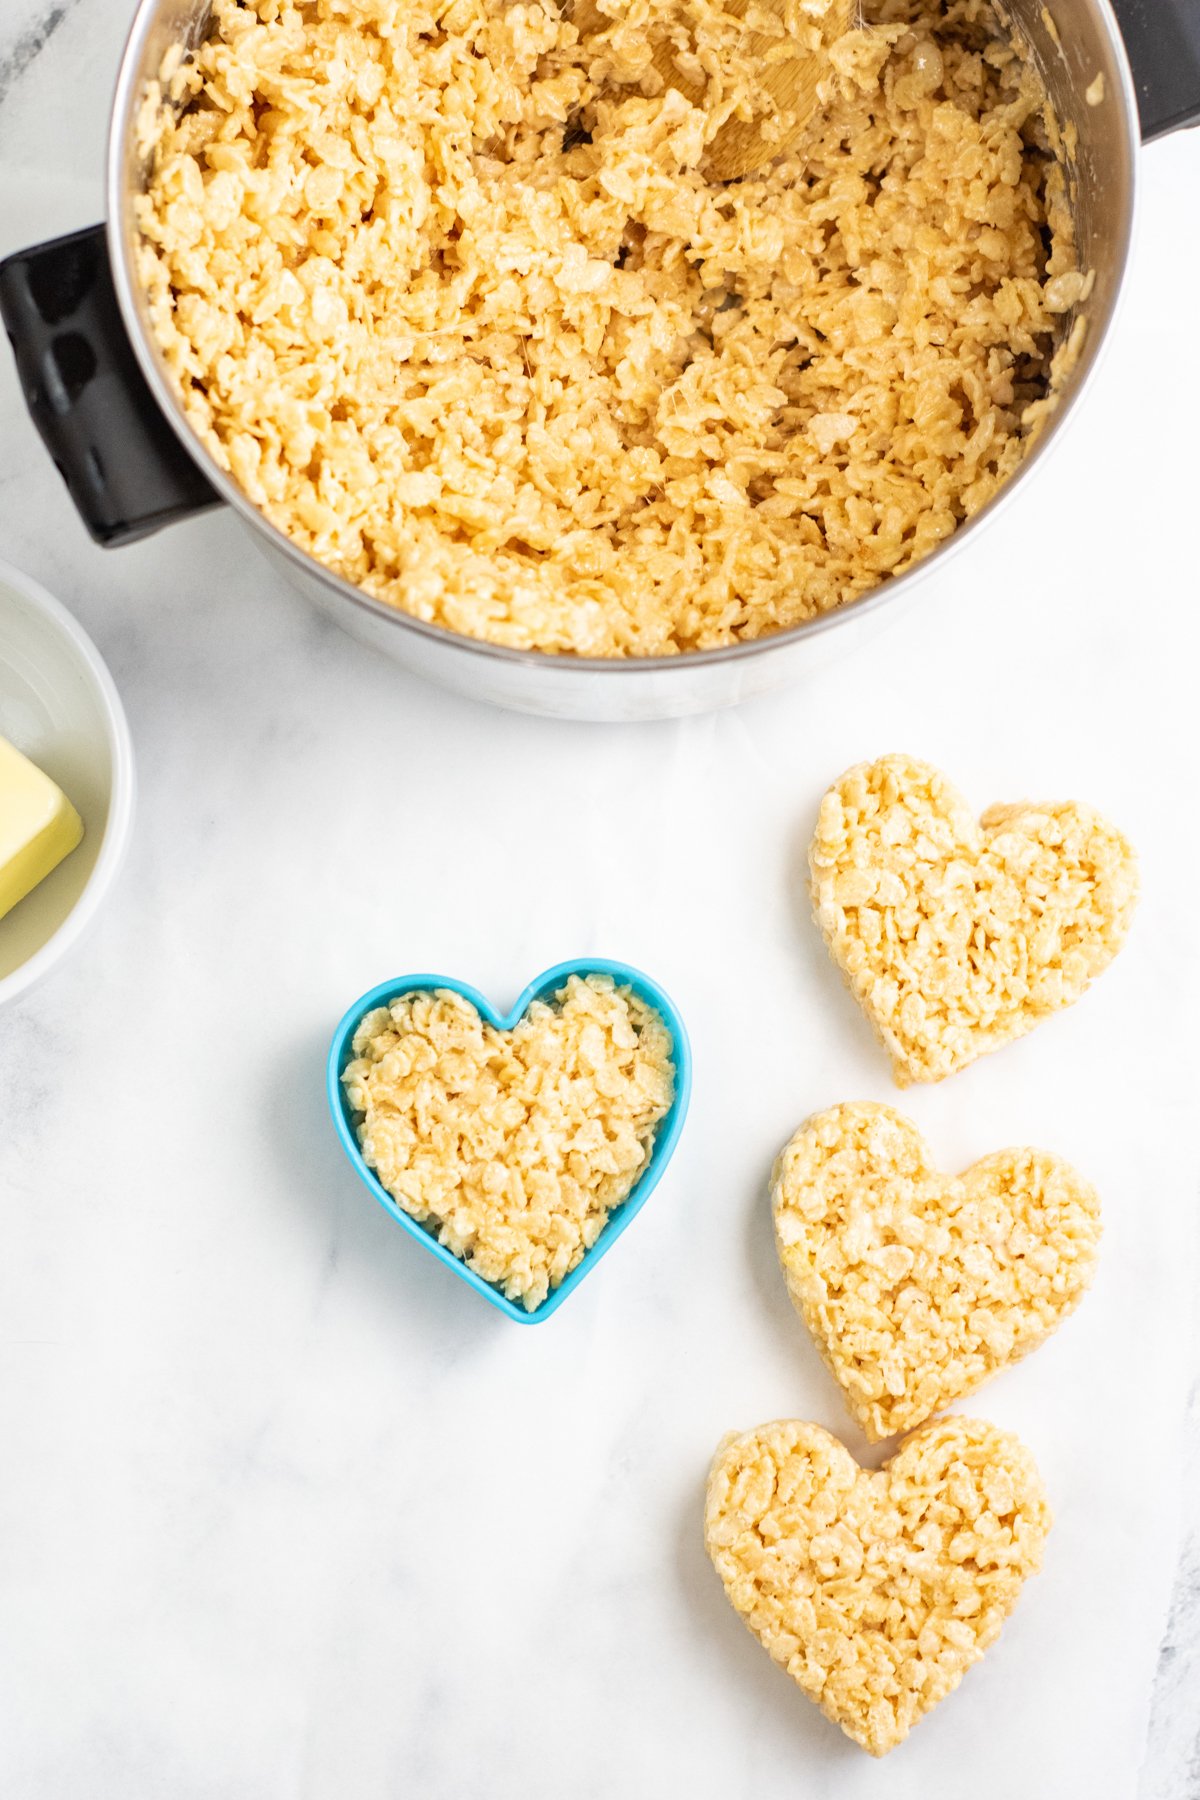
Once the rice krispy treats have cooled, it’s time to turn them into conversation hearts!
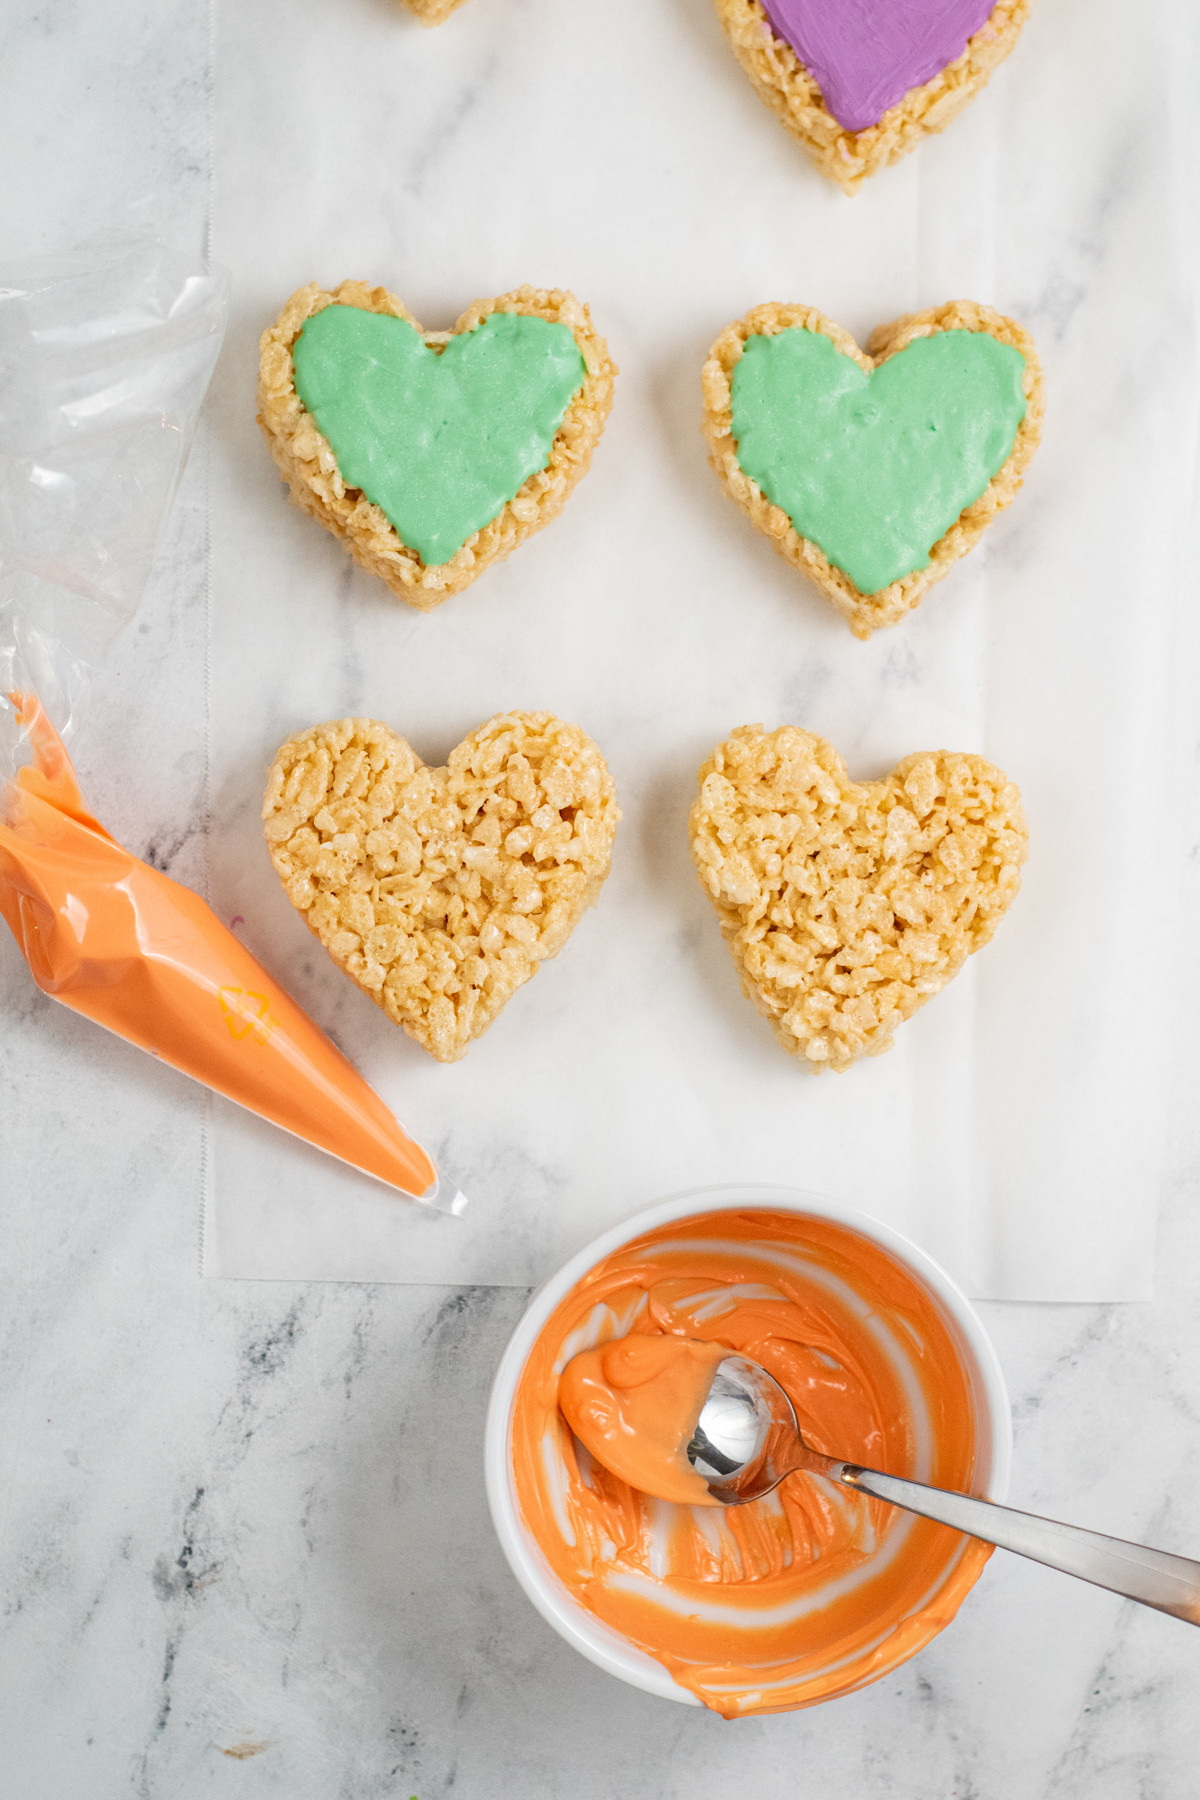
To decorate the hearts, place each color of candy melts in a separate microwave-safe bowl.
Microwave one color at a time for 30 seconds, stir, then repeat until completely melted and smooth.
If the candy is not getting smooth for some reason, you can add 1/2 tsp of coconut oil to give it a more creamy and shiny texture for spreading.

Add the melted candy melts to a piping bag (or zip top bag with the corner cut off). Then pipe an outline around the edge of the heart shapes treats.
Fill in the heart with melted candies and spread to the outline with a knife, making it nice and smooth. Repeat with each color until you have finished all the treats.
Once coating is completely cooled, use an edible marker to write your sayings on the hearts. You can use a damp paper towel to wipe away any mistakes. (If you’re really brave you can skip this step and free-hand the sayings!)
Choose what color you want the sayings to be and melt the candy melts again as noted above. Then use a piping bag with a small hole or small circle tip to write over the edible marker sayings or free-hand sayings on coating.

Allow the letters to harden completely then they are ready to share with your Valentine!

Expert Tips
Store in an airtight container for up to three days. Longer than that and they’ll start to get hard, so it’d be easier to just whip up a new batch!
Work in color batches. Choose two colors of candy melts to melt at a time and use those colors to add color to the hearts and to write on the hearts. For example, melt blue and purple at the same time. Then do some hearts with a purple layer and blue writing and some hearts with blue base layer and purple writing. That way you don’t have to deal with a bunch of colors all at once.
Keep your temperature low on the marshmallow mixture, even if you are tempted to heat it up higher to melt it quicker. Slow and low is the way to go!
Recipe FAQs
How far in advance can I make rice krispy treats?
I recommend making these no more than 24 hours in advance of when you want to eat them. They’re still good for three days after making them, but they’re best fresh or enjoyed within 24 hours. The longer the sit, the harder they get.
How long should Rice Krispy Treats cool before cutting?
Rice Krispy Treats only need to cool for 10-15 minutes before cutting, just long enough that the mixture can cool and solidify together for cutting.
How do you shape Rice Krispy treats?
You can either press the rice krispy treats into a pan with parchment paper then use cookie cutters to cut them into shaped treats. Or you can press the mixture directly into cookie cutters that have been sprayed with non-stick spray. Press them in gently and pop them out gently to get the shape you’re looking for.
More Easy Valentine’s Day Recipes
- Brownie dip – a delicious chocolate dip that tastes just like homemade brownies!
- Chocolate lava cake – the most amazing homemade chocolate lava cake, super easy to make and delicious!
- Cotton candy drink – this sweet strawberry mocktail is fun for both kids and adults!
- Snickers cake – chocolate cake topped with caramel and whipped cream, this one’s to die for!
- Easy chocolate truffles – these creamy chocolate truffles make a perfect addition to any Valentine’s Day traet plate!

Conversation Heart Rice Krispie Treats
Ingredients
- ½ cup butter
- 20 ounces mini marshmallows
- ½ tsp salt
- 2 tsp vanilla
- 9 oz Rice Krispies Cereal
- ½ cup each colored candy melts (white, pink, purple, blue, green, yellow, orange)
- 1 TBS coconut oil (if needed)
- edible pen optional
- 1 – 2 TBS butter for hands/cookie cutter (if needed)
Instructions
- Line a 9×13 pan with parchment paper.
- Melt butter in a large pot on medium-low heat. Once the butter is fully melted, you’ll add 1 1/2 bags of mini marshmallows into the pot and set the other marshmallows aside for later!
- Mix the butter and marshmallows together with a rubber spatula, stirring continuously until the marshmallows have completely melted, making sure to keep the heat on low.
- Once the marshmallow mixture is totally melted, remove the pot from the heat and stir in vanilla and salt.
- Add roughly half of the rice krispy to the marshmallow mixture, making sure to scrape the bottom thoroughly to incorporate all the marshmallow mixture.
- Once that’s all mixed together, add in the remaining marshmallows and rice cereal.
- Pour the rice krispies into the pan, then gently spread the treat evenly onto the pan.
- With parchment paper, wax paper, or the back of a rubber spatula, gently press the rice krispies until you have a flat layer that is slightly thinner than the cookie cutter.
- Allow the rice krispy treats to cool for 10 minutes to harden slightly.
- Remove the rice krispy treats onto a flat surface using the parchment paper.
- Lightly spray the inside of your cookie cutter with a non-stick cooking spray, press it gently into the rice krispy treats, and press out the desired shape. Transfer the finished treat to another tray to allow it to set completely.
- Repeat the process, reapplying the non-stick spray as necessary until you run out of room.
- To decorate the hearts, place each color of candy melts in a separate microwave-safe bowl. One color at a time, microwave for 30 seconds, stir, then repeat until completely melted and smooth. 1/2 – 1 tsp coconut oil may be added to chocolate if needed to make it smooth and easy to spread.
- Use a piping bag, or plastic baggie with the corner tip cut off, to pipe melted chocolate around the edge of heart shaped treats. Then fill in the heart with melted chocolate and spread to the outline with a knife, making it nice and smooth. Repeat with each color until you have finished all the treats.
- Once coating is completely cooled, use an edible pen to write sayings on the hearts. Use a damp paper towel to wipe away any mistakes. (Or you can skip this step and free-hand the sayings!)
- Choose the color you want the sayings to be and melt the chocolate as noted above. Then use a piping bag with a small hole to write over the edible marker sayings or free-hand sayings on coating.


Leave a Reply