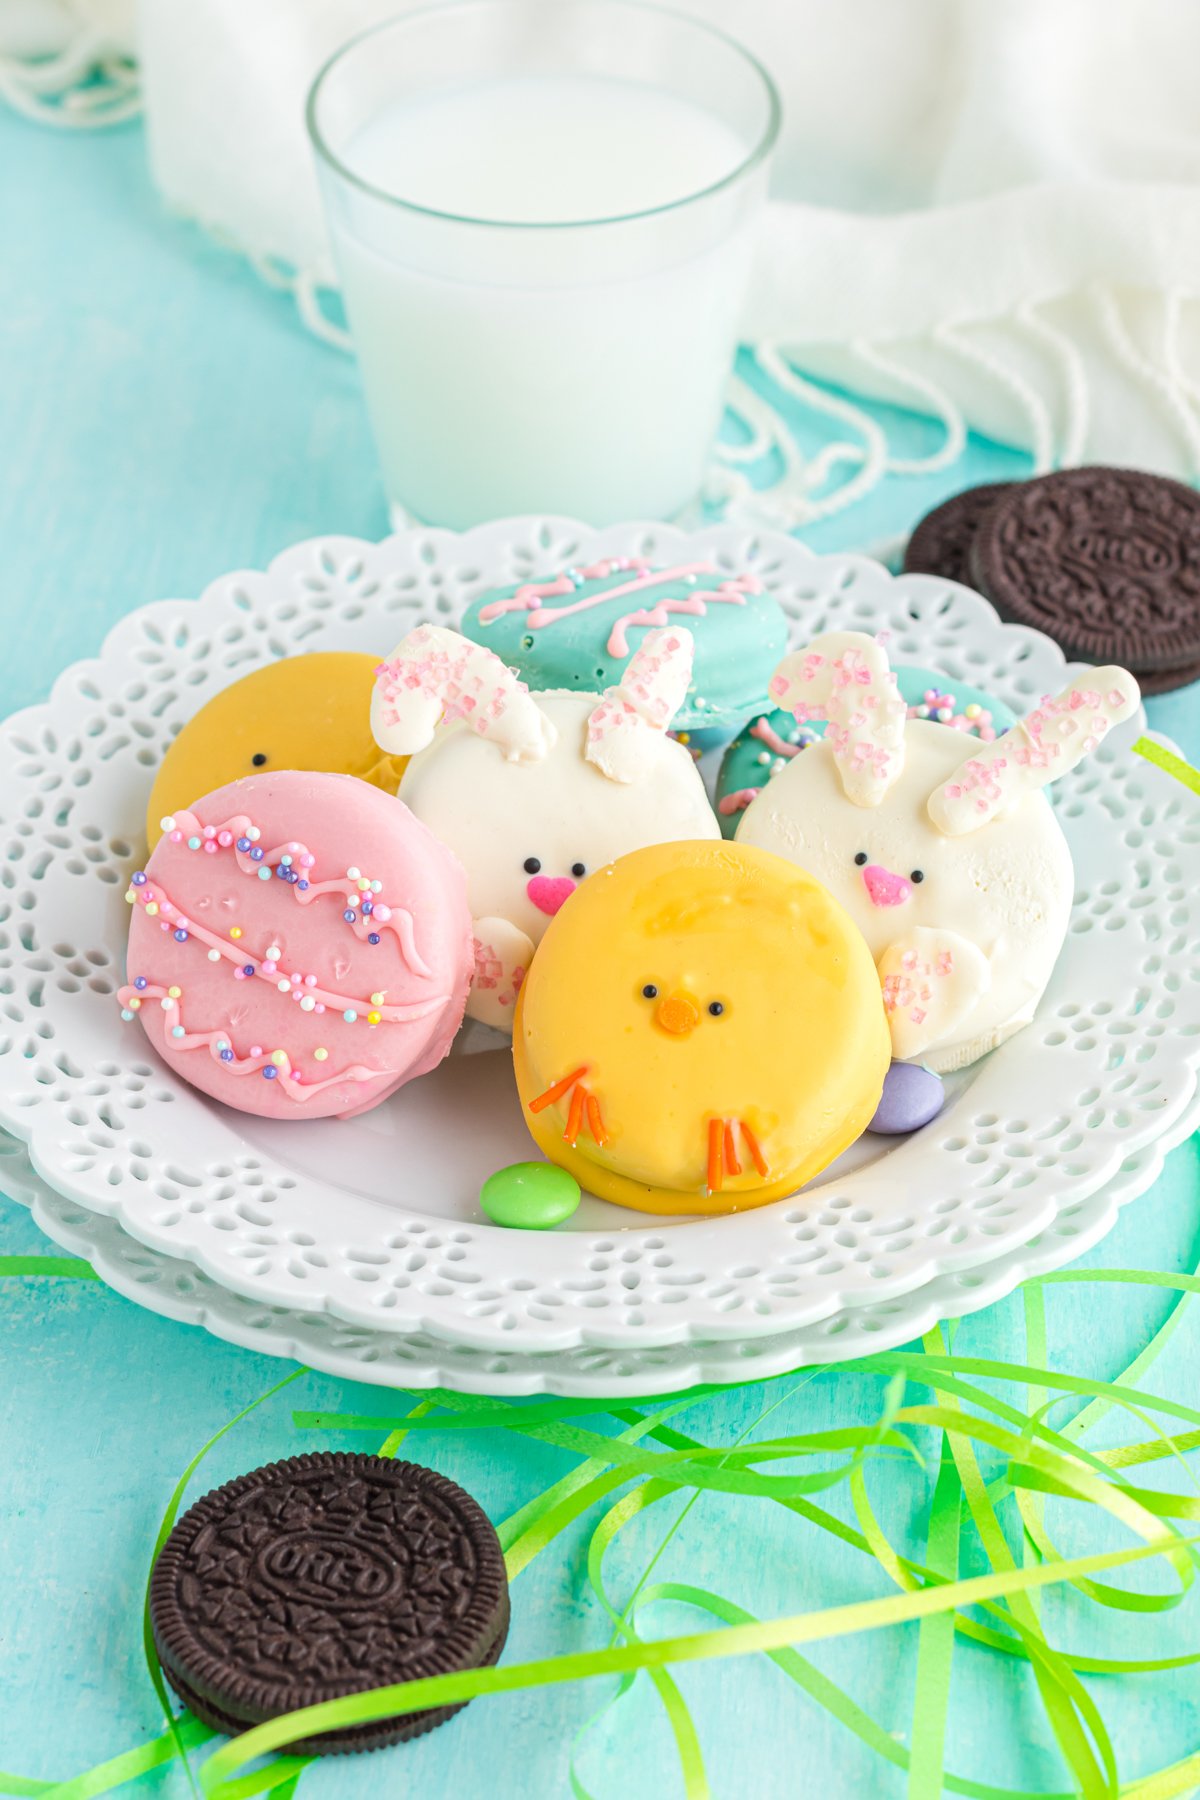
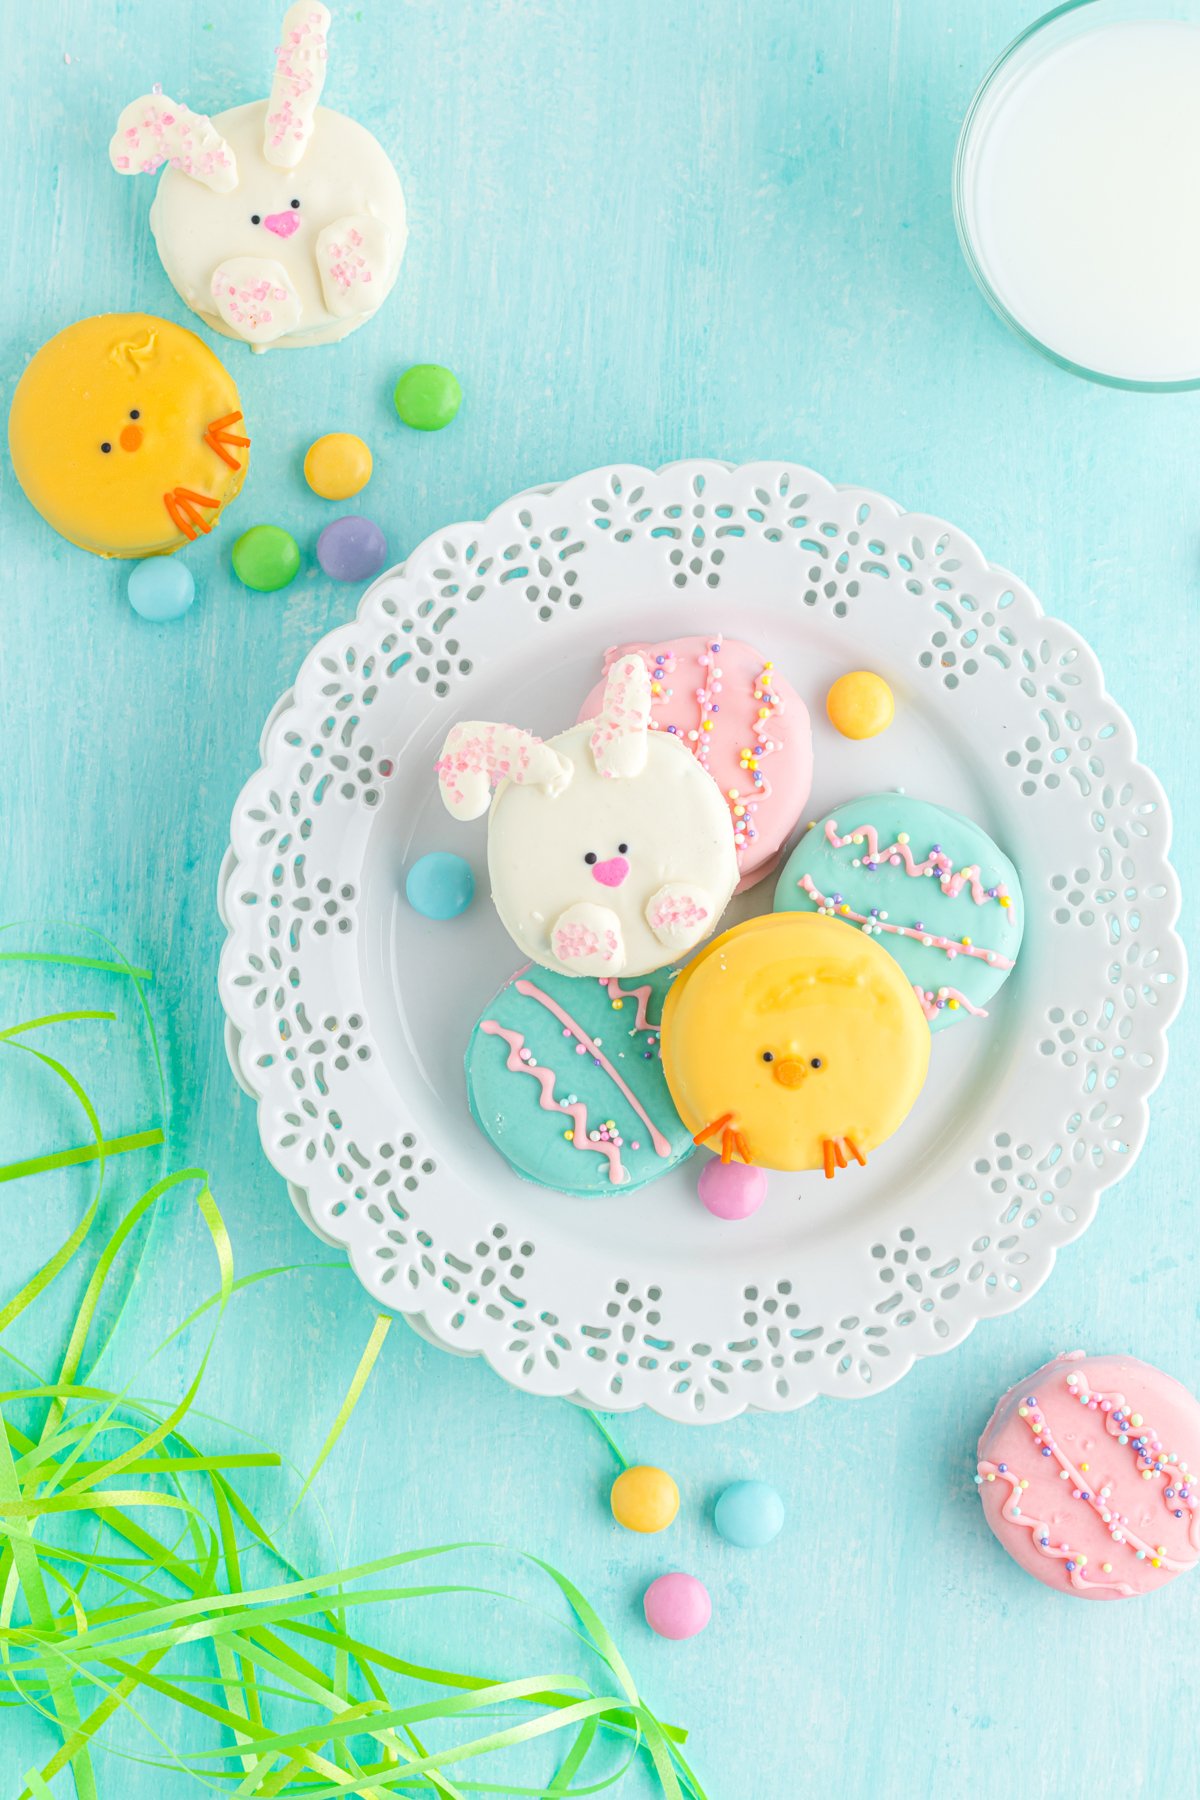
These chocolate covered Easter Oreos are the perfect addition to any Easter dessert spread! Oreos get turned into cute Easter bunnies, chicks, and Easter eggs with just a little bit of help from white chocolate! They’re the perfect treat for Easter Sunday or to add to Easter baskets for kids!

Want to save this recipe?
Enter your email below and we’ll send this idea straight to your inbox (plus you’ll receive fun weekly ideas from us too!)
One of my favorite things to serve at Easter dinner is all sorts of cute Easter treats from mini Easter cheesecake that look like nests to these Easter egg Oreos!
Last year I shared these chocolate covered Peeps (so good), so I thought this year I’d try my hand at another fun chocolate covered recipe – chocolate covered Easter Oreos!
If you’ve ever had chocolate covered Oreos before, you’ll know that not only are these cute, they’re also really tasty! Oreos are even better when they’re dipped in chocolate!
Kids of all ages and adults will love this easy treat, especially with all of the different colors and designs!
Serve these up at your next Easter celebration or you could even make them a prize for a little Easter bingo or at the end of this Easter scavenger hunt! Or you could even add them into Easter baskets – they’d make a great addition to Easter baskets for teens who like to decorate cakes!
Why You’ll Love This Recipe
- Easy snack – although they may look impressive, these Easter Oreos are actually really easy to make. It’s just coloring the white chocolate, dipping, and decorating!
- Cute Easter designs – these are one of my favorite things to serve at Easter parties because you can make them into so many different designs. I’ve included a bunny, chick, and some Easter eggs but you could get really creative with these and do all sorts of different eggs!
- Only four ingredients – all you need for these Easter Oreo cookies are original Oreos, white chocolate, food coloring, and things to decorate! I’ve included details in the recipe card on how much of each ingredient.
Ingredients
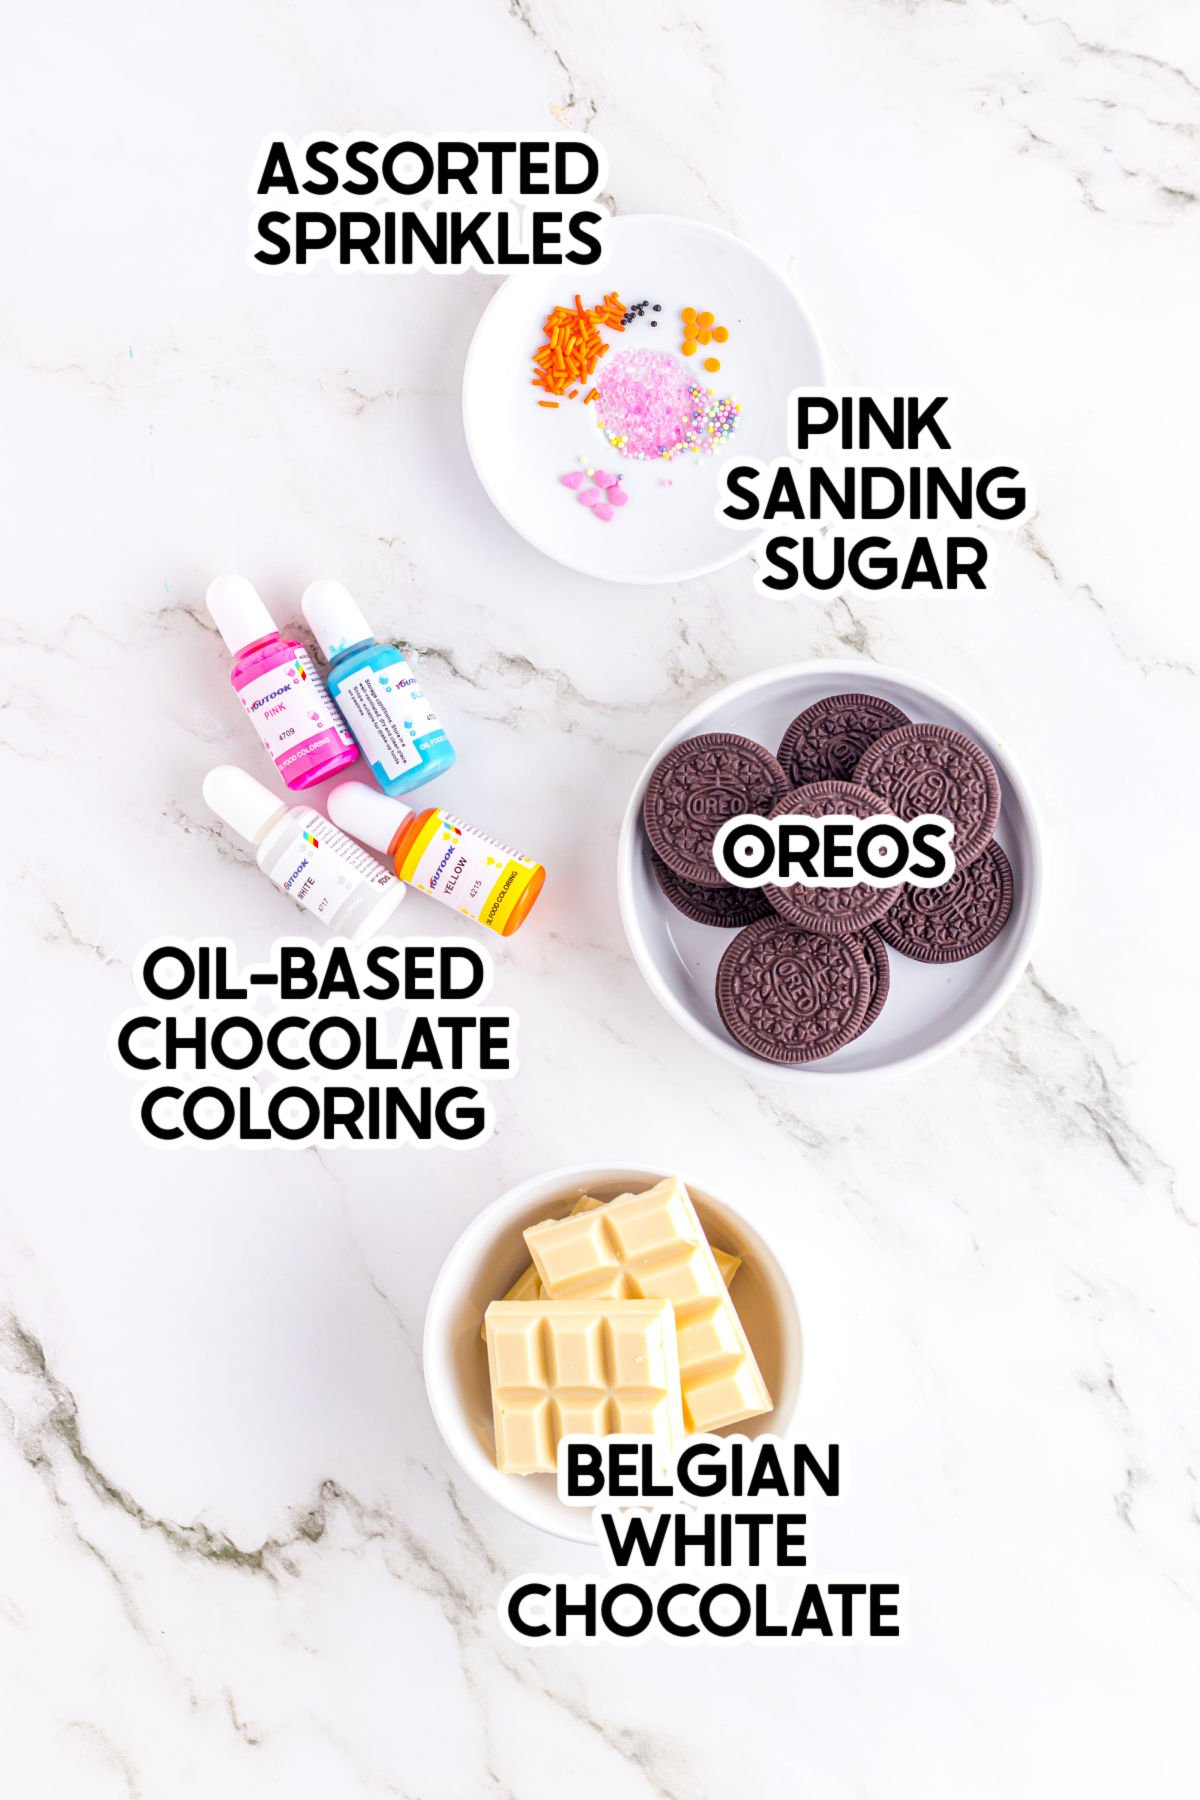
Ingredient Notes
- White chocolate – I used Belgain white chocolate squares for this because I feel like it melts really well, and I love the flavor. If you can’t find it or would like to use something else, Ghirardelli white chocolate melting wafers are great, white chocolate chips with a tsp of coconut oil works as well, or even white candy melts. Just make sure whatever you’re using melts well and hardens quickly. Or if you want to skip coloring the white chocolate, you can also use colored candy melts. You could even do these with milk chocolate or dark chocolate, but they won’t be nearly as cute as these pastel colored ones!
- Oreos – you can use either normal Oreos, chocolate Oreos, or any seasonal treats you want as long as it’s an Oreo. I recommend sticking with the normal stuff compared to Double Stuf just because it’ll be less white chocolate to cover the Oreos.
- Candy coloring– here’s the deal. If you want to get the best colors, you can use oil-based chocolate coloring. But if you want to go cheap, you can also use food coloring instead. I recommend an oil based version or at least gel so you can use less for bolder colors, but it works okay for things like this, although you may end up with some streaks. I just happened to have the actual chocolate coloring, so I used that.
- Pink sanding sugar – I used this for the bunny ears but you could also just use little pink sprinkles or something else. I had some left from making my bunny cupcakes, so I used that.
- Decorations – depending on how you want to decorate your Oreos, you can use all sorts of different types of sprinkles and decorations. I’ve included the exact list that I used to make these seasonal treats in the recipe card at the bottom of this post.
How to Make Easter Oreos
The good news is that making these Easter Oreos is not too difficult, but it does take a little bit of time! Here’s a quick rundown of how you’ll make these.
- Melt and color the chocolate.
- Dip the Oreos and let the chocolate harden.
- Decorate the Oreos to look like bunnies, chicks, and Easter eggs!
Each of the types of cookies has its own decorating instructions, but the general idea is the same. I’ve included details for making the chocolate covered Oreos below and then specifics for decorating down below that.
1 – Melt and Color the White Chocolate
Start by lining a baking sheet with wax paper then set it aside for later. If you’re making a bunch of the decorated egg cookies and Easter animals, you may need more than one baking sheet.
Add the white chocolate to a small microwave safe bowl and microwave in 20 second increments until melted, stirring between increments, until the chocolate is evenly melted.
Divide the chocolate into bowls then add your candy coloring (as desired) and mix until you’ve reached the desired shade for each of your designs.
2 – Cover the Oreos with Chocolate
Okay, I’ll be the first to admit that it’s much easier to make chocolate covered Oreos if you use a chocolate covered Oreo mold. If you have time for that (or already have a mold), you can totally cover the Oreos that way and just use my tips for decorating them like little Easter animals.
How to Make Chocolate Covered Oreos Without a Mold
If you don’t have one of those silicone molds, you can also dip and cover the Oreos by hand.
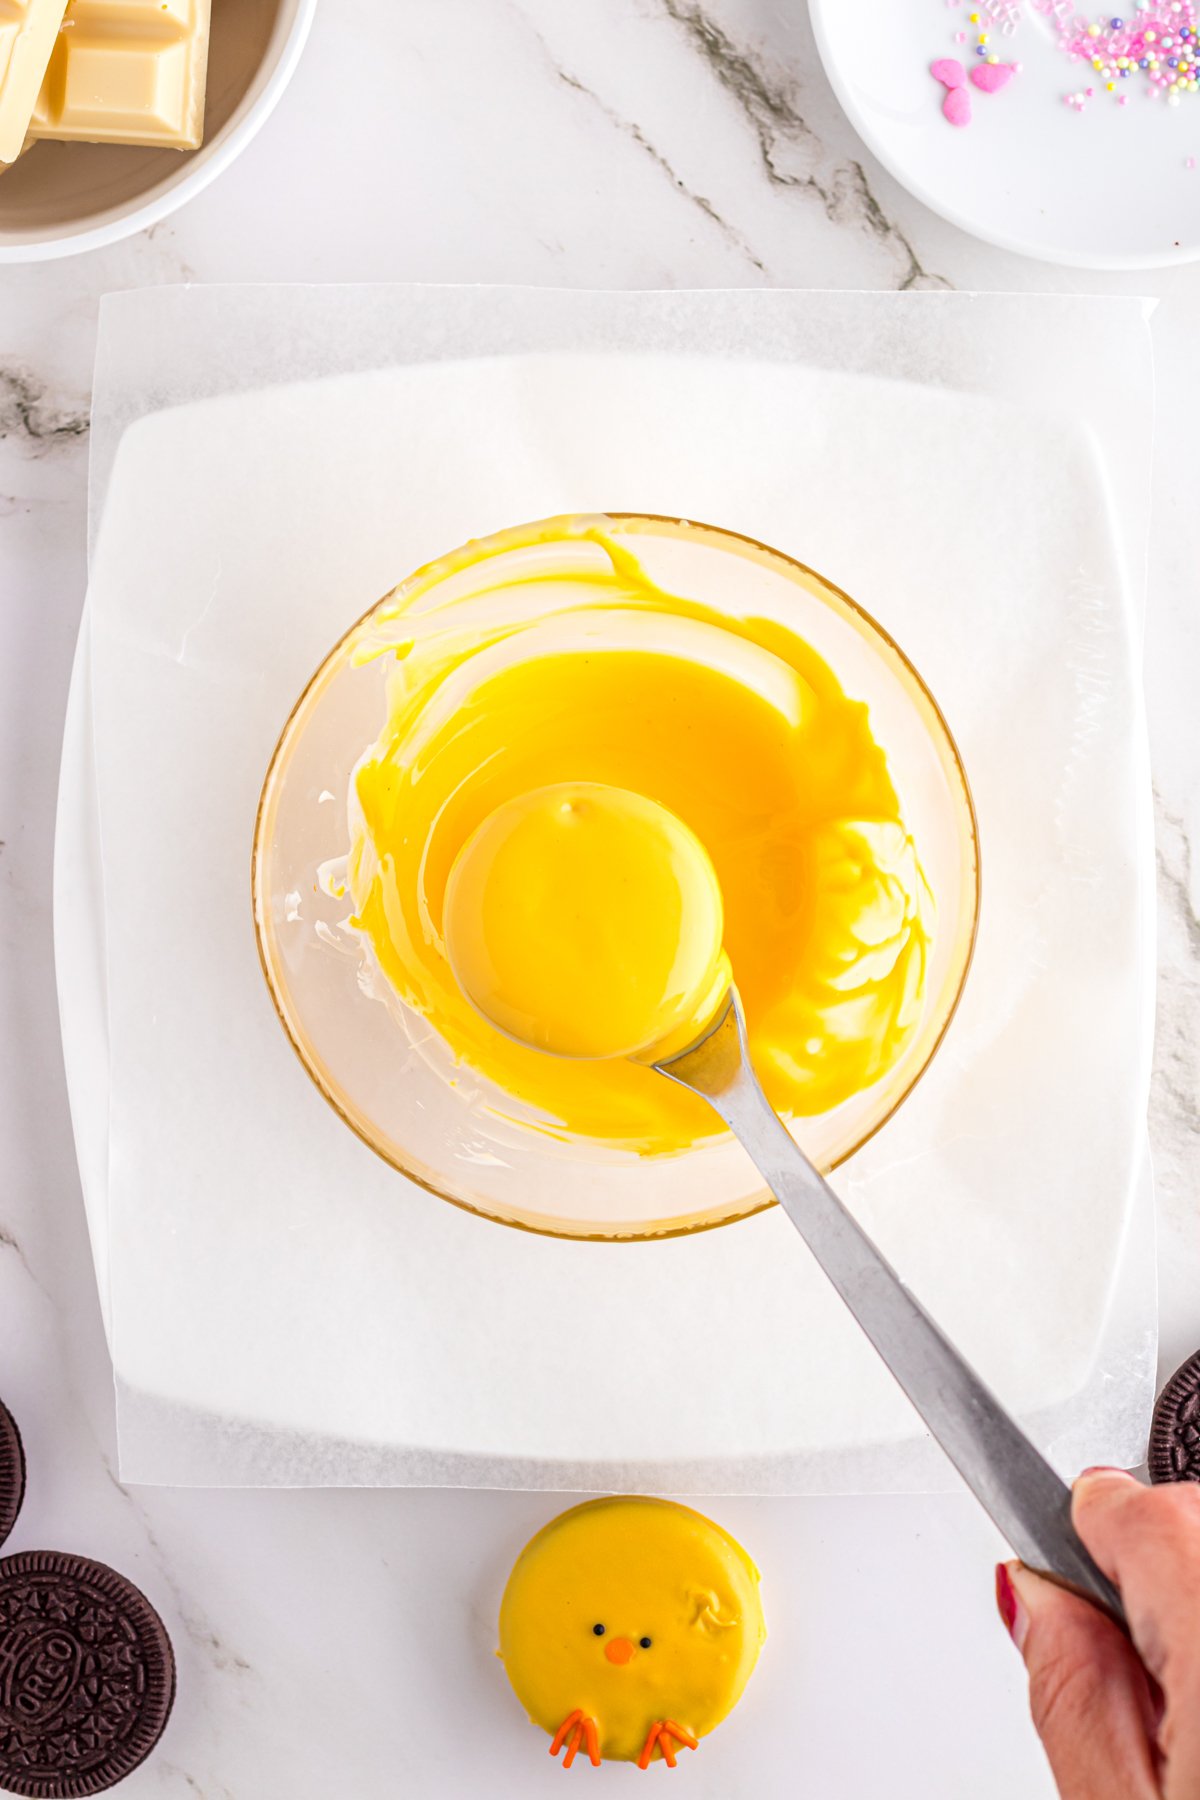
Place the Oreo onto a fork and dip it into the melted chocolate, making sure to cover the entire thing.
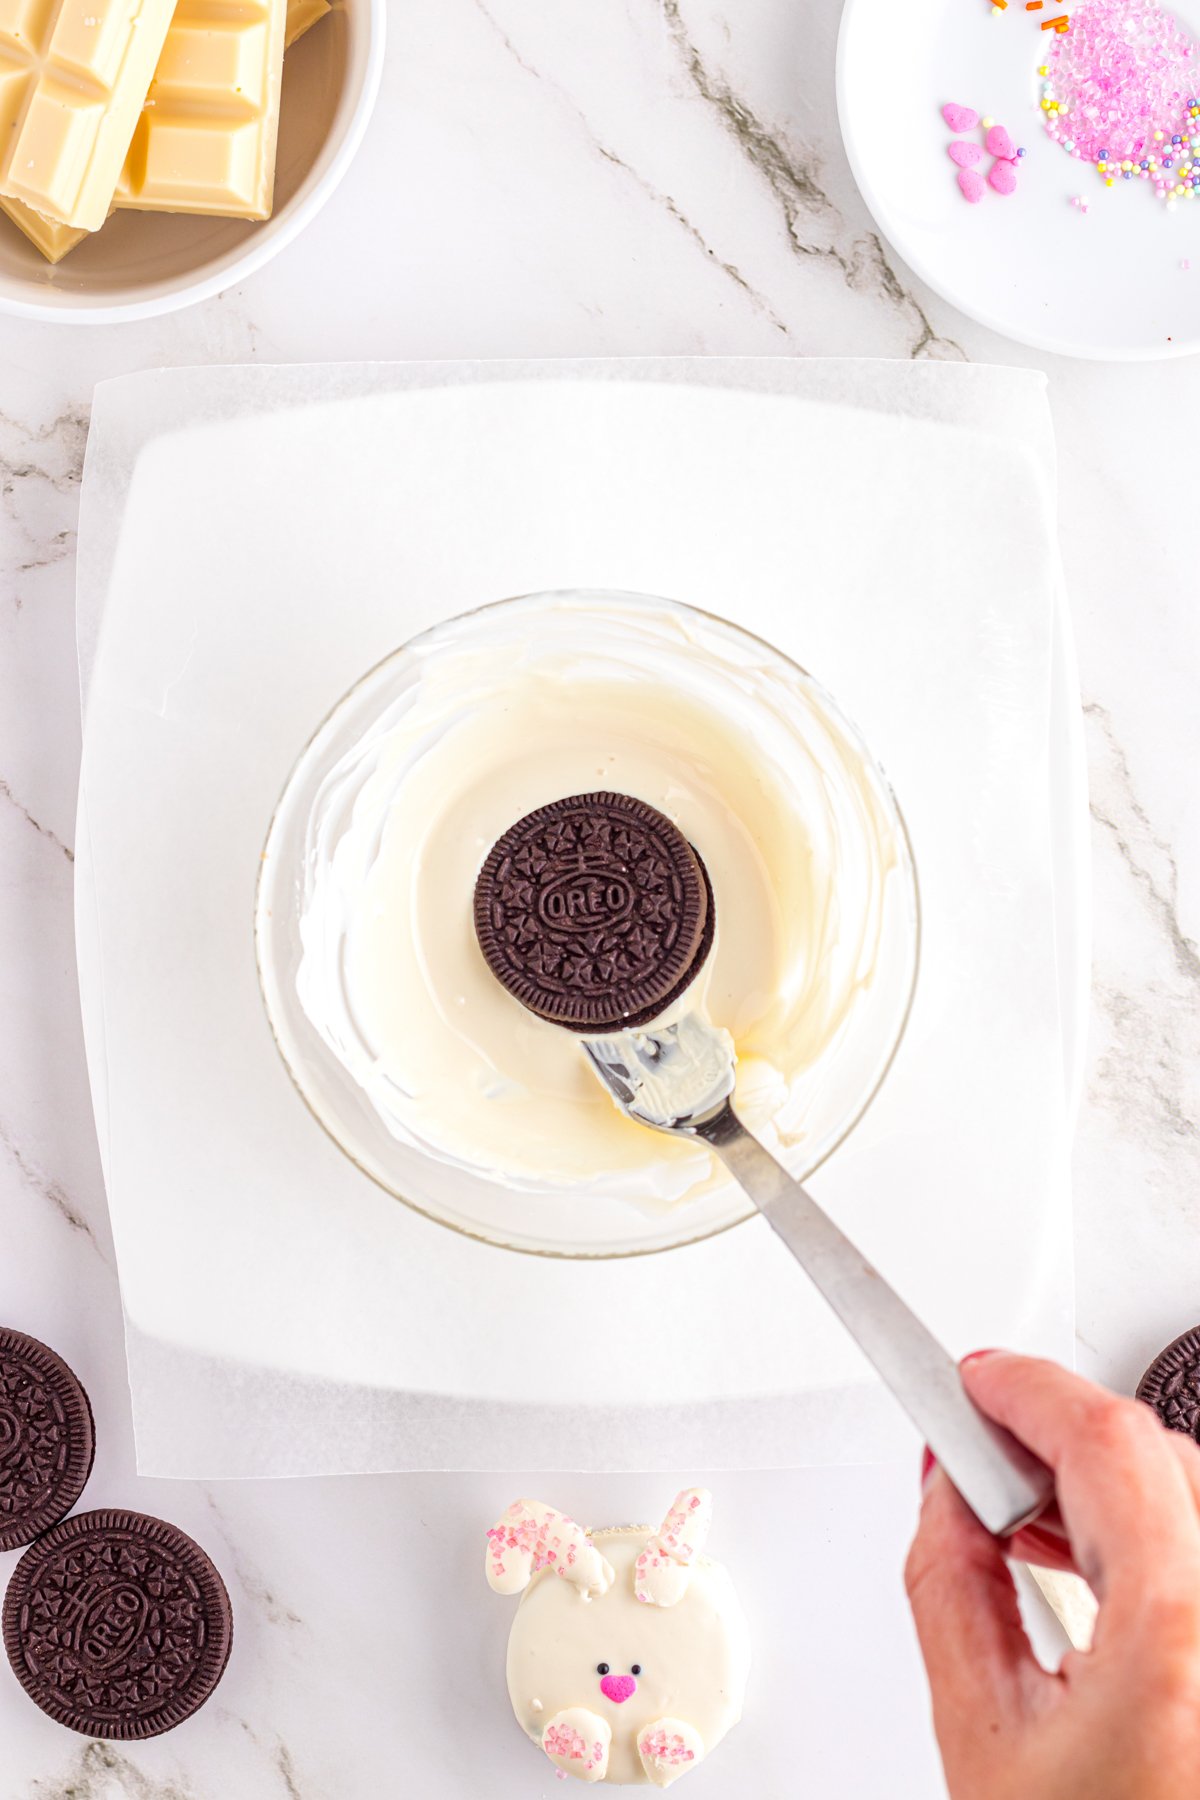
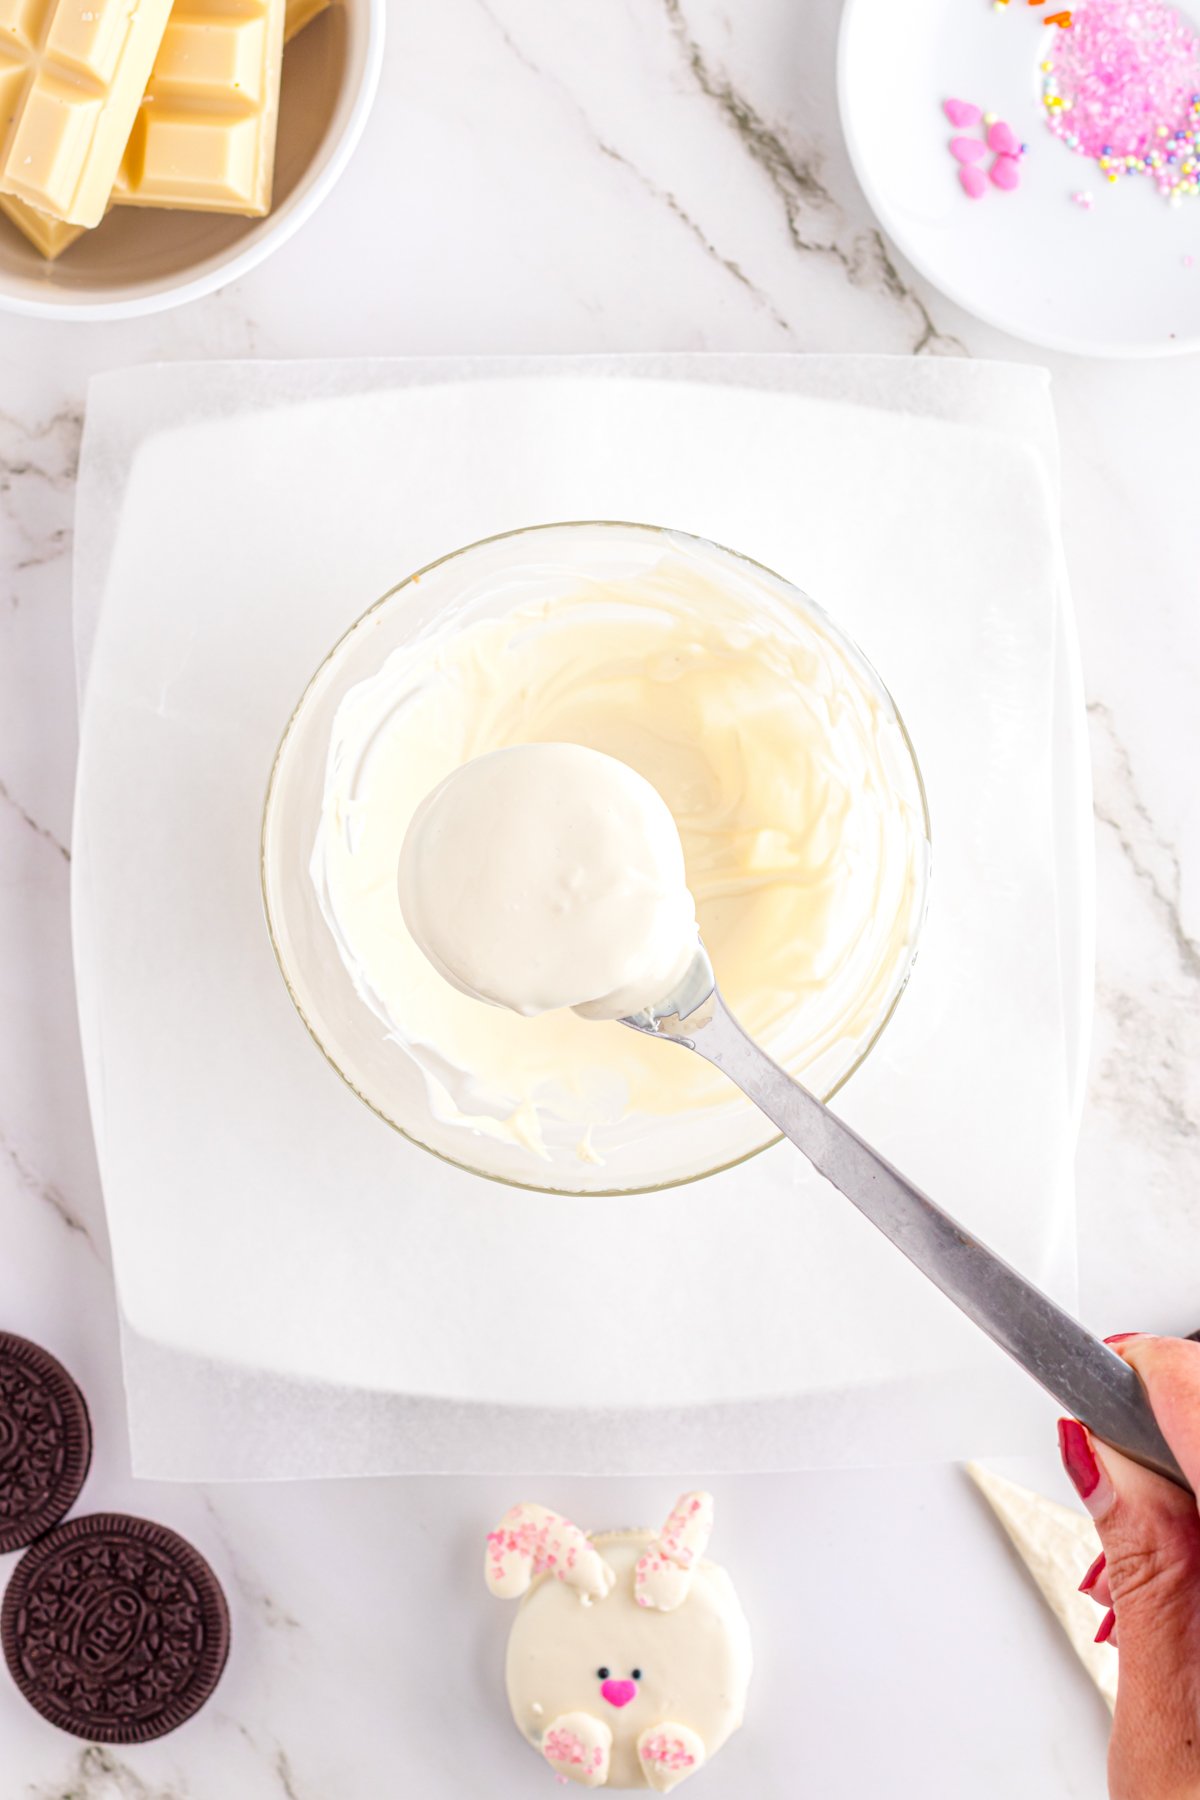
Tap the edge of the bowl gently to let the excess drip off to give you a smoother finish. Then immediately place the Oreo onto the prepared baking sheet and either decorate immediately (if called for) or allow it to harden.
Repeat with all of your other Oreos – using the color tips and decorations below in the decorating section.
3 – Decorate The Easter Cookies
Here are more detailed instructions on how to decorate the Oreos to look like each of the cute treats shown in my pictures!
Easter Bunny Oreos
Start by melting white chocolate and then mixing white candy coloring into it to get a pure white color. You can skip this if you want, but it will give you a better white color than just using the melted chocolate.
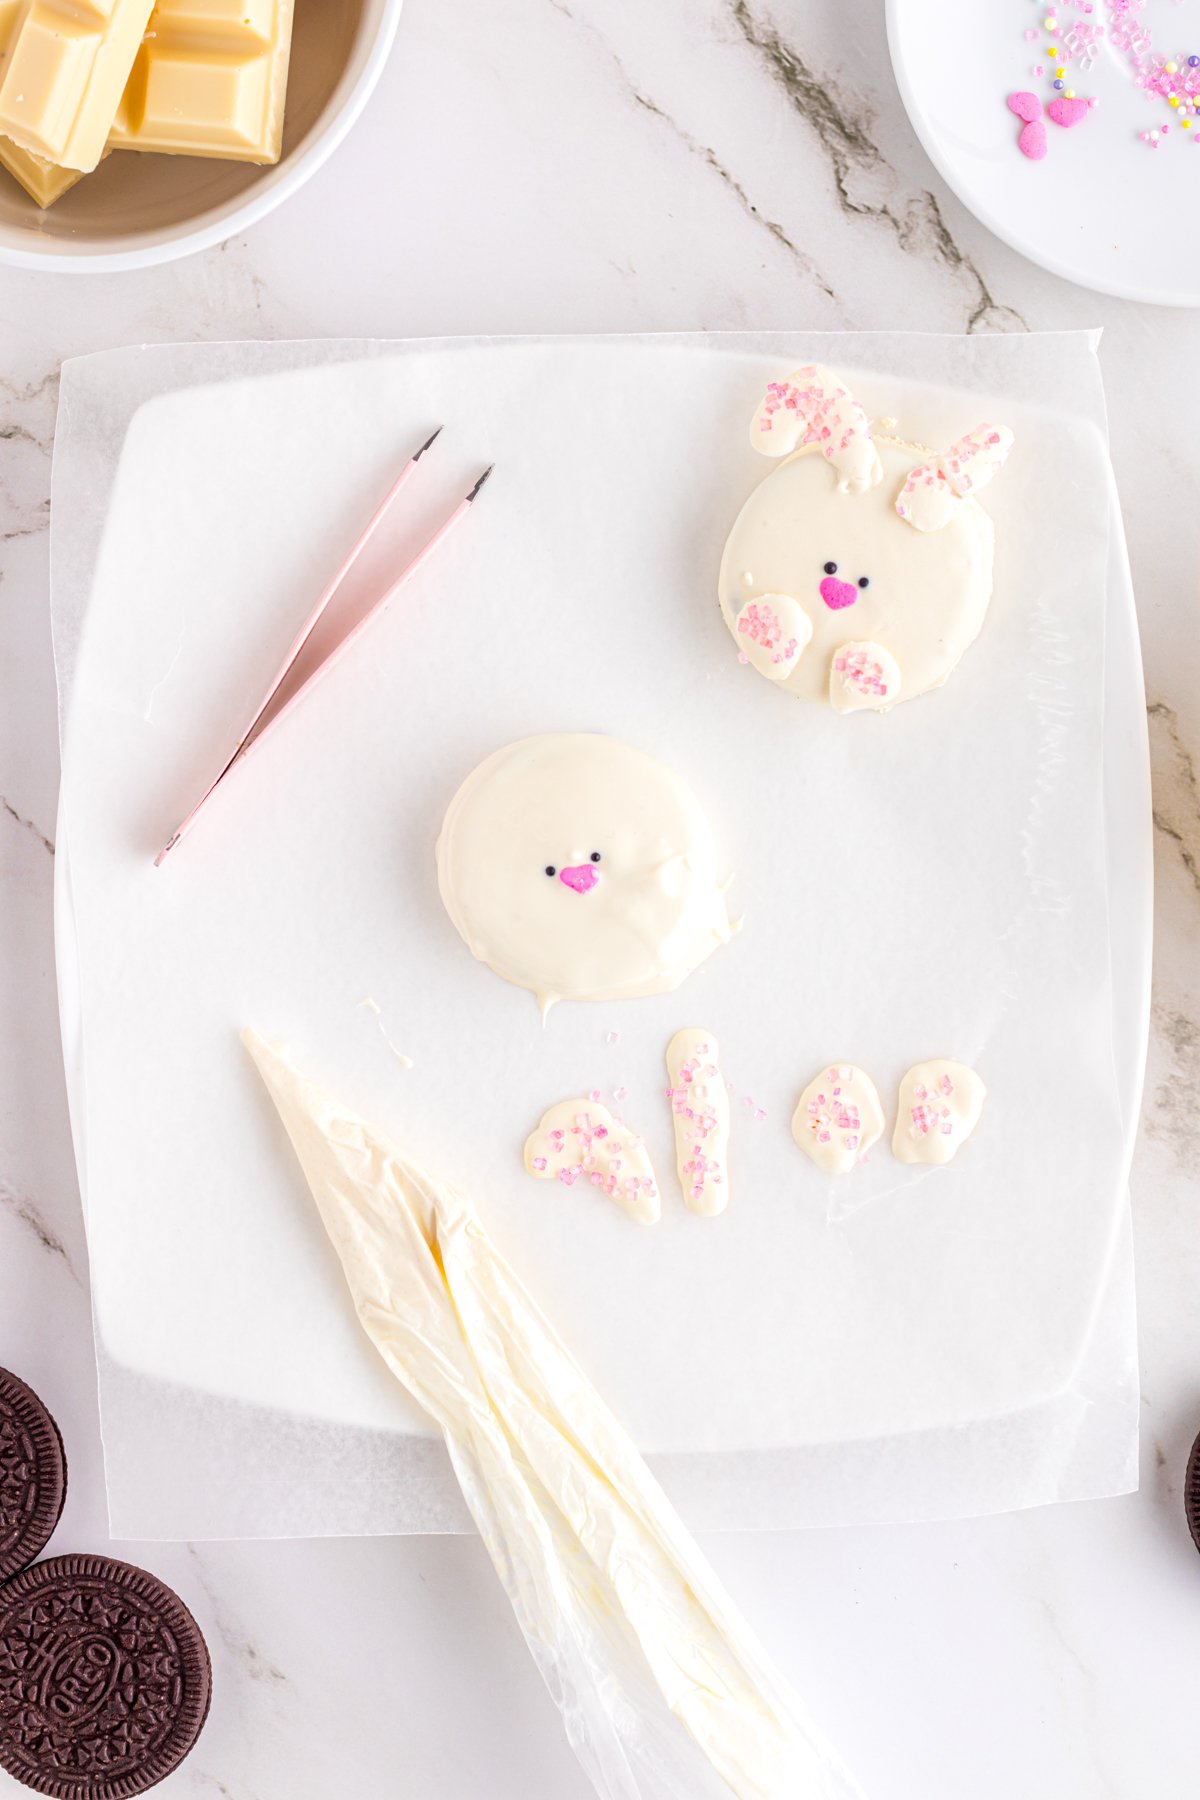
Cover in white chocolate using the instructions above. While the white coating is still wet, place two black nonpareil sprinkles on the top of the Oreo for the eyes and nose and a pink heart sprinkle for the nose.
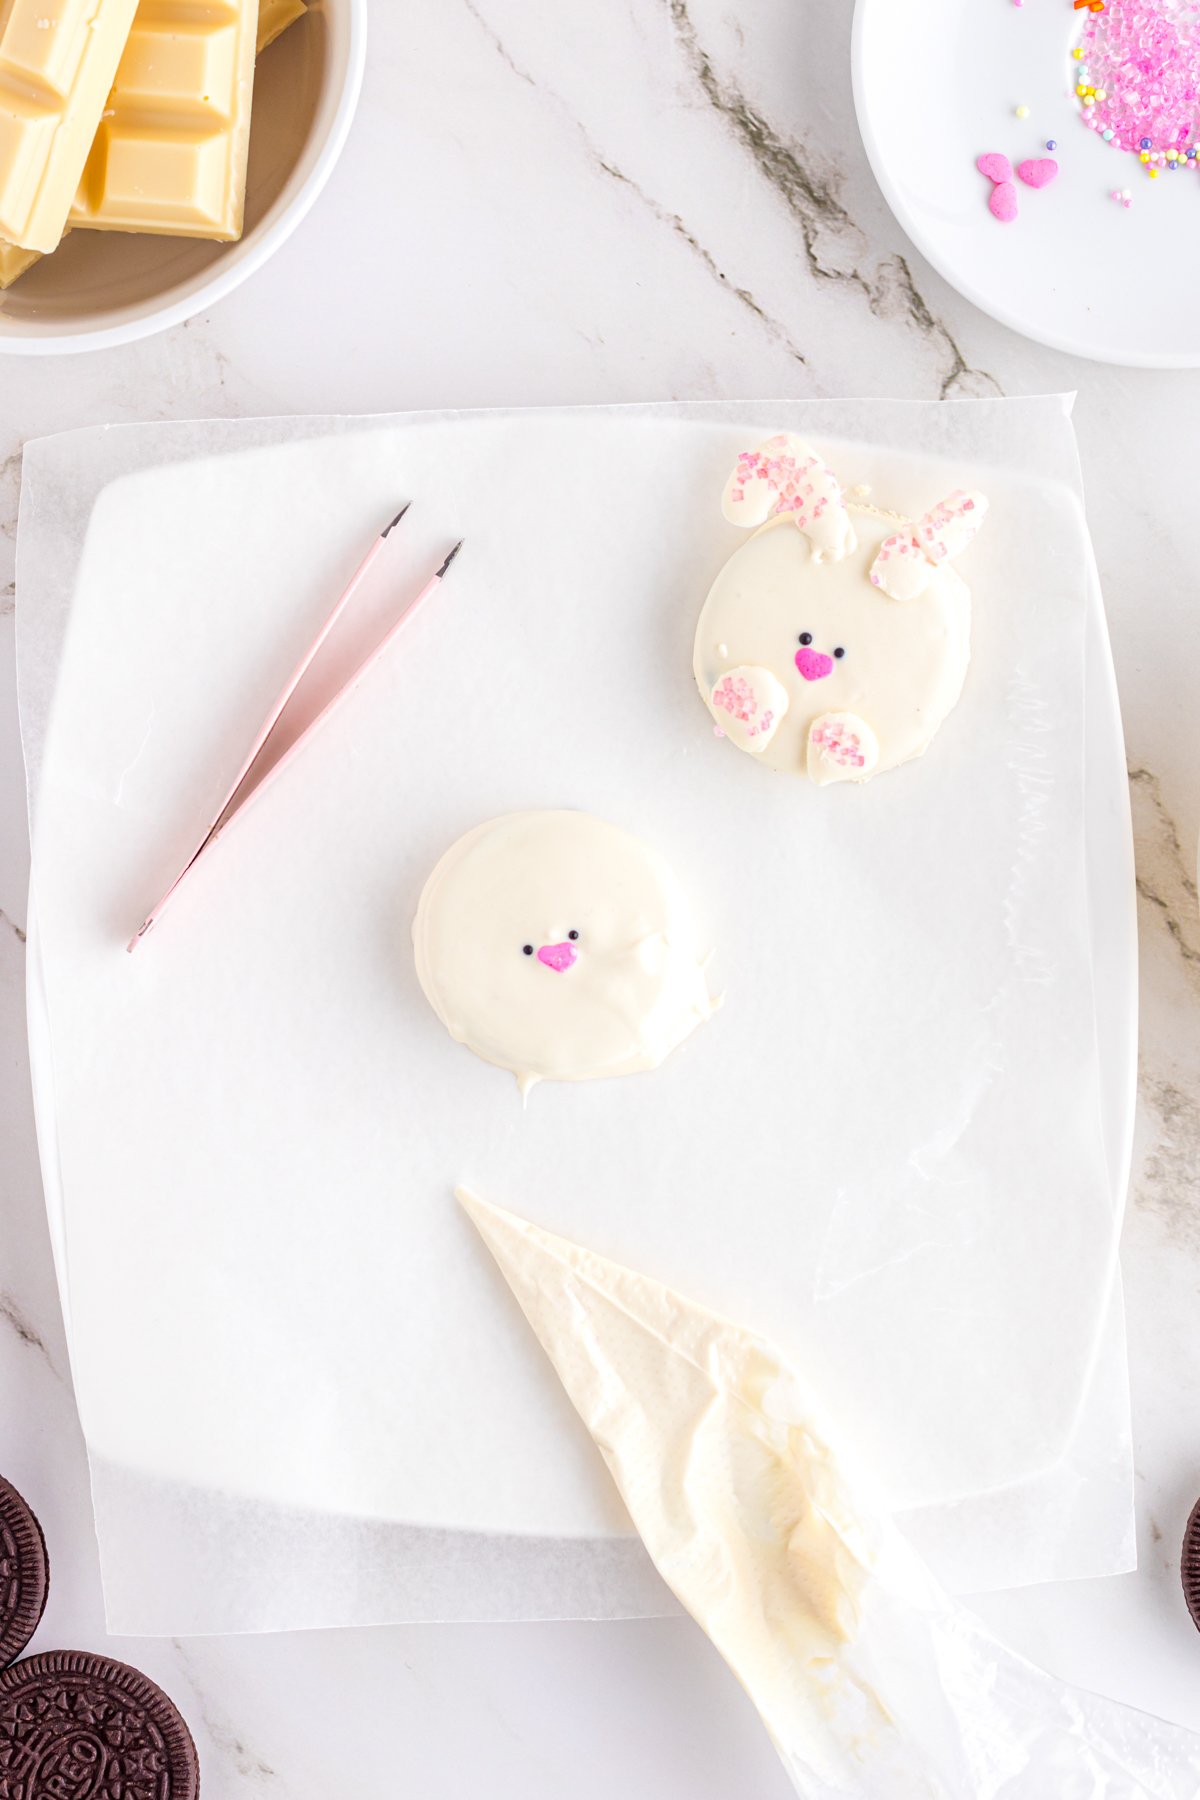
Add about one tablespoon of melted white chocolate to a piping bag. With the piping bag draw out two ears and two bunny paws on the wax paper then immediately sprinkle the ears and paws with pink sanding sugar.
Place the baking sheet in the freezer for about 10 minutes. This will allow the chocolate to set quicker.
After the paws and ears have set, remove them from the wax paper and place them onto the bunny Oreo, connecting it with a small dot of melted white chocolate.
Easter Chick Oreos
Start by melting white chocolate and then mixing in yellow candy coloring until it reaches the yellow shade you want.
After the chocolate has fully melted, add yellow candy color until it your desired shade of yellow.
Cover the Oreos in the yellow chocolate using the instructions above then place on the wax paper.
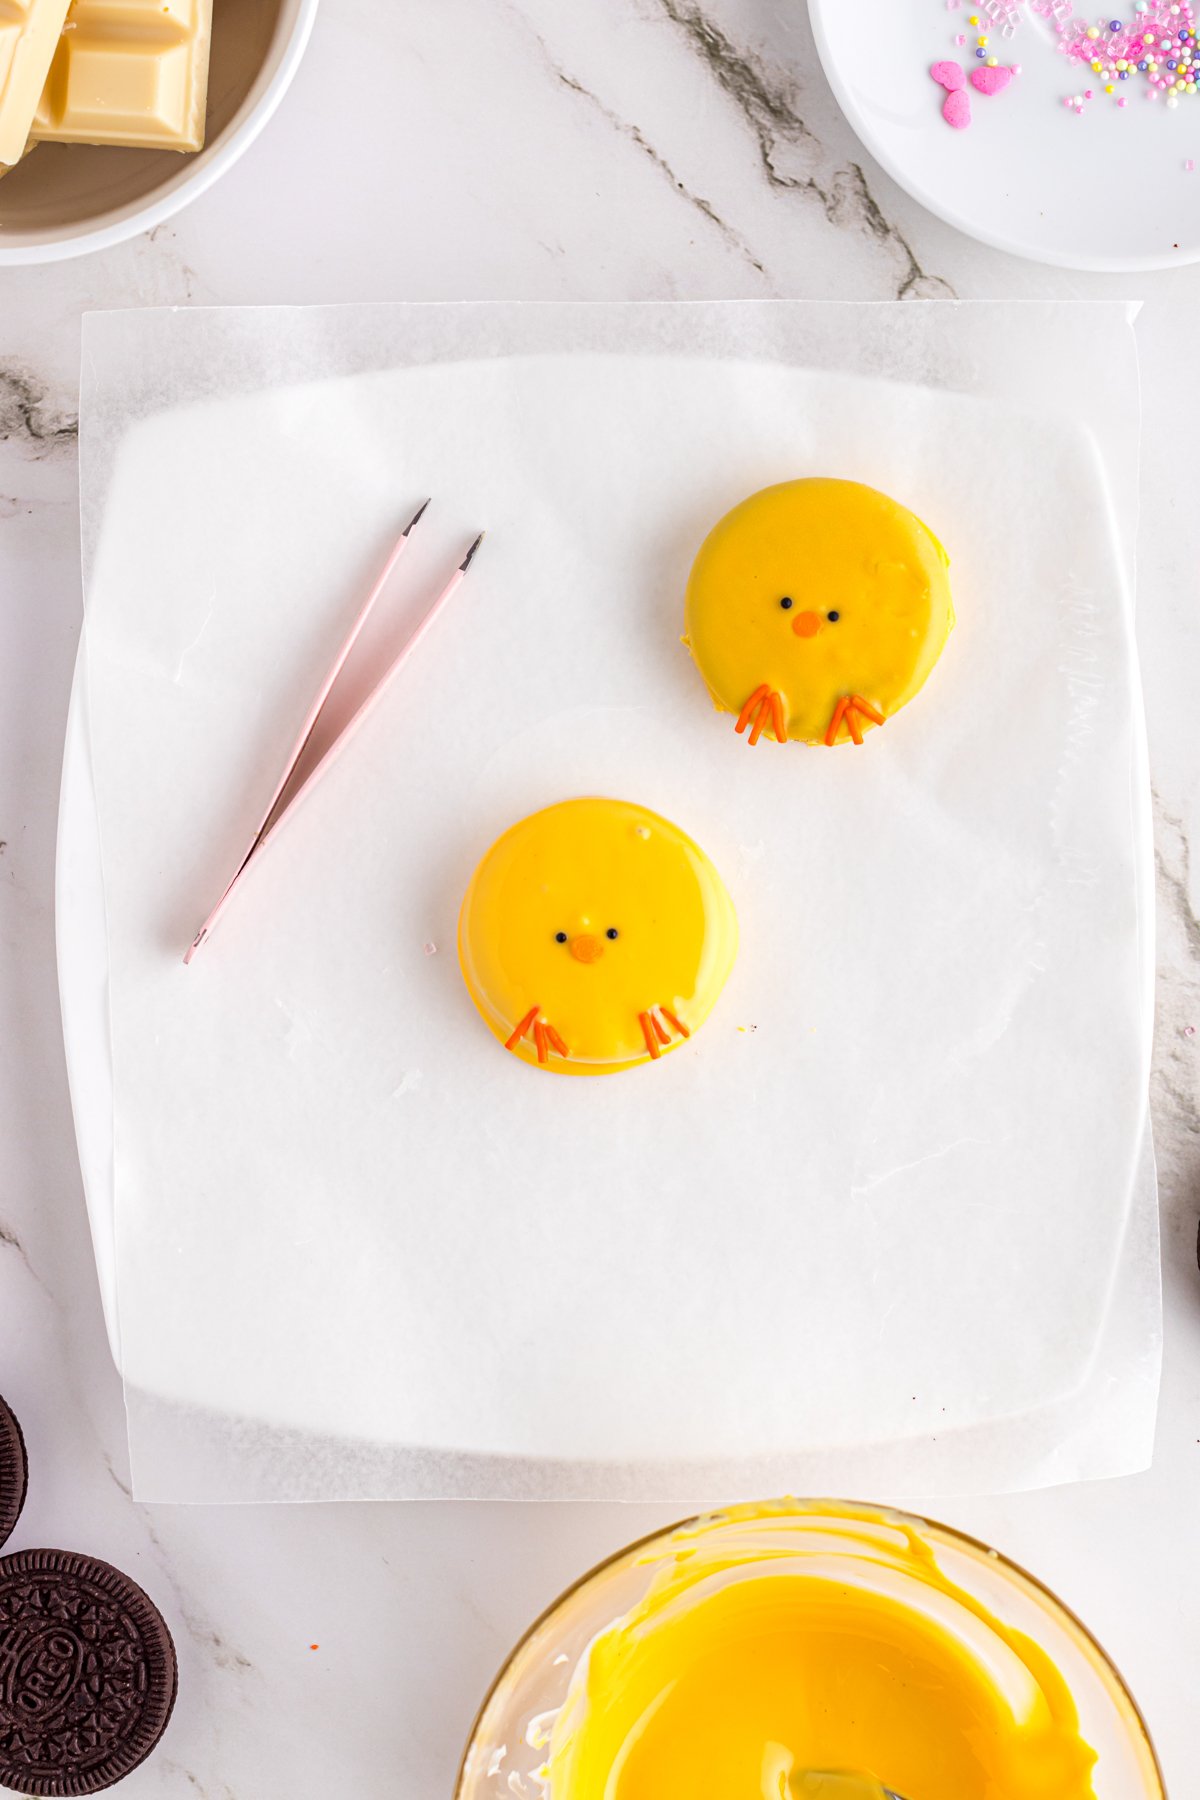
While the coating is still wet, add orange long sprinkles (jimmies) for the feet, an orange circle sprinkle for the nose, and two black nonpareil sprinkles to the eyes.
Easter Egg Oreos
There are really not set instructions for the Easter eggs because you can be as creative as you’d like.
Do the same thing as you did with the ones above – melt the chocolate, color to your preference, and then you can get creative with decorating the Oreos to look like designed Easter eggs!
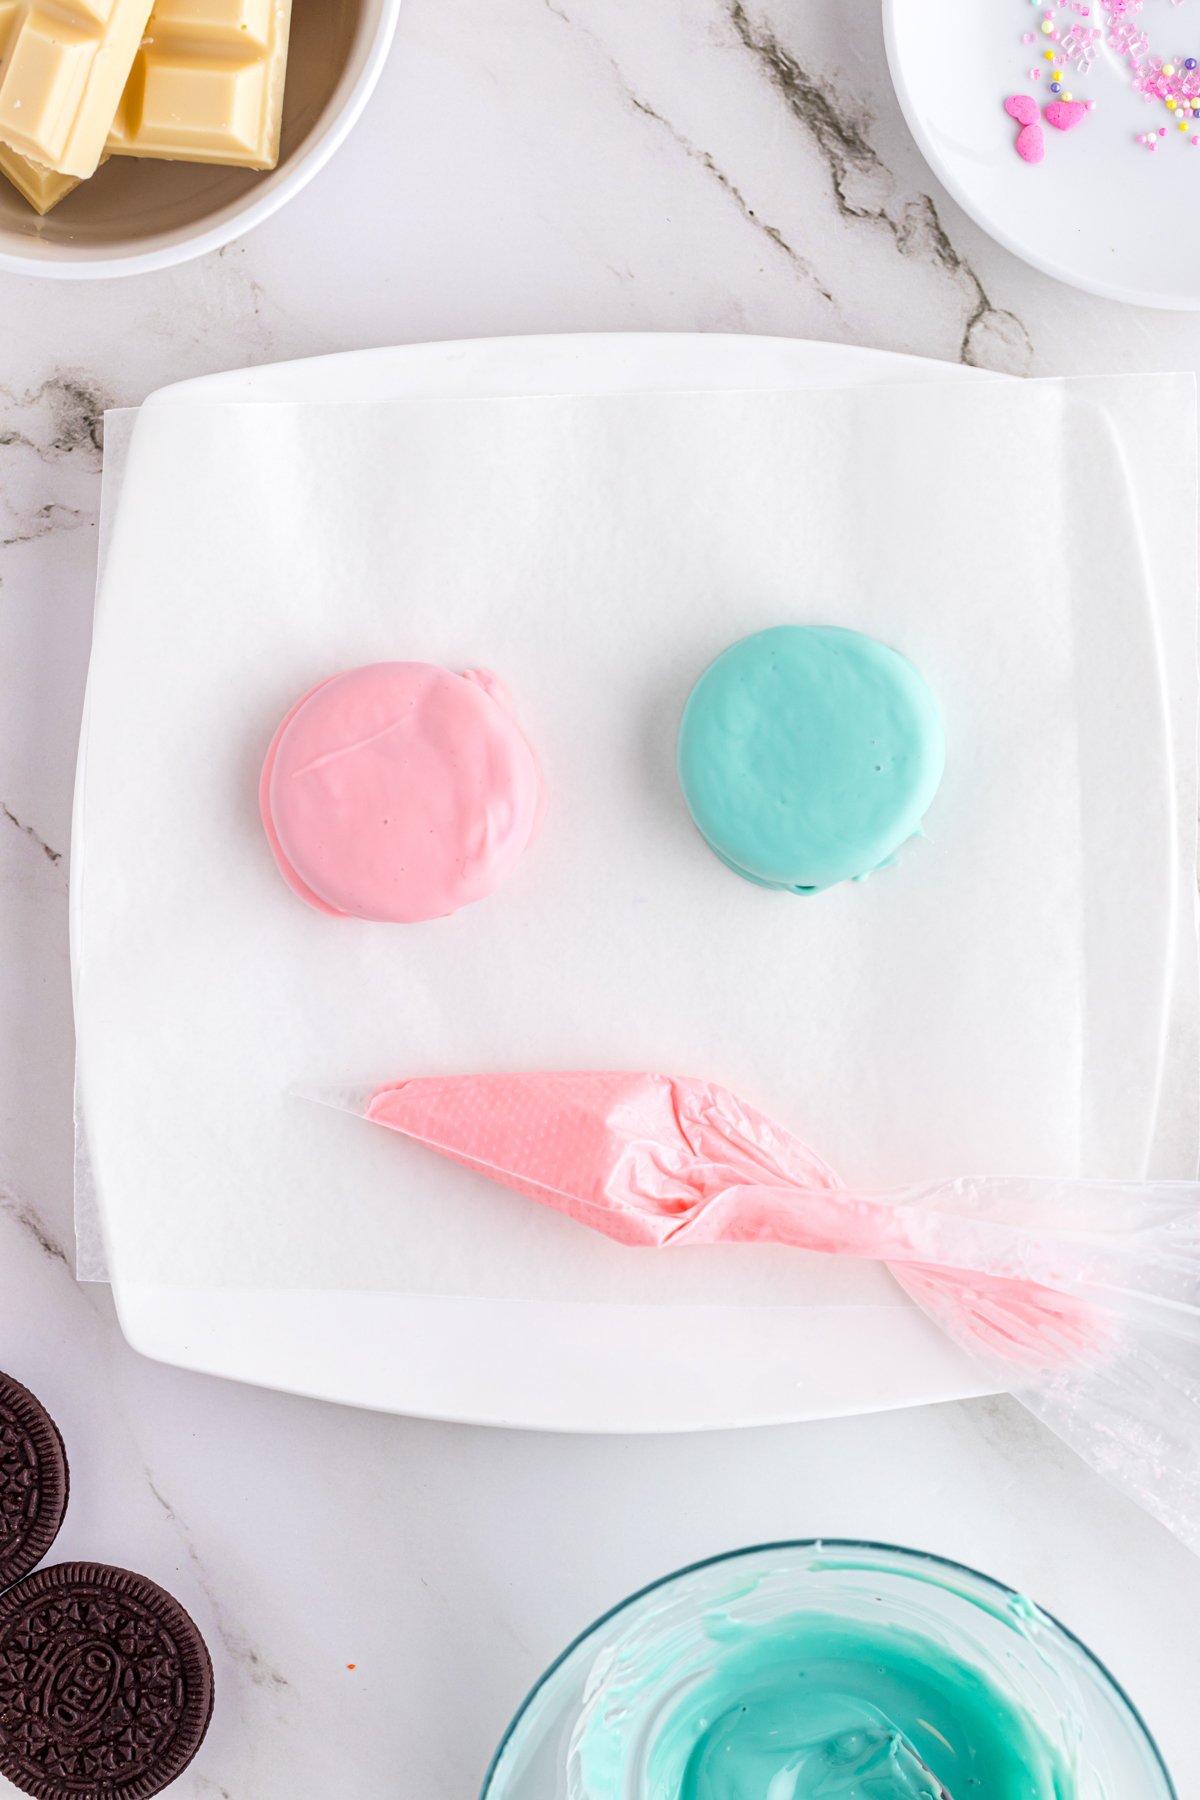
Add zig zag lines of the different colors of chocolate, add sprinkles, sanding sugar, or really whatever you want to make them look like delicious little egg treats! I like the idea of the zg-zag pattern because it looks like decorated Easter eggs but get creative!
These ones are also super fun to let kids help with – they’ll enjoy decorating these as much as decorating actual Easter eggs. And this year, they’re much cheaper!

Once they’re decorated, let them sit on the wax paper until completely set then enjoy! These are such a yummy little treat! Serve them on a pretty Easter plate, cake stand, or even in a cute Easter basket!
Expert Tips & Storage Info
Spoon chocolate over top of the Oreos while you’re dipping them to get a nice smooth finish over the top. This tends to allow you to keep the Oreo from falling into the white chocolate and you having to dig it out.
Don’t overheat the white chocolate or you risk it clumping up together, which makes it extremely hard to dip! Stick with twenty second increments at a time and be patient.
Store finished Oreos at room temperature in an airtight container for up to two weeks. No need to refrigerate but make sure they don’t get too hot or the chocolate will start to melt. It is chocolate after all.
Pack Oreos in a single layer for gifting so you don’t end up with all of the colors combining. I like to put a couple of them in a little gift box with one of these tags for a sweet Easter gift! Or you could put them on an Easter treat plate with pieces of this Easter bark and these carrot cake balls for a fun surprise!

Recipe FAQs
How long can chocolate covered Oreos last?
Chocolate covered Oreos can last up to two weeks when stored in an airtight container.
Should dipped Oreos be refrigerated?
Dipped Oreos do not need to be refrigerated. They can be stored at room temperature in an airtight container for up to two weeks. Storing Oreos of any kind in the refrigerator can make the Oreos soften and lose their delicious crunch.
More Easy Easter Treats
Once you’ve finished making these Easter chocolate covered Oreos, try one of these easy recipes that’s adorable too!
- Chocolate nests – simple chocolate treats filled with candy eggs!
- Mini fruit tarts – one of those simple recipes you never would’ve thought of but now make all the time!
- Flower cookies – a simple semi homemade variation on a spring treat!
- Easter trifle – layers of cake, pudding, and more make this a treat everyone will love!
- Easter cake – a cake of many colors and flavors, this one’s a keeper!
Want more Goodies?
Want more delicious recipes just like this one? Enter your first name and email address in the form below to join the Play Party Plan community! You’ll receive weekly recipes and party ideas directly to your inbox!

Easter Oreos
Ingredients
- 2 cups Belgian white chocolate or white melting chocolate divided
- 8 chocolate Oreo cookies
- oil based candy coloring white, yellow, pink, light blue
- black nonpareil sprinkles
- pink heart sprinkles
- orange round sprinkles
- orange Jimmie sprinkles
- pink sanding sugar
Instructions
Easter Bunny Oreos
- Line a baking sheet with wax paper then set aside for later.
- For the easter bunny oreos add 1/2 cup white chocolate to a small microwave safe bowl and microwave in 20 second increments until melted.2 cups Belgian white chocolate or white melting chocolate
- Add white candy color and mix it into the melted white chocolate.oil based candy coloring
- Place the oreo onto a fork and dip it into the melted chocolate. Then immediately place the oreo onto the prepared baking sheet.8 chocolate Oreo cookies
- For the eyes and nose, place two black nonpareil sprinkles on the top of the oreo and a pink heart sprinkle for the nose.black nonpareil sprinkles, pink heart sprinkles
- Add about 1 tablespoon of melted chocolate to a piping bag. With the piping bag draw out 2 ears and 2 bunny paws on the wax paper then immediately sprinkle the ears and paws with pink sanding sugar.pink sanding sugar
- Place the baking sheet in the freezer for about 10 minutes.
- Remove the ears and paws from the wax paper and place them onto the bunny oreo. Use a small dot of white chocolate to glue them on.
- Once all the chocolate has set, they are ready to serve!
Easter chick
- Melt 1/2 cup of white chocolate in a small microwave safe bowl. Microwave in 20 second increments stir, then melt again until the chocolate has fully melted,2 cups Belgian white chocolate or white melting chocolate
- Add yellow candy color until it is a yellow shade you prefer.oil based candy coloring
- Dip the oreo into the yellow melted chocolate. Then place the oreo onto the prepared baking sheet.8 chocolate Oreo cookies
- Add the eyes, nose, and feet to the chick while the chocolate is still wet. Use 2 black nonpareil sprinkles for the eyes and a circular orange sprinkle for the nose. Then carefully add 3 orange jimmie sprinkles to make one of the chicks feet, then repeat for the other foot.black nonpareil sprinkles, orange round sprinkles, orange Jimmie sprinkles
- Let the chocolate completely set before serving.
Easter Egg
- Add 1/2 cup of white chocolate into two seperate small bowls. Then melt the chocolates in the microwave in 20 second increments stir and continue until fully melted. repeat for the second bowl of white chocolate.2 cups Belgian white chocolate or white melting chocolate
- In one bowl mix in pink until it’s the shade you like. Then mix blue into the other bowl of melted chocolate.oil based candy coloring
- Place an oreo onto a fork and dip the oreo into the pink chocolate. Dip another oreo into the blue chocolate.8 chocolate Oreo cookies
- Place them onto the wax paper lined baking sheet. Place the baking sheet in the freezer for about 10 minutes or until the chocolate has fully set.
- Add 1 tablespoon of pink chocolate to a piping bag. Create a zig-zag pattern at the top of the oreo then pipe a line under the zig-zag. Finally add another zig-zag to the bottom of the oreo. Sprinkle the pattern with sprinkles. Repeat with any remailing oreos.
- Allow the chocolate to completely set then serve!
Tips & Notes:
- Belgian white chocolate + coloring can be replaced with colored candy melts if desired. The white chocolate tastes better but both work.
- Any flavor of Oreos can be used, regular Stuf recommended







Leave a Reply