Learning how to make a diaper cake is so easy and once you know, you know! This simple diaper cake DIY tutorial will show you how easy making a diaper cake can be!
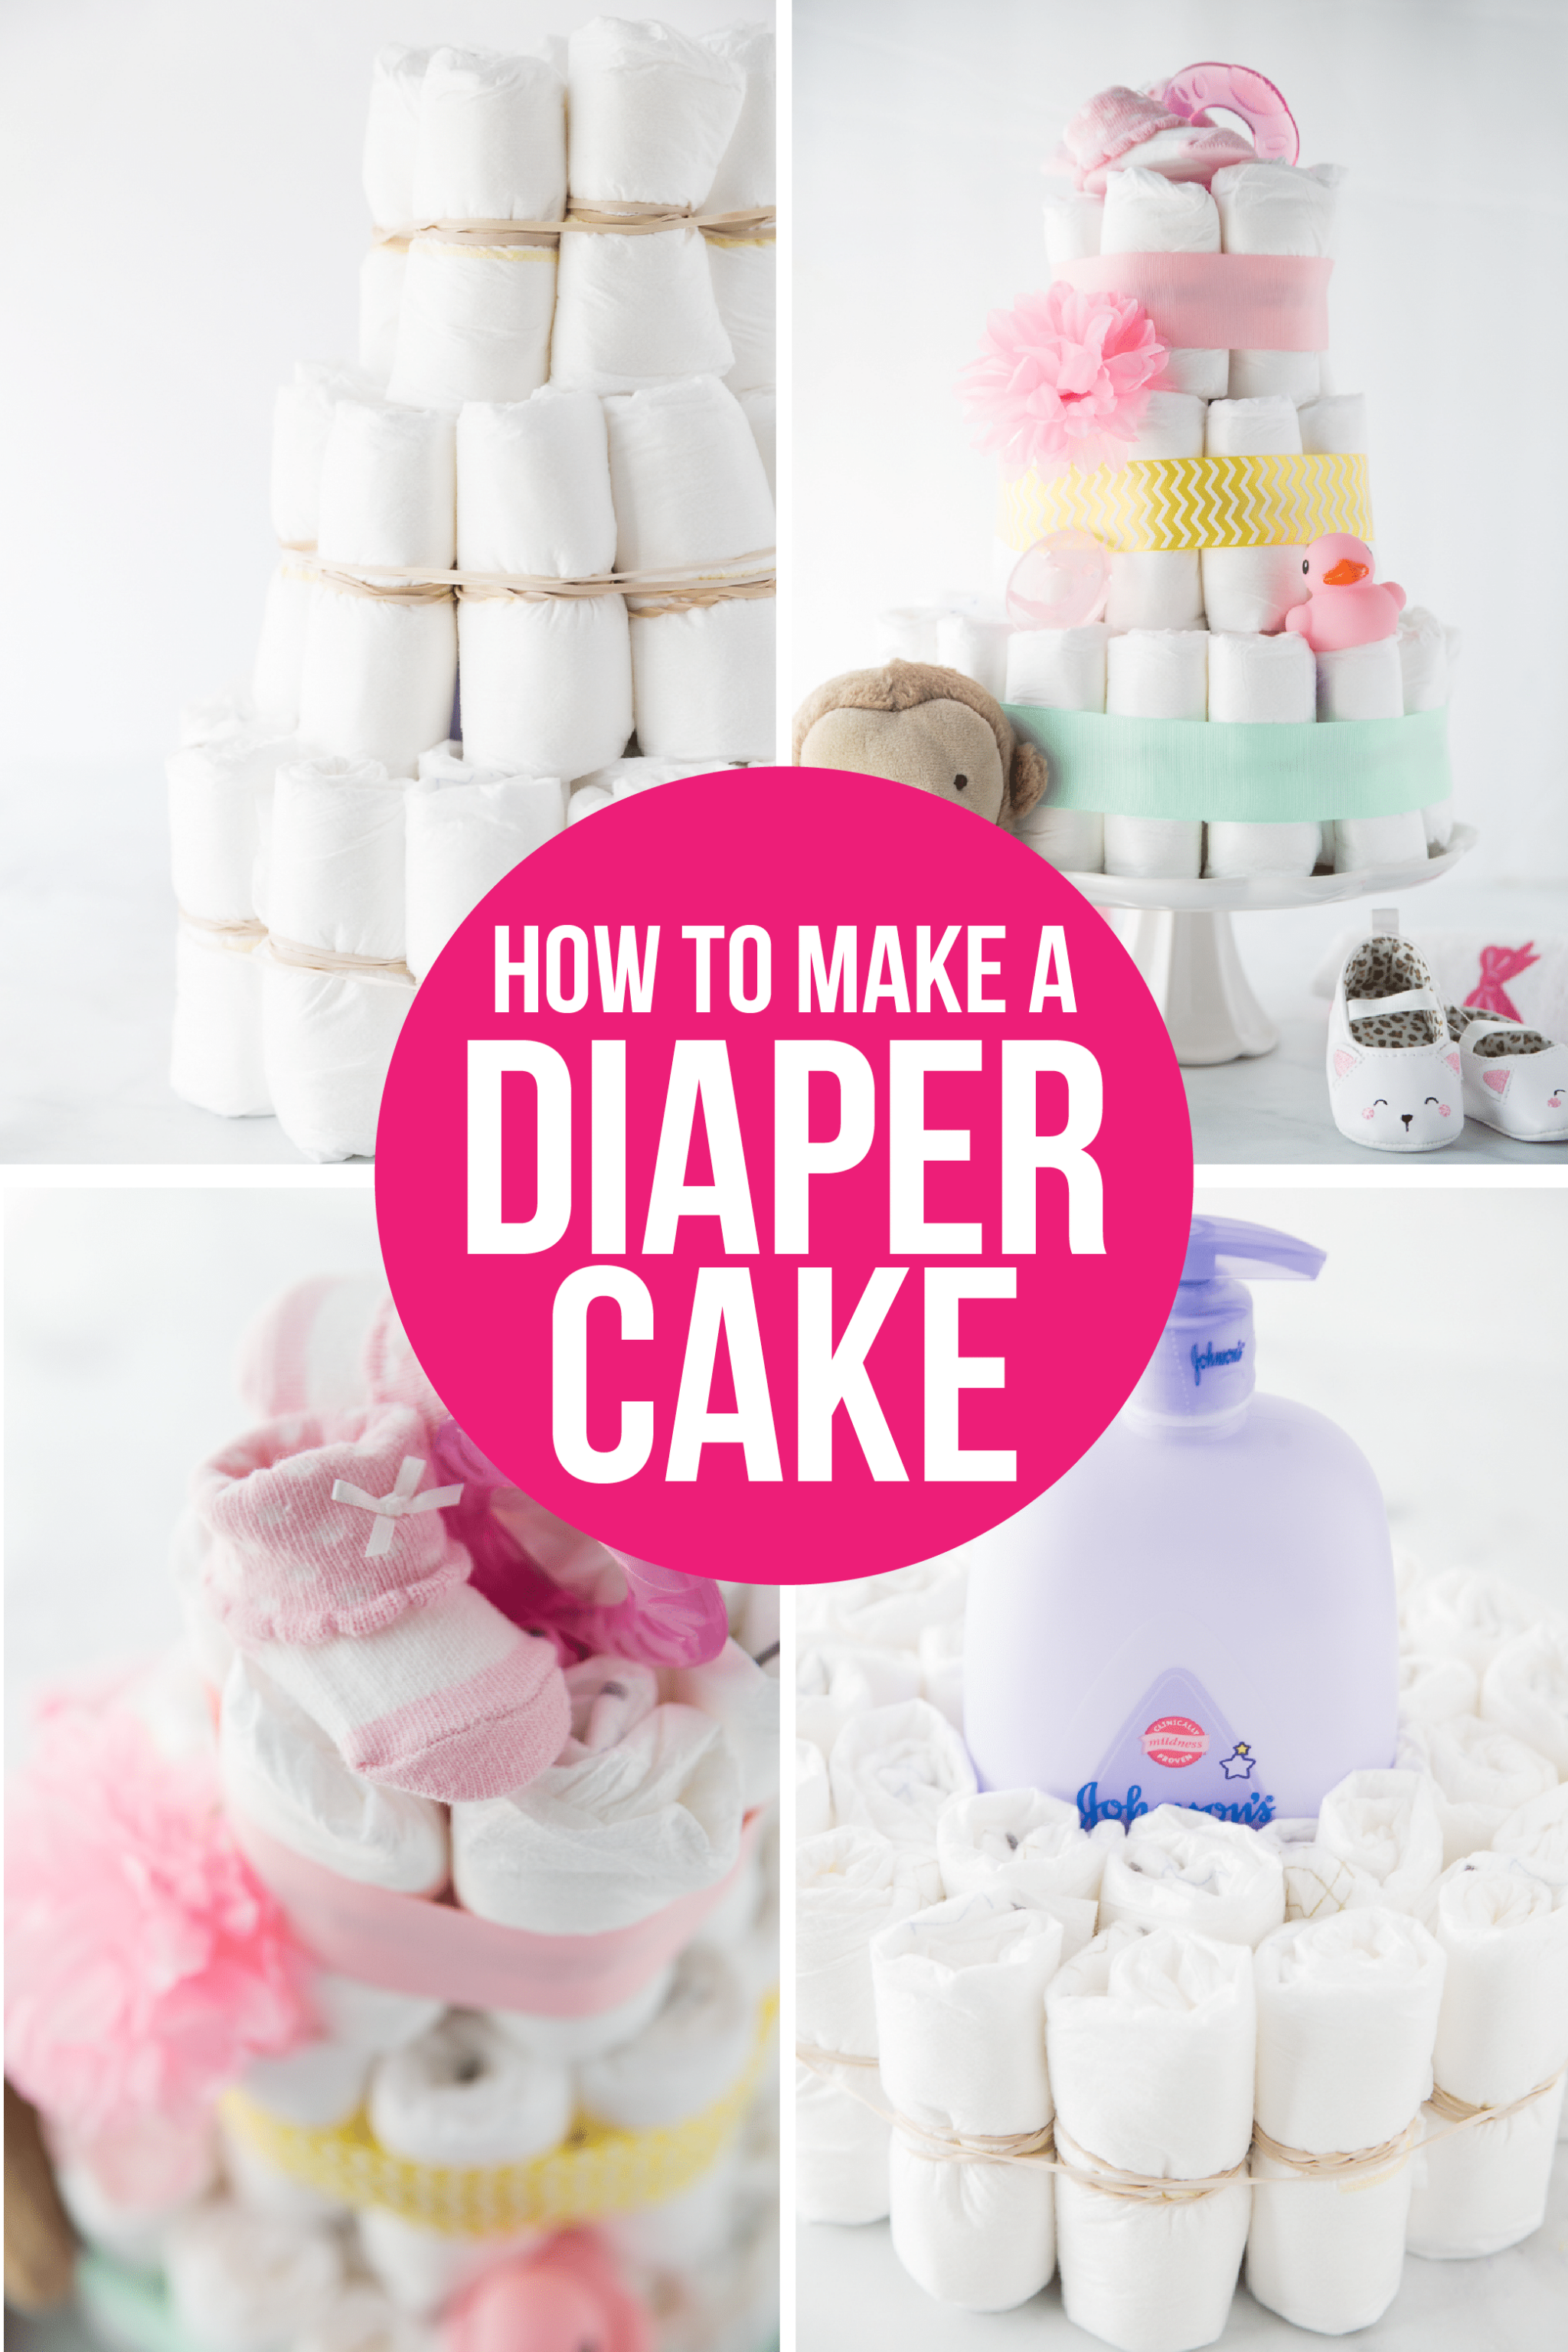
I’m not sure where it started but at some point diaper cakes became a thing. I personally would prefer a Snickers poke cake at my baby shower but diaper cakes are definitely cuter.
After attending and hosting so many baby showers (I can’t tell you how many baby shower games I’ve come up with), I finally decided it was time to learn how to make a diaper cake.
I waited so long and it’s so simple! Literally just a 3-step process and then you can make it as extravagant with decorations as you want (or not). You can also customize the diaper cake to one of these baby shower themes or whatever theme you’re using.
And best of all – a diaper cake makes one of the best baby shower gifts because it’s a bunch of new mom essentials, just made cute!
Diaper Cake Supplies
Before you get started, make sure you have all of your supplies. You don’t want to get to the second layer and realize that you don’t have everything you need because it’ll make it 10x harder to finish! I’ve also included details on exactly how many diapers for a diaper cake because I’ve been that person who buys a box of diapers only to realize there weren’t enough inside!
And if you want this in printable format, make sure to scroll to the bottom of this post for printable instructions!
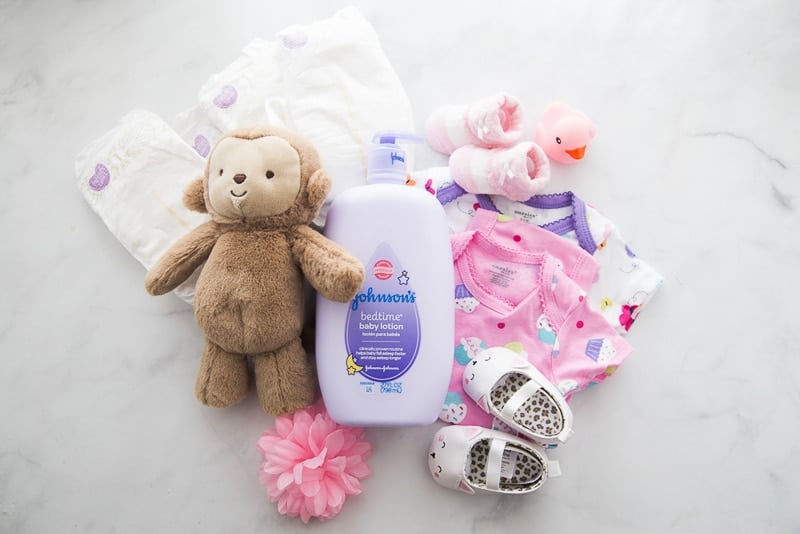
- Diapers
– for my three-tiered cake I used 38 total diapers (23 on the bottom layer, 9 on the middle, and 6 on the top).
- Small rubber bands
– 1 per diaper
- Large rubber bands
– 4 total
- Tall skinny object to go in the center of your cake – I used a bottle of Johnson’s baby wash
but you could use something else, just make sure it has enough weight to stand up
- Ribbon
- Small baby items such as baby booties
, wash cloths
, stuffed animals
, etc. to embellish your cake
- Cake stand or cardboard circle (to build your cake on)
Diaper Cake Instructions
Okay so there are really three steps to this – making your diaper layers, covering your diaper layers, and decorating! I’ve included a video in this post to show you how easy it is!
1 – Make your Cake
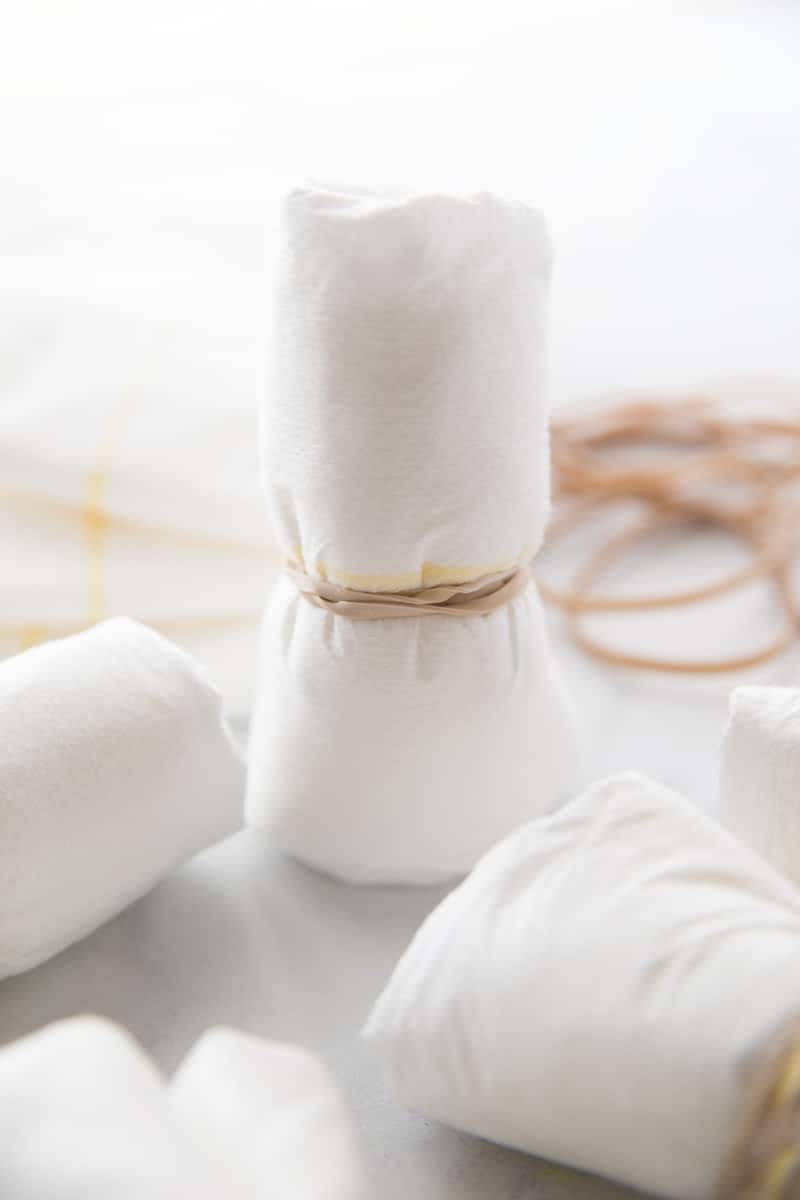
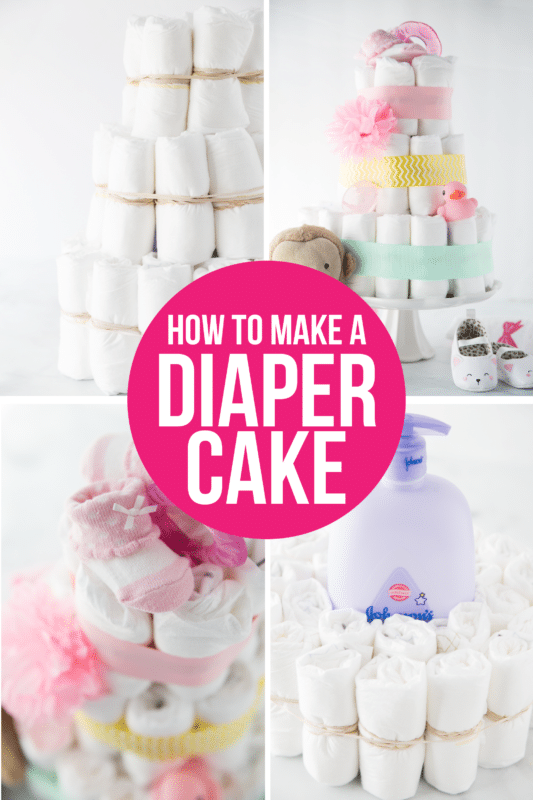
The first thing you need to do is roll up each of your diapers and secure with a small rubber band. Repeat this until all of your diapers are rolled and secured!
If your rubber bands are a little loose, I recommend wrapping the rubber band around twice.
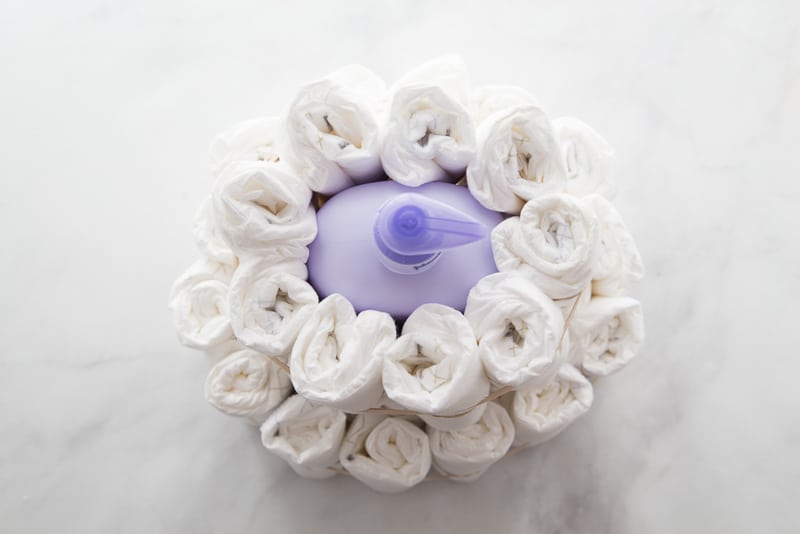
Once your diapers are all rolled, place your tall object in the center of the cake stand and make a ring around it with the rolled diapers.
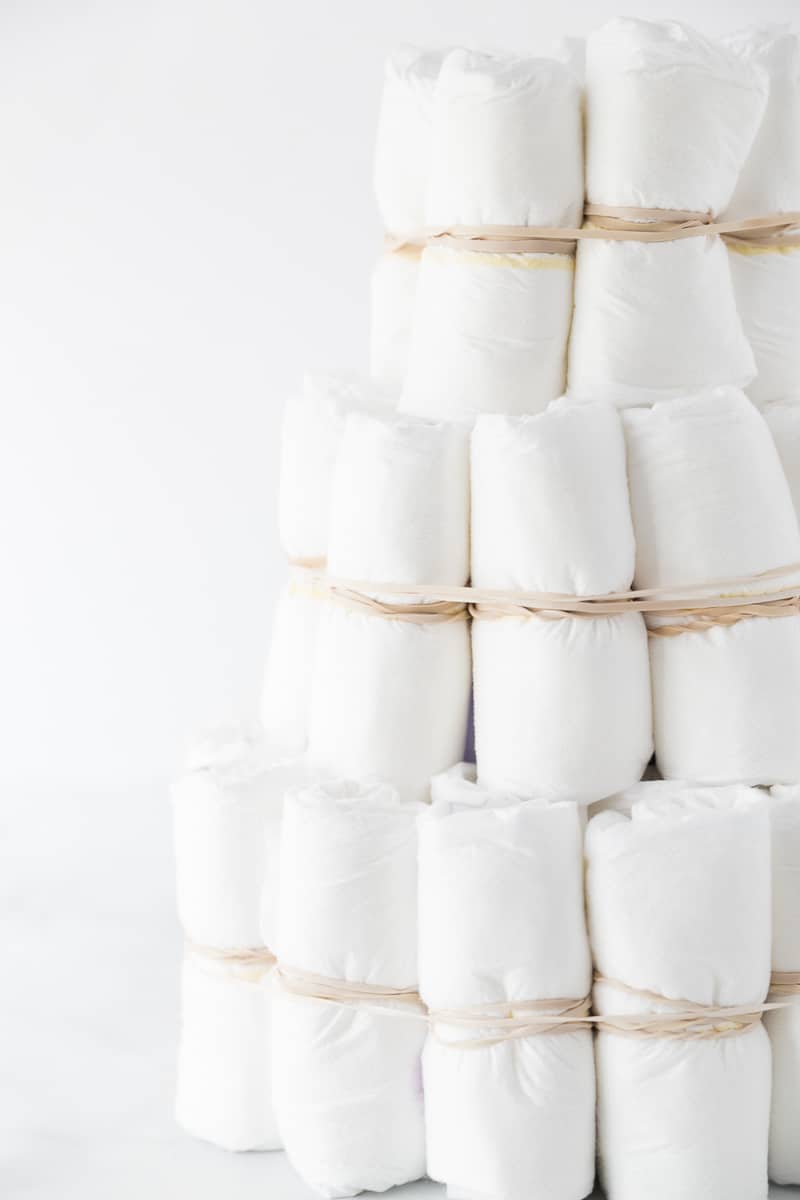
Once it’s completely covered in diapers, place a large rubber band around the ring of diapers to create your base layer.
Repeat and make another ring around the first ring of diapers, this will give you that nice thick bottom layer of the cake.
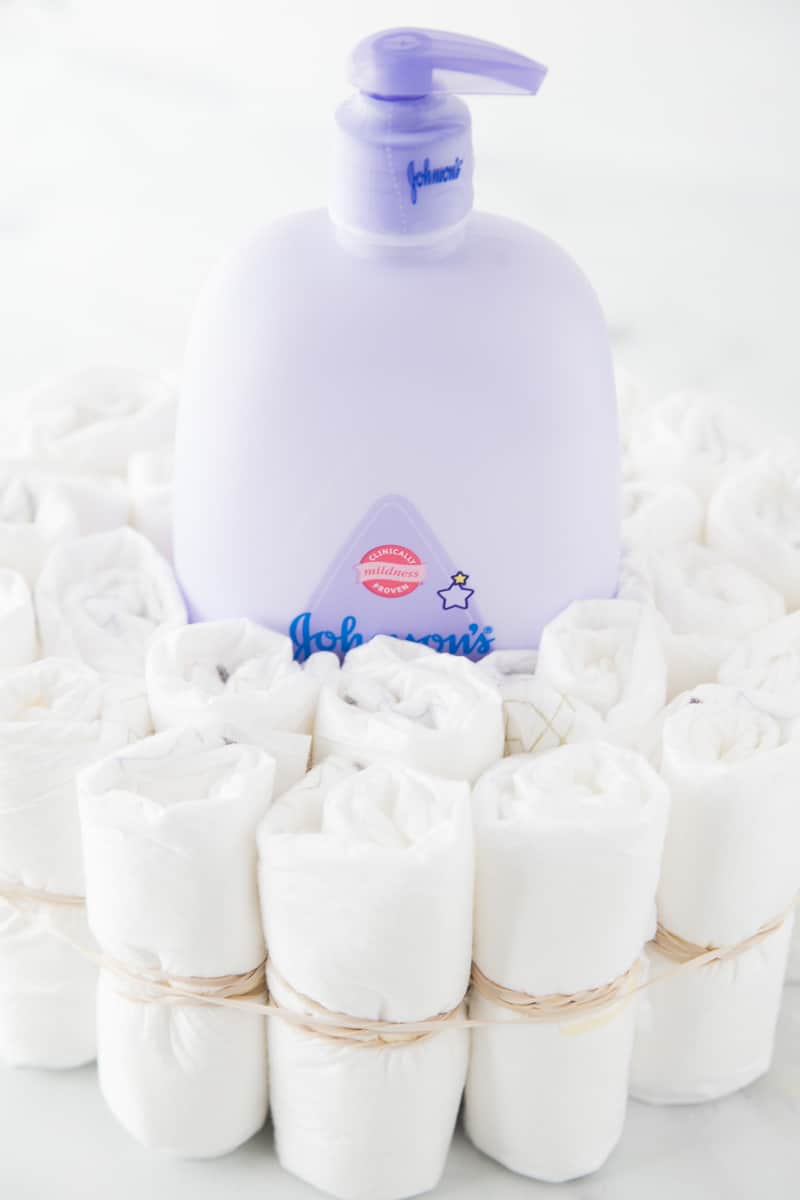
After your bottom layer is secure, repeat with a second and third layer – the only difference is that this time you are only going to do one ring, not two for each layer.
2 – Wrap Your Cake
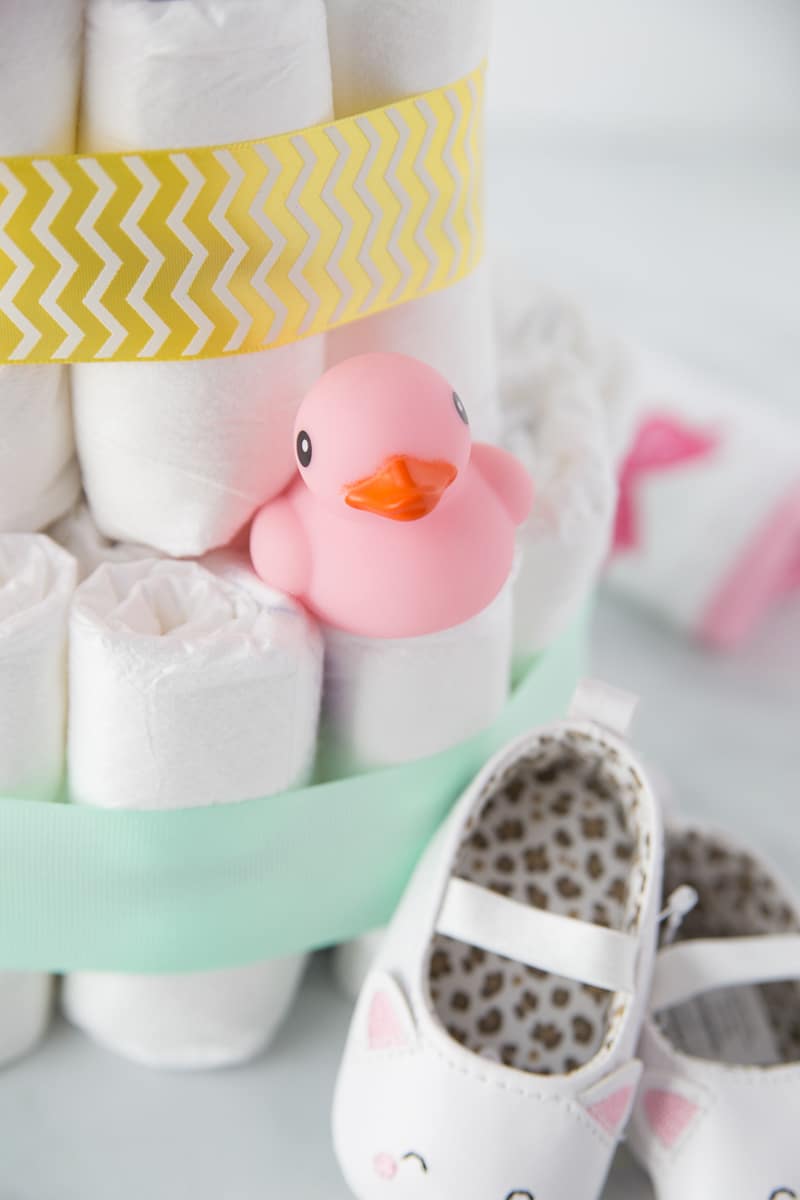
There are a lot of different things you can wrap your cake in, but my favorite is big thick ribbon. I think it looks the most like a regular cake! You could also use fabric or lace or really whatever you want to wrap it, just make sure it’ll wrap nice and tight.
To wrap your cake, simply start on one side of the cake (preferably whatever will be the back), wrap around, then secure with either tape or a straight pin. I prefer the straight pin for looks.
3 – Decorate the Diaper Cake
One of the most fun parts of a DIY diaper cake is decorating the cake! Choosing how to decorate the diaper cake is totally up to you and can match your theme, your color scheme, the baby’s nursery, or really any decoration scheme you want!
The idea is simply to decorate the cake with little toys, baby booties, and useful items (like wash cloths) that the mom-to-be can use with the baby. And of course anything that will make the cake look cute!
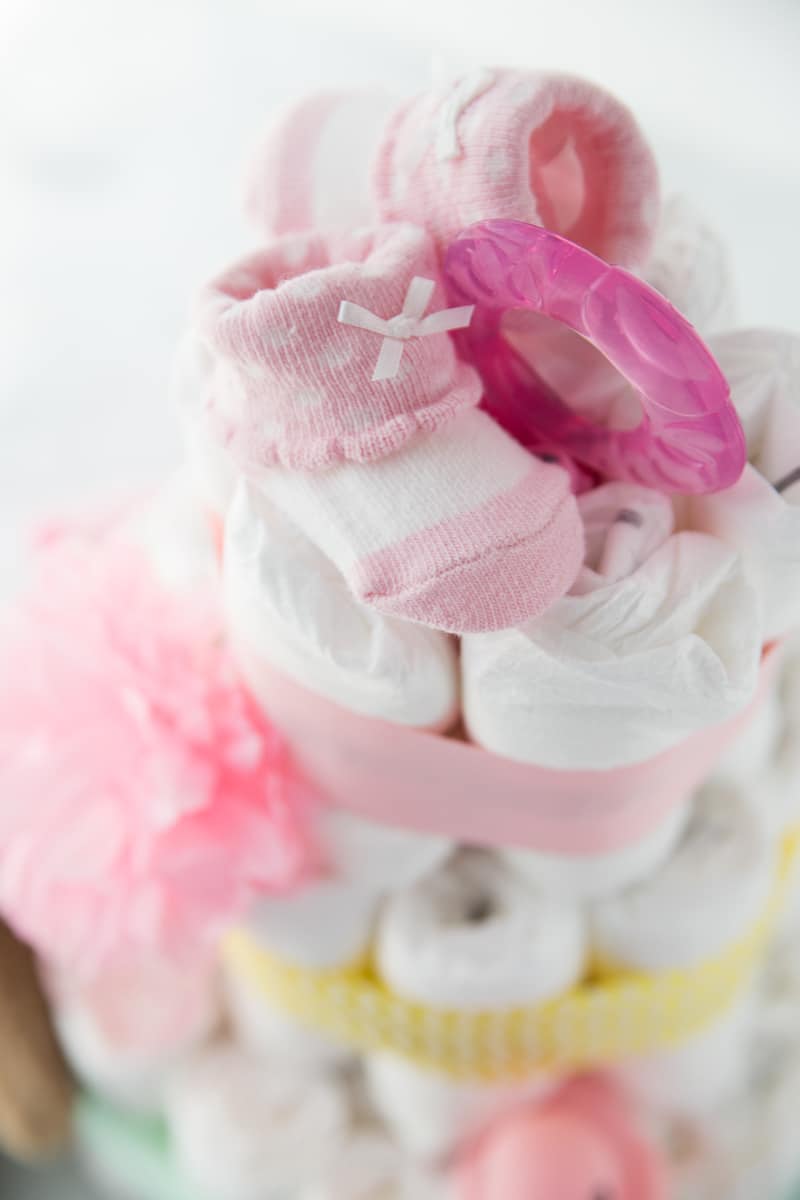
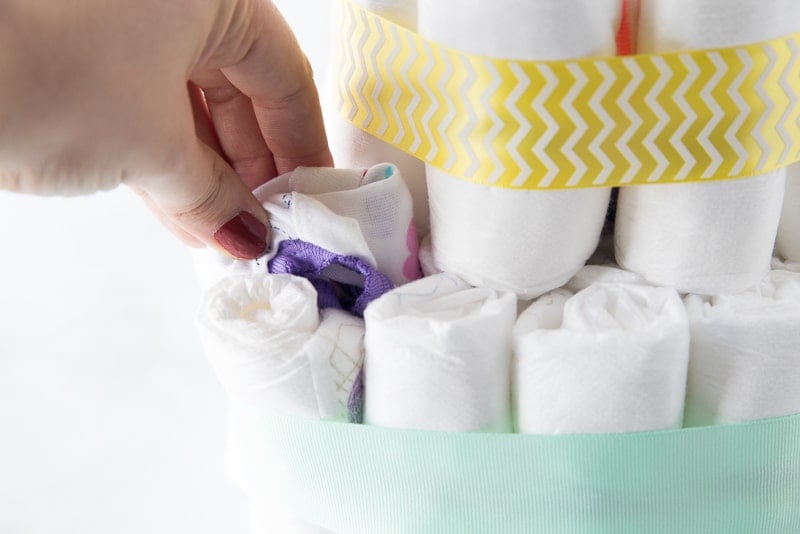
One of my favorite things to do is to roll up wash cloths, socks, etc. and tuck them into the rolls of diapers so you can’t actually see them just by looking at the cake.
I know it seems counterintuitive since the cake is supposed to be a decoration, but it’s a really fun for the mom-to-be to pull out those surprises when she’s taking the cake apart to keep the parts after the baby shower! Almost as fun as these hilarious baby shower games, almost.
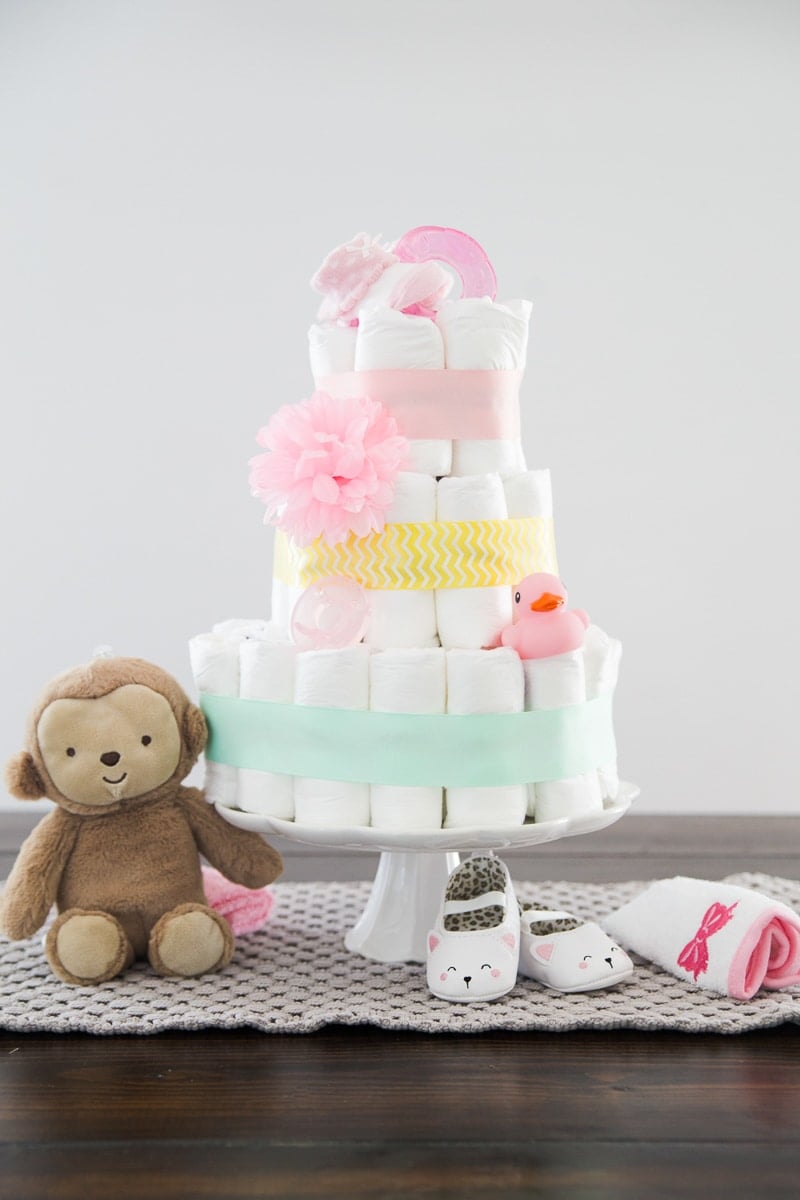
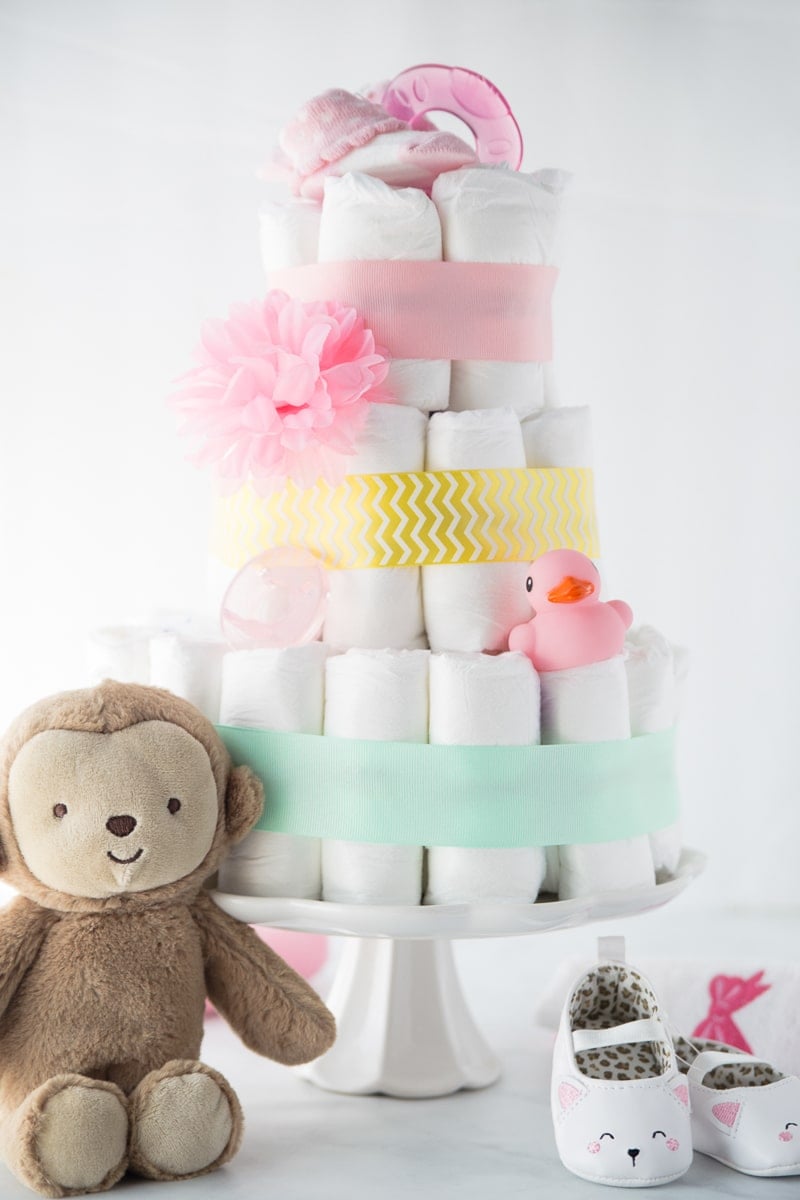
And there you go – the cutest DIY diaper cake! Hope this diaper cake tutorial helped you figure out how to make a diaper cake on your own. It’s so much simpler than it seems and a great way to add a themed and personal touch to any baby shower!
Add this to these sweet baby shower favors for the perfect shower!
Expert Tips
Roll the diapers as tight as possible. If they’re too loose, it won’t look as good and it’ll be harder to keep that cake look.
Make a small diaper cake by simply cutting down the number of diapers used in the tutorial.
Decorate the cake with gifts that you would actually give the mom to be rather than junk that just looks cute.
Use decorations to personalize the cake. Having a sports themed baby shower, do a fun basketball onesie or little baby basketball shoes. Doing an animal themed shower? Add in little stuffed animals, animal socks, and animal wash cloths.
Display the cake where people can’t touch it. For some reason people really like to touch diaper cakes, especially all the cute little items on them. If you want it to look nice throughout the baby shower, stick it in the middle of a table or on a counter out of reach.
Diaper Cake FAQs
If you’re reading this post, you probably already know that a diaper cake is a non-edible cake made out of diapers and other baby items. It’s typically used in lieu of a real cake at a baby shower and doubles as a baby shower decoration and a gift for the mom-to-be!
The price will depend on the size of diapers you use (I used newborn), how many embellishments you get, and the items in the middle. So the cost of a diaper cake can really be whatever you want it to be.
If your attempts at making a diaper cake fail, you can always just buy one from the experts. Or skip trying making a diaper cake and just buy one in advance. These are some of my absolute favorites, so cute!
Princess Diaper Cake with a Tutu
Nautical Whale Diaper Cake (you can’t even tell this is made out of diapers!!)
Bassinet Carriage Diaper Cake (in the shape of a bassinet)
A Kid’s Bike Diaper Cake
Mermaid Diaper Cake
And that’s one of the main reasons to make a diaper cake – it’s a great baby shower centerpiece and a cute gift!
Diaper cakes always used to intimidate me until I realized how simple they are to make! Here’s a quick and easy diaper cake tutorial – only three steps to a beautiful diaper cake! Making a diaper cake only took less than an hour, so it really is easy!
More Great Baby Shower Ideas
- Baby shower emoji game
- Baby shower song game
- Baby shower poem game
- Strawberry mocktail
- Reese’s peanut butter pie recipe
DIY Diaper Cake
Ingredients
- 38 diapers
- 38 small rubber bands
- 4 large rubber bands
- 1 bottle Johnson's baby lotion
- ribbon
- baby items to decorate with
- cake stand or cardboard circle to build cake on
- 3 straight pins
Instructions
- Roll each of your diapers tightly then secure with a rubber band. Repeat until all diapers are rolled.
- Place your baby lotion in the center of the cake stand and make a ring around it with rolled diapers. Place a large rubber band around the diapers to create your base.
- Add another layer of diapers around the first layer with another large rubber band to secure the final bottom layer.
- Repeat with a second and third layer of diapers, building up. The only difference is that you'll only do one circle of diapers per layer, not two.
- Wrap your cake with ribbon, securing with straight pins.
- Add baby items in and around the cake to decorate.



Barbara says
How do you secure the embellishments onto the cake? I want to make one, but have to transport it 50 miles to the shower.
Britni Vigil says
Embellishments as in the ribbon or like the little extras that go into the cake? I typically just stick them in between the diapers or pin them into the diapers (with ribbon). But if you’re really worried about it, you could just add those little extras right when you get there.
Toli says
What size diapers did you use
Britni Vigil says
I used newborn diapers for this particular cake.
Erica Quinn says
I’m excited to try this. How do u recommend attached the “decorations” to the “cake”?
Britni Vigil says
Just stick them into the diapers and in the rubber bands!
Kelly says
OMG so easy!!! I’m not crafty at all and these were the best instructions. I thought it was going to be more difficult and I thought I would have to get my daughters-in-law to finish it. Thank you!!
BritniV says
You are very welcome!
Anna says
Thank you for this tutorial. Best cake I’ve ever made… and it’s a diaper haha. Much appreciated!!
BritniV says
you are very welcome
Stacy Risenmay says
Adorable! I have never made one since they looked like it would be a pain. Never knew it was so simple!
Rita O'Neal says
What an awesome diaper cake! I love the hidden surprises. I would never have thought to use the baby care items as the core. I wouldn’t want to take this apart if it was given to me. #client
Britni Vigil says
Thanks Rita, it took me a while to take it apart.
Ashley Phipps says
Awe this is so super cute!!
Britni Vigil says
Thanks Ashley!
Amy Latta says
Diaper cakes are such sweet gifts! Thanks for sharing how to create one so simply!
Britni Vigil says
Thanks Amy! I have a feeling you’ve made plenty of diaper cakes, probably hand painted ones, in your day.
Kim says
Thank you so much for putting this out here!!! I can’t wait to make this for my friends shower!!! I can’t thank you enough!!!!
BritniV says
Glad I could help! I’d love to see what you made – tag me on social with #PlayPartyPlan or @PlayPartyPlan! 🙂
Katie says
great tutorial. I’ve never made a diaper cake and have always thought they were so hard to make–you make it look so easy! 🙂
Britni Vigil says
Thanks Katie!
Christine Bell says
I just love it! I’ve always wanted to make one, and now I really think I can!
Britni Vigil says
You definitely can. I seriously was nervous at first but it’s so easy!
DesignedByBH says
These have always intimidated me, too–this is so cute! I love the little ducky. Pinning!!! 🙂
– Brooke –
Britni Vigil says
Thanks Brooke, the ducky was my favorite too!