
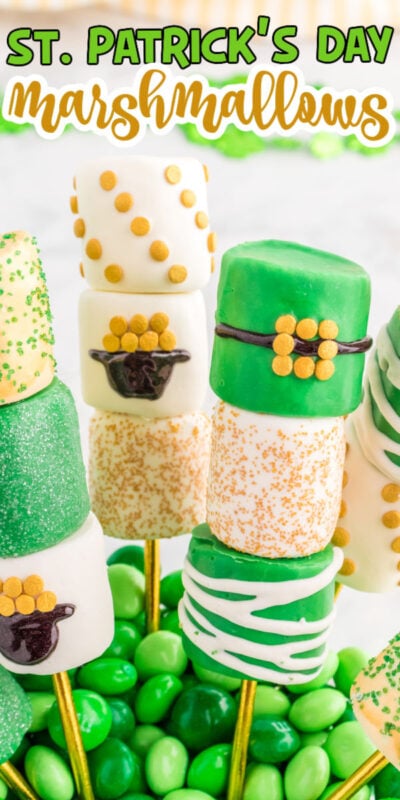
These fun St. Patrick’s Day marshmallow pops are easy to make with just a few ingredients and some sprinkles! They would make a great addition to any St. Patrick’s Day party or as a fun treat for kids, possibly left by a leprechaun himself!

Want to save this recipe?
Enter your email below and we’ll send this idea straight to your inbox (plus you’ll receive fun weekly ideas from us too!)
With St. Patrick’s Day just around the corner, it’s time to share all sorts of fun St. Patrick’s Day shenanigans and treats. I’ve already shared my Lucky Charms cookies and St. Patrick’s Day pudding cups but that’s just the beginning.
I’m going to be sharing everything you need for the ultimate St. Patrick’s Day celebration whether you’re just celebrating with family at home or hosting a shindig your Irish ancestors would be proud of!
Let’s kick it off with these fun marshmallow pops!
One of my favorite kind of recipes to share are ones that look impressive but are really pretty easy to make. These St. Patrick’s Day marshmallow pops are just that.
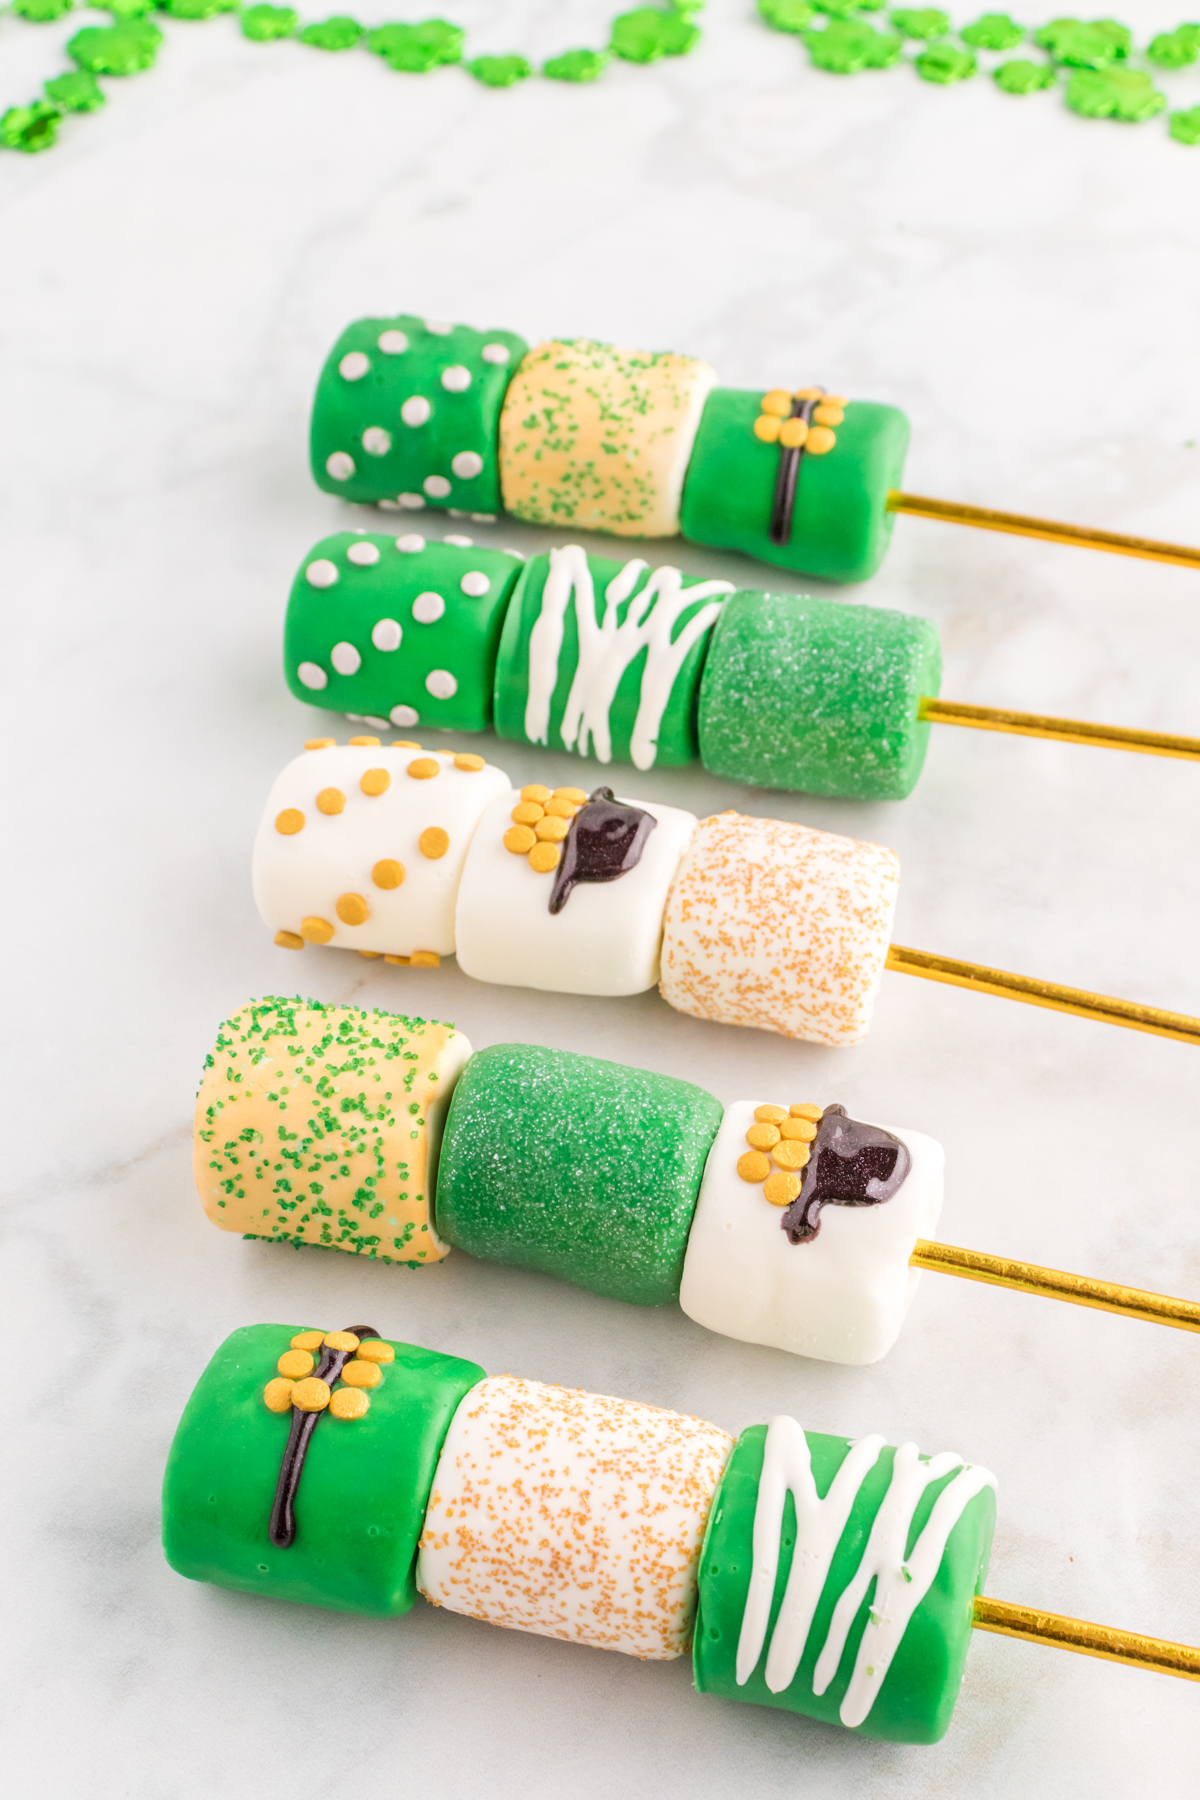
Dipped marshmallows get decorated and put on fun sticks to create marshmallow pops that kids will love and adults will be impressed by!
And they really only take a few minutes to make with the right ingredients!
Put these in a pot of gold candies for the surprise at the end of a St. Patrick’s Day scavenger hunt, add to these St. Patrick’s Day favors for a take home treat, or send in to the classroom with these St. Patrick’s Day bingo cards to be prizes for the winners!
Why You’ll Love This Recipe
- Creative – if you like to be artsy or creative with your treats, these will be right up your alley. I’ve included details on how I made each of the marshmallows below but feel free to let your creative side come out!
- Simple – as cute as they are, they’re actually pretty easy to make. Half of them are just dipped marshmallows sprinkled with glitter and the others are just designed by carefully adding confetti sprinkles!
- Adorable – kids and adults will be impressed by how cute these are! So if you want something festive, these are a great choice!
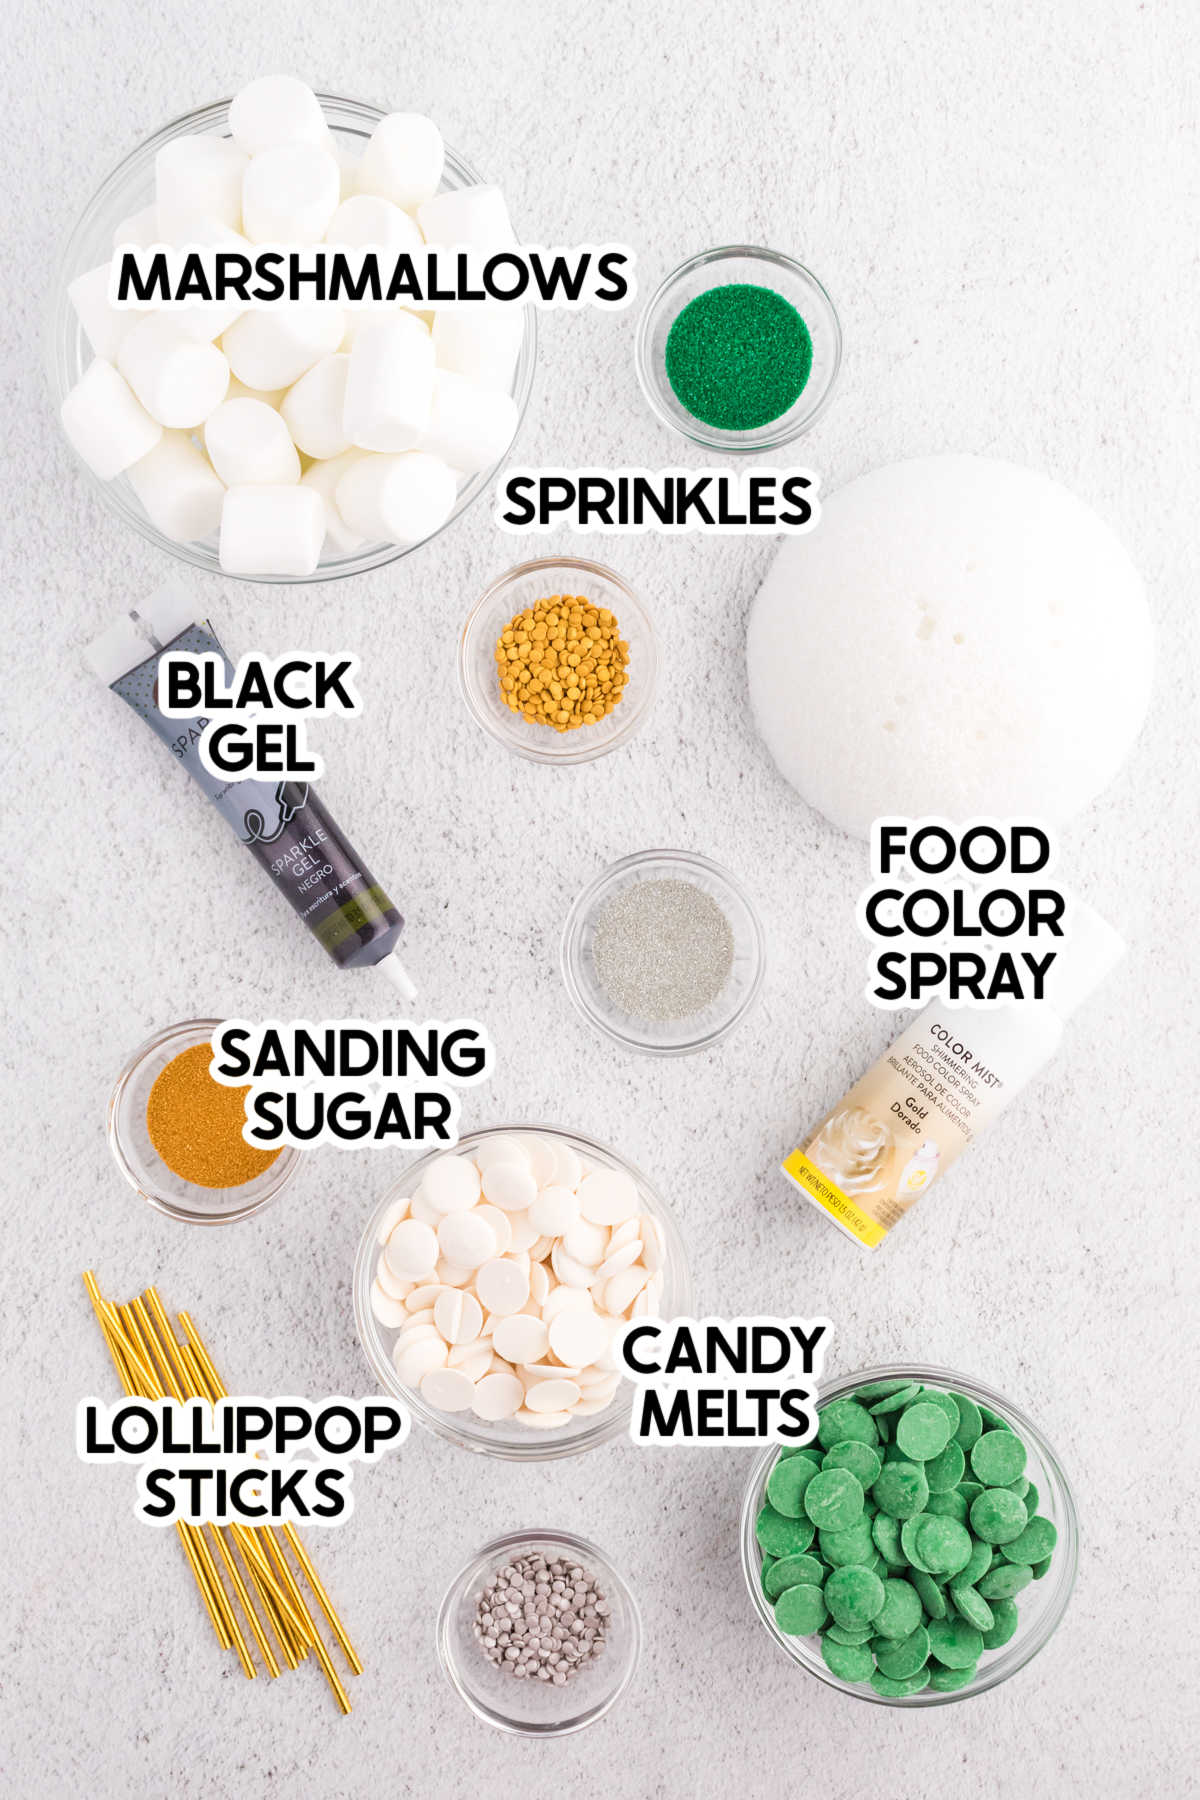
Ingredients
Ingredient Notes
- Candy melts – you’ll need both white and green candy melts if you want to create all of the designs. Candy melts are the best for this because they melt and harden quickly, which means less time overall creating these! I used a dark green for these, not a light green like I did with my Grinch Christmas balls.
- Sanding sugar – I used silver, green, and gold sanding sugar for these designs but you would also incorporate some green if you have it! Sanding sugar is just the really little crystal sprinkles if you can’t find something called sanding sugar.
- Confetti sprinkles – these are going to be round and flat sprinkles like these gold ones and these silver ones. They’re also sometimes called cake sequins – just know that you’re going for something small, round, and flat.
- Black decorating gel – I used this black sparkle gel but it could really be any kind of black gel, I just liked the added bonus of the sparkle for the pots of gold.
And while technically not an ingredient, you’ll also need lollipop sticks. You can use any color lollipop sticks (or even just plain white) to hold your marshmallow pops. I personally used gold ones like these for added color but the color really doesn’t matter.
You can also use a styrofoam stand to hold the marshmallow pops if you want or just put them in a vase of candy to hold them up – totally up to you!
How to Make Marshmallow Pops
These are pretty easy to make but each one’s instructions are bit different once you get past the coloring the marshmallow step so pay close attention! I broke it down by marshmallow type to make it easier to decorate, especially if you’re only planning on doing one or two of the designs!
1 – Dip the Marshmallows
The first thing you need to do for all of the marshmallow designs is to coat your marshmallows in candy melts. This is what will keep the decorations sticking to the actual marshmallows!
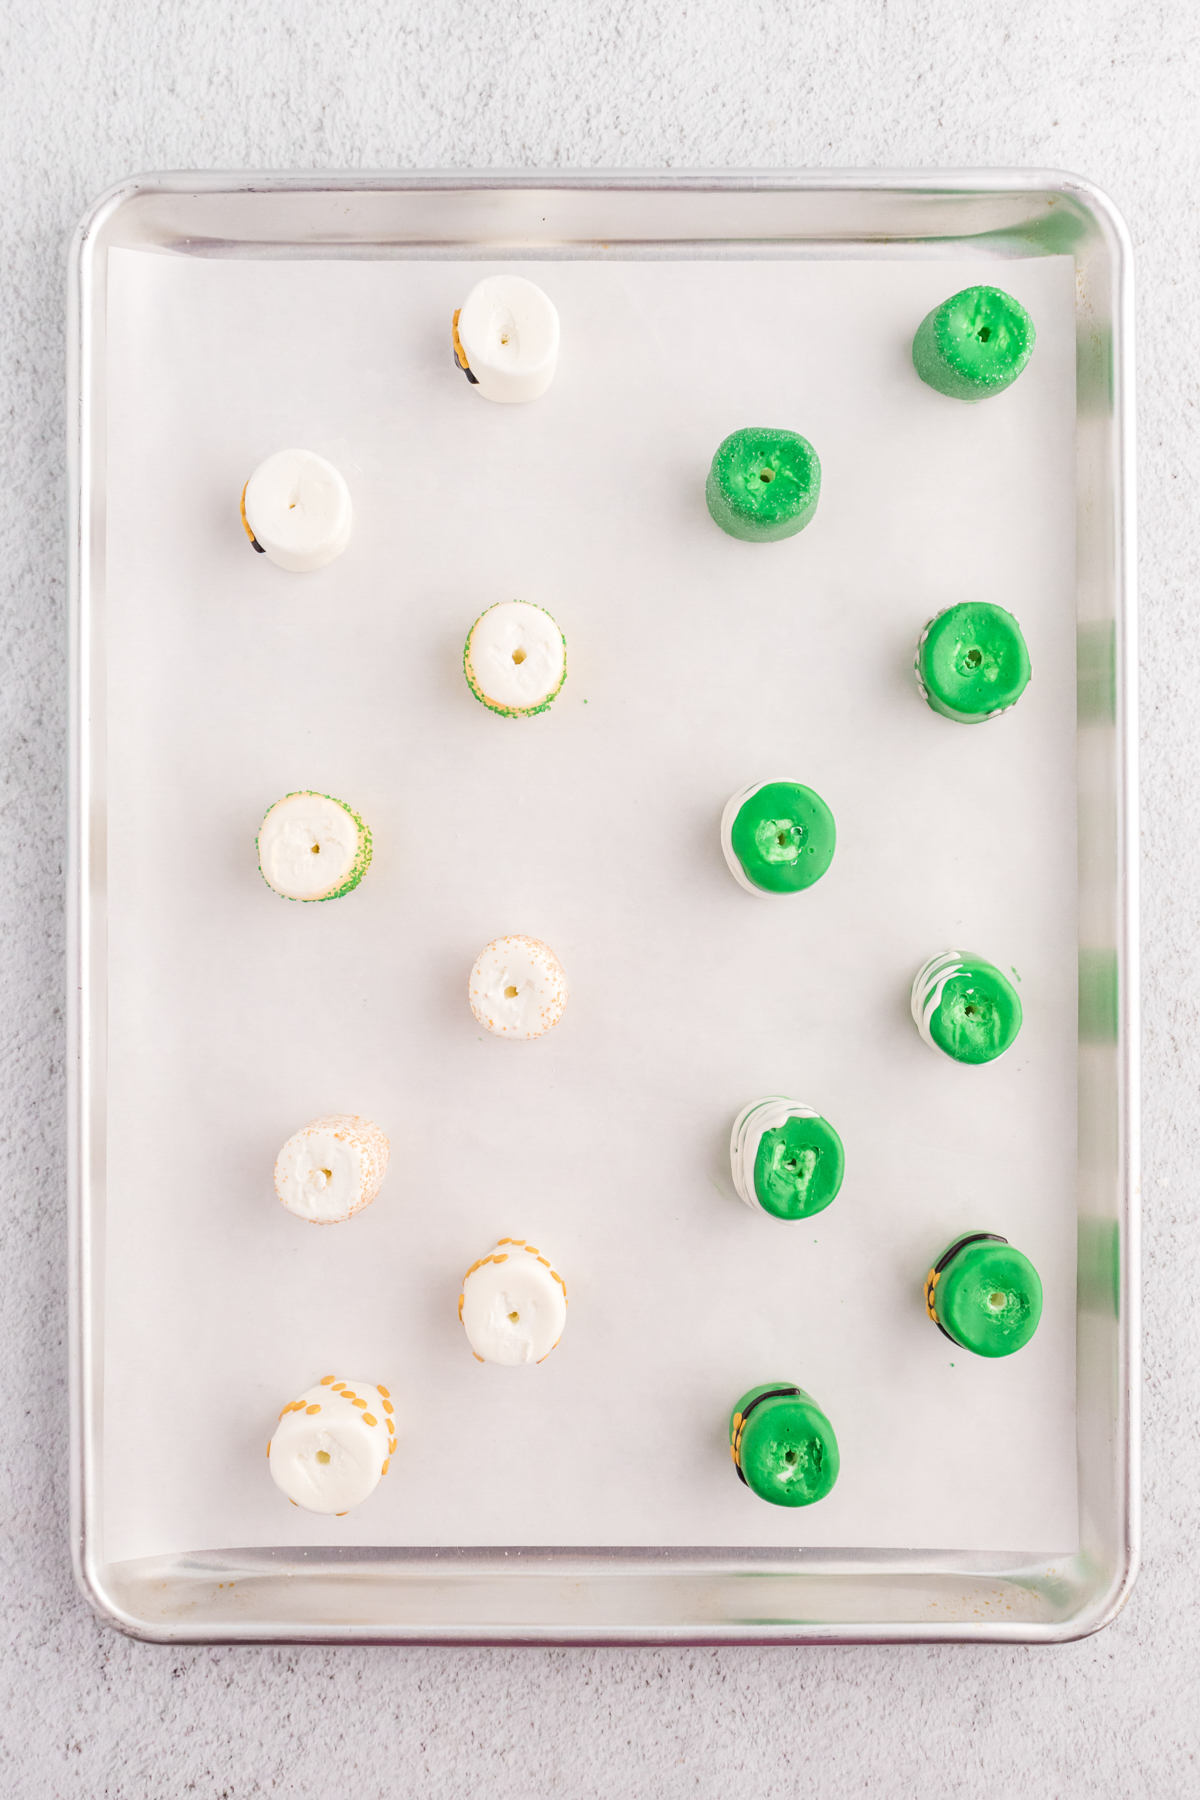
Starting by lining a baking sheet with parchment paper and setting it aside for later. Get all of your decorations together so that you can add them before your candy melts harden.
In a microwave-safe bowl, melt 1 – 1 1/2 cups of green candy melts in the microwave for 30 seconds, stir and repeat until fully melted and smooth.
You can also do this on the stove using a double boiler – your choice!
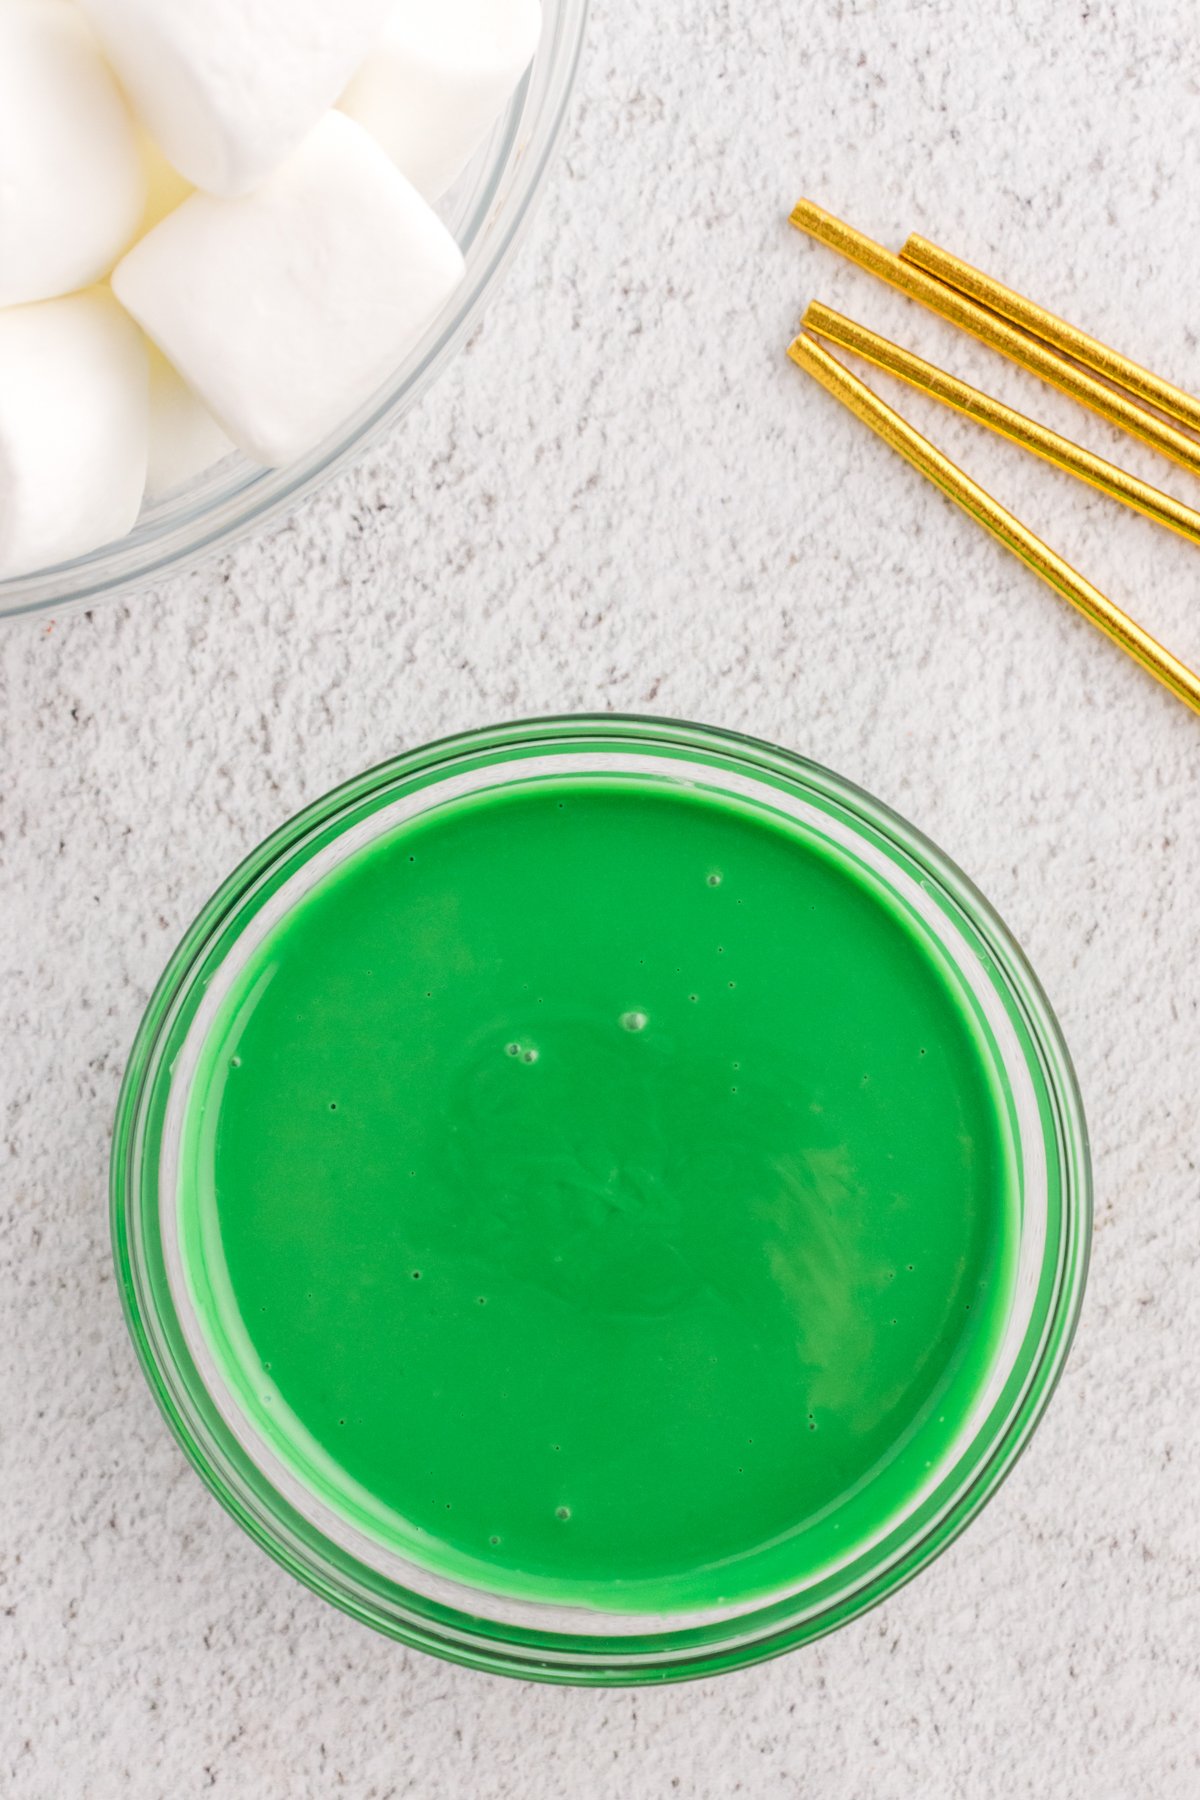
Place one marshmallow on a stick and then dip it into the melted candy at a 45°angle. Turn the stick slowly until the marshmallow is completely covered.
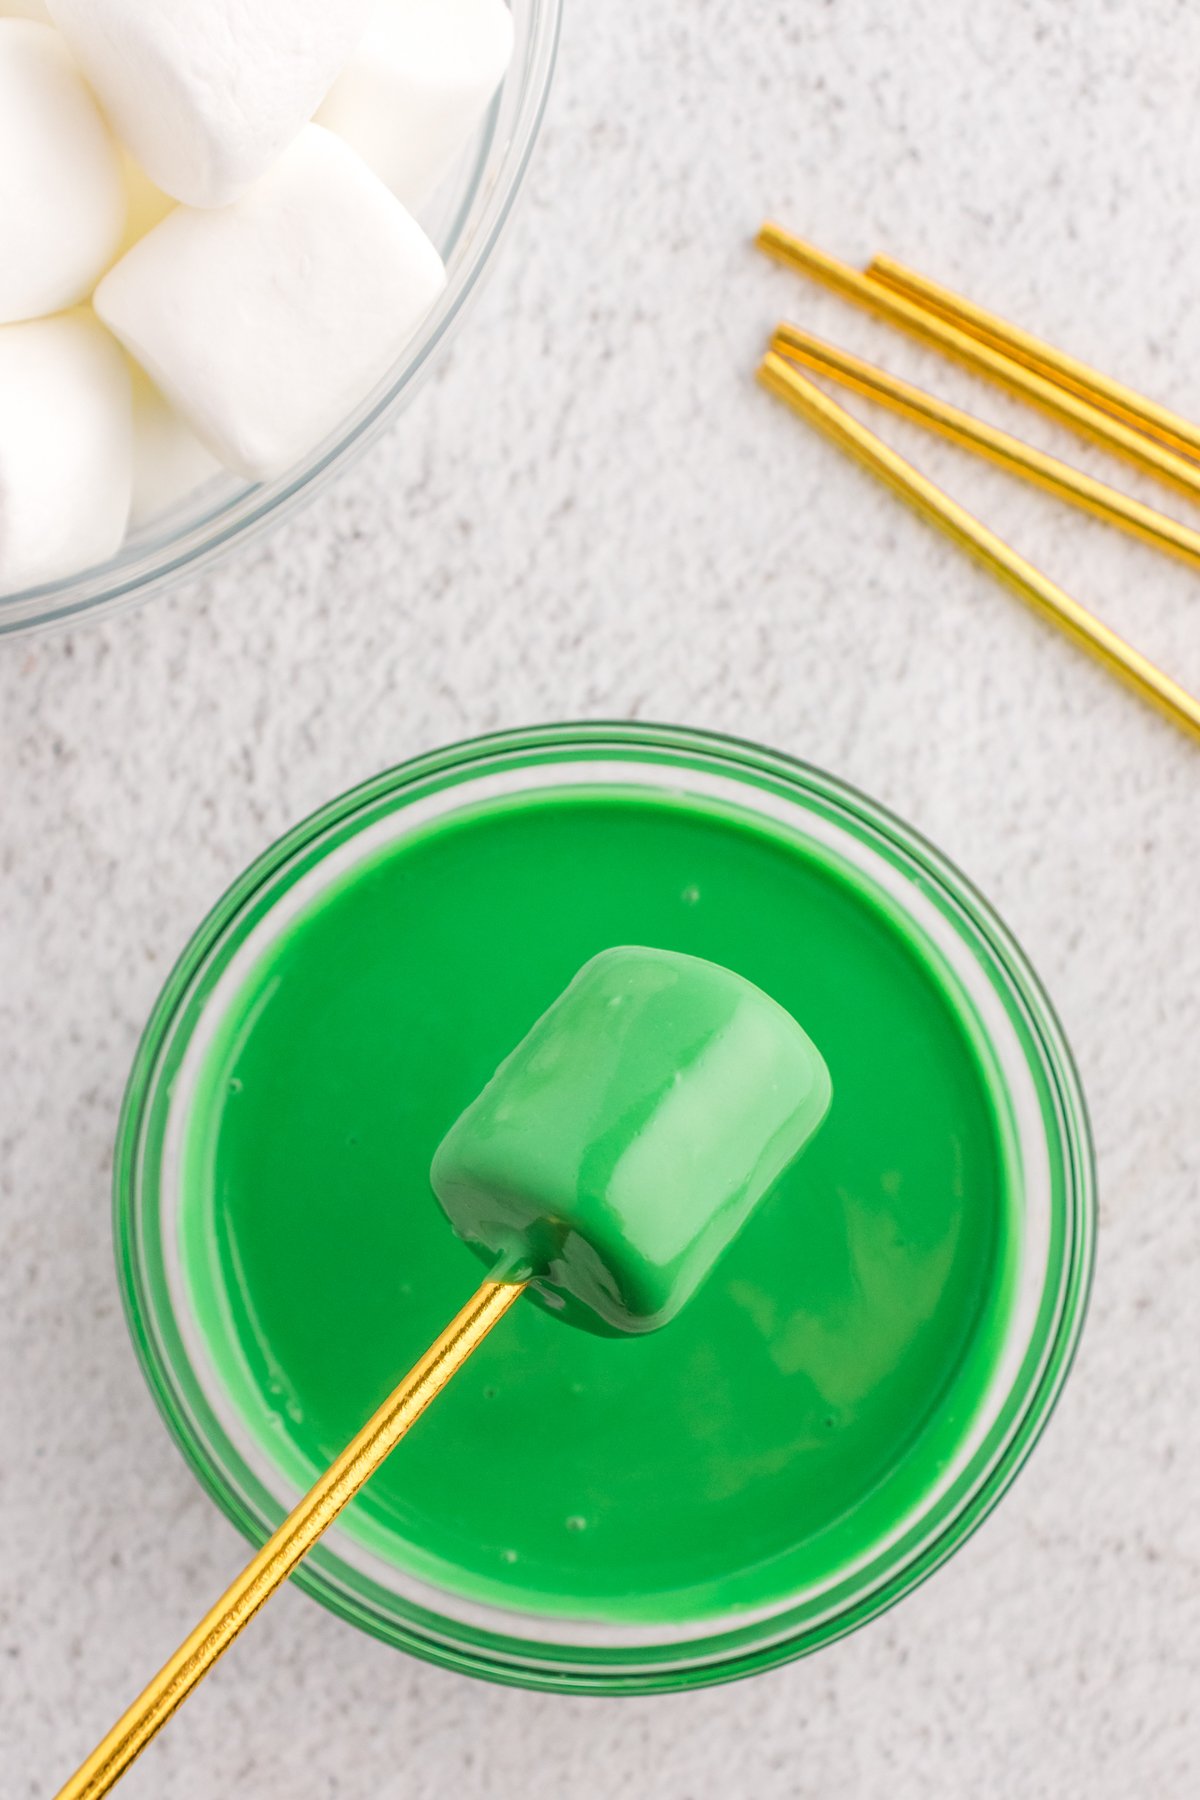
Remove any excess melted candy by gently tapping the stick on the side of the bowl. Repeat for any marshmallows you’ll be dipping in the green candy melts. I did 12 of my marshmallows in green.
Before the candy melts harden, you’ll want to add your decorations to the marshmallows. I’ve included specifics for each of the marshmallow designs below.
This is the exact same process that you’ll do for the white candy dipped marshmallows so I won’t explain it again. Just know that I recommend doing all of the green then decorating, then all of the white and decorating (or vice versa but dip and decorate one color at a time).
2 – Decorate the Marshmallows
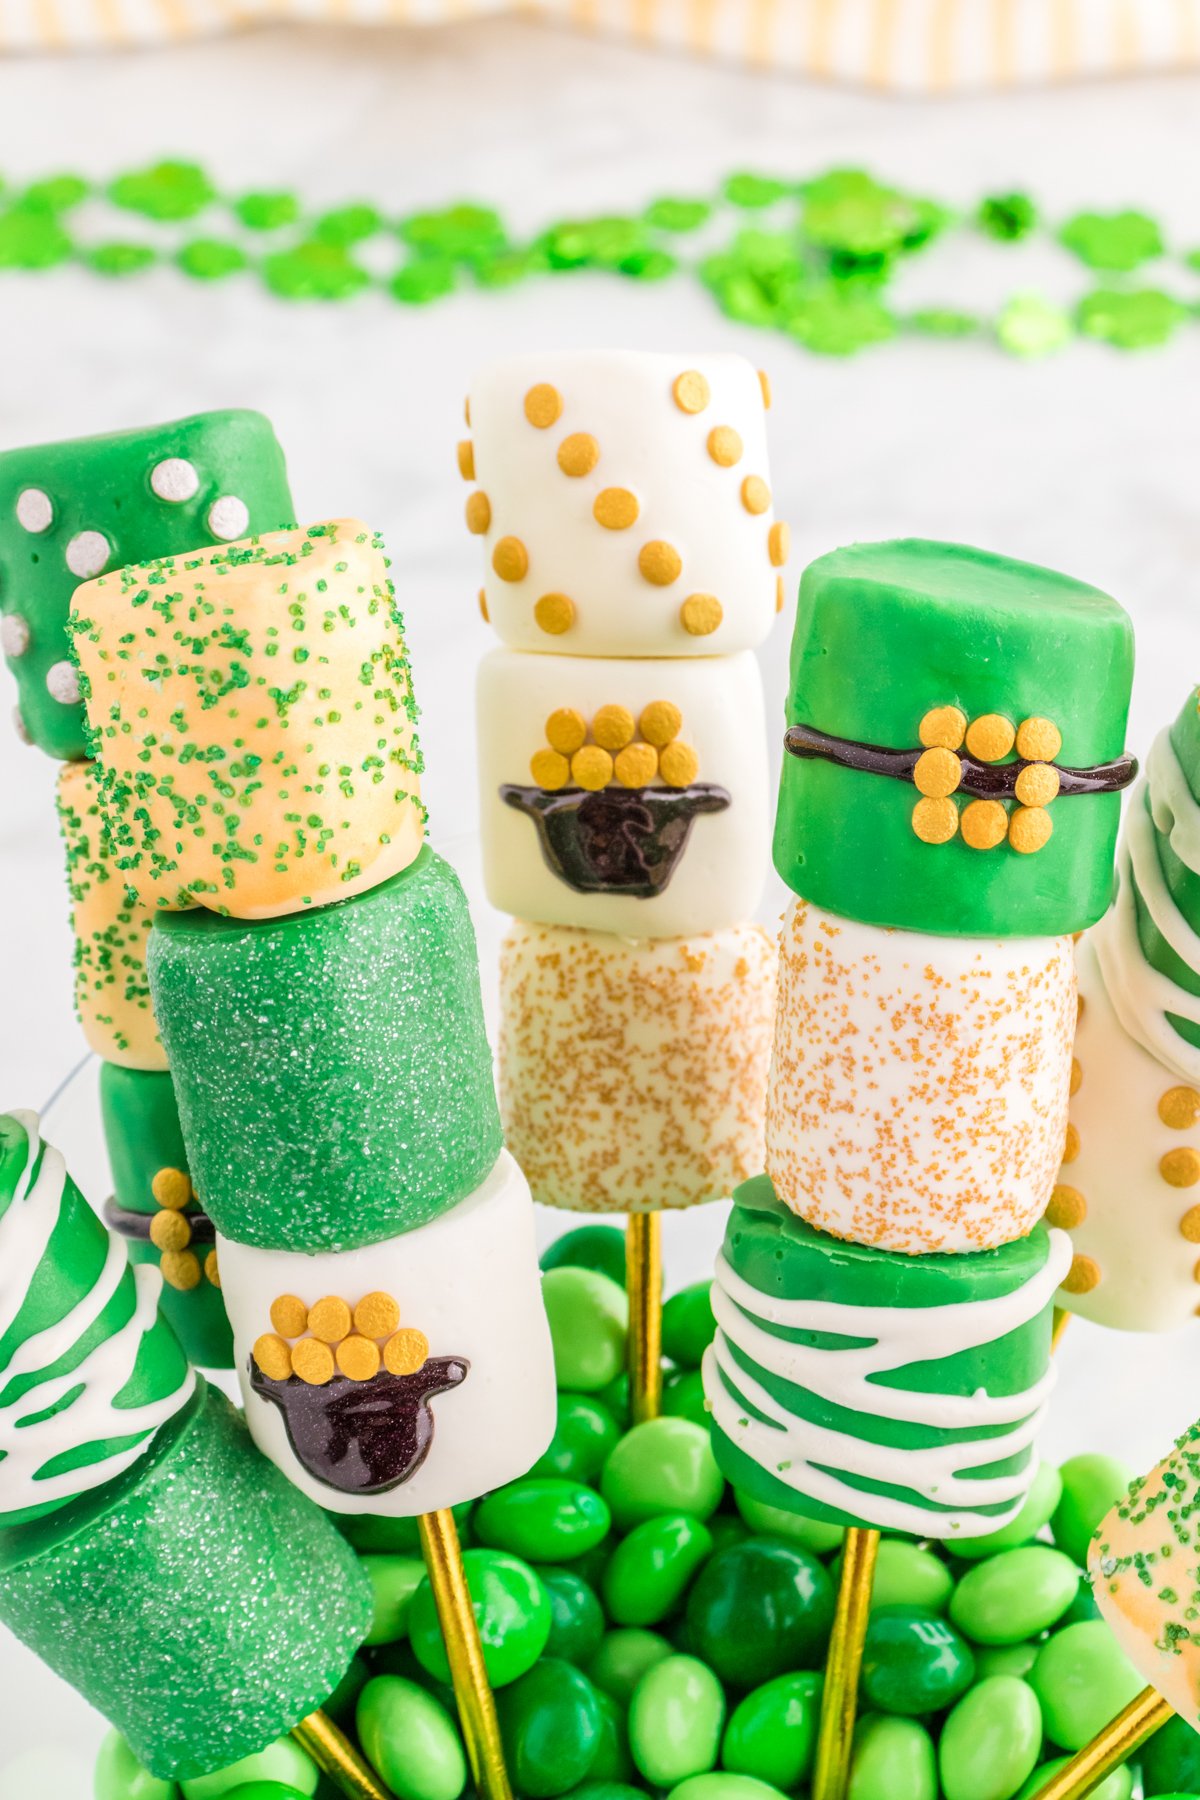
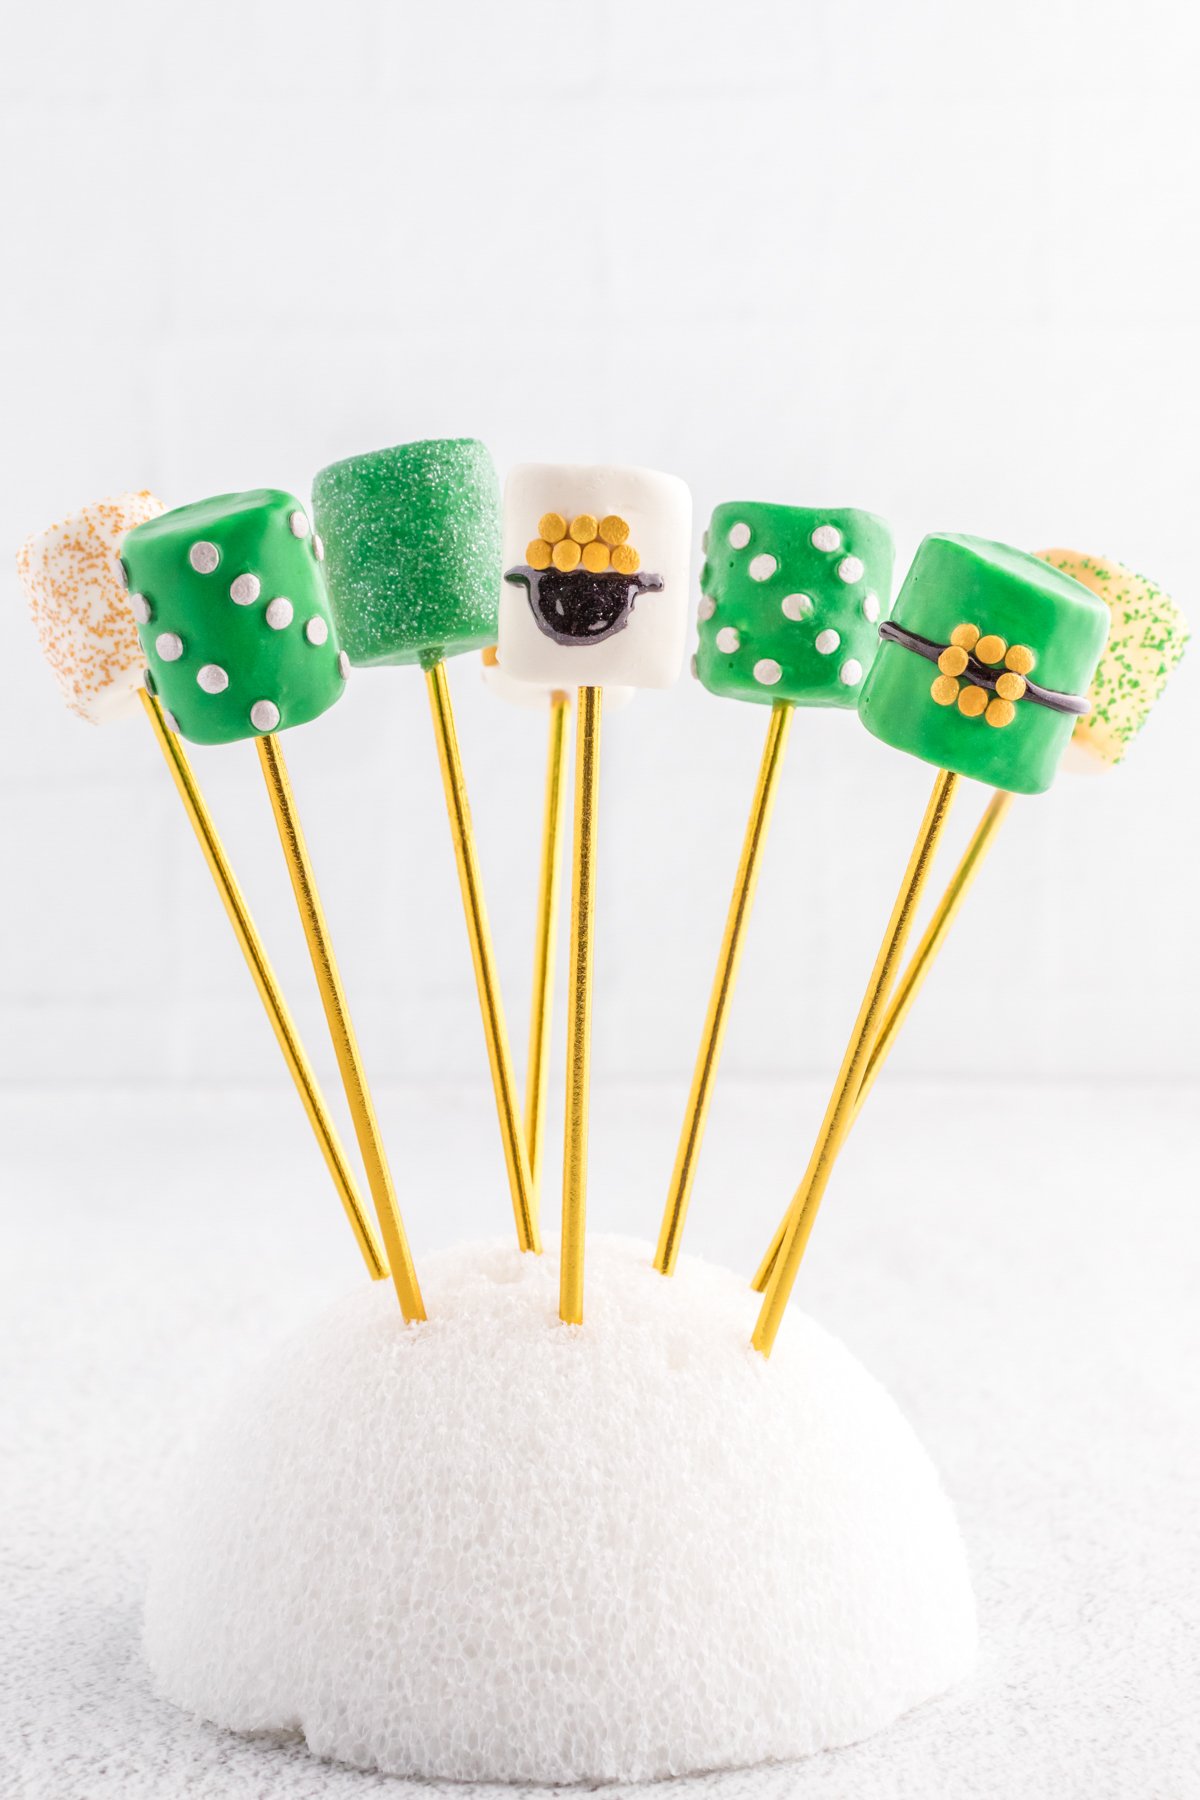
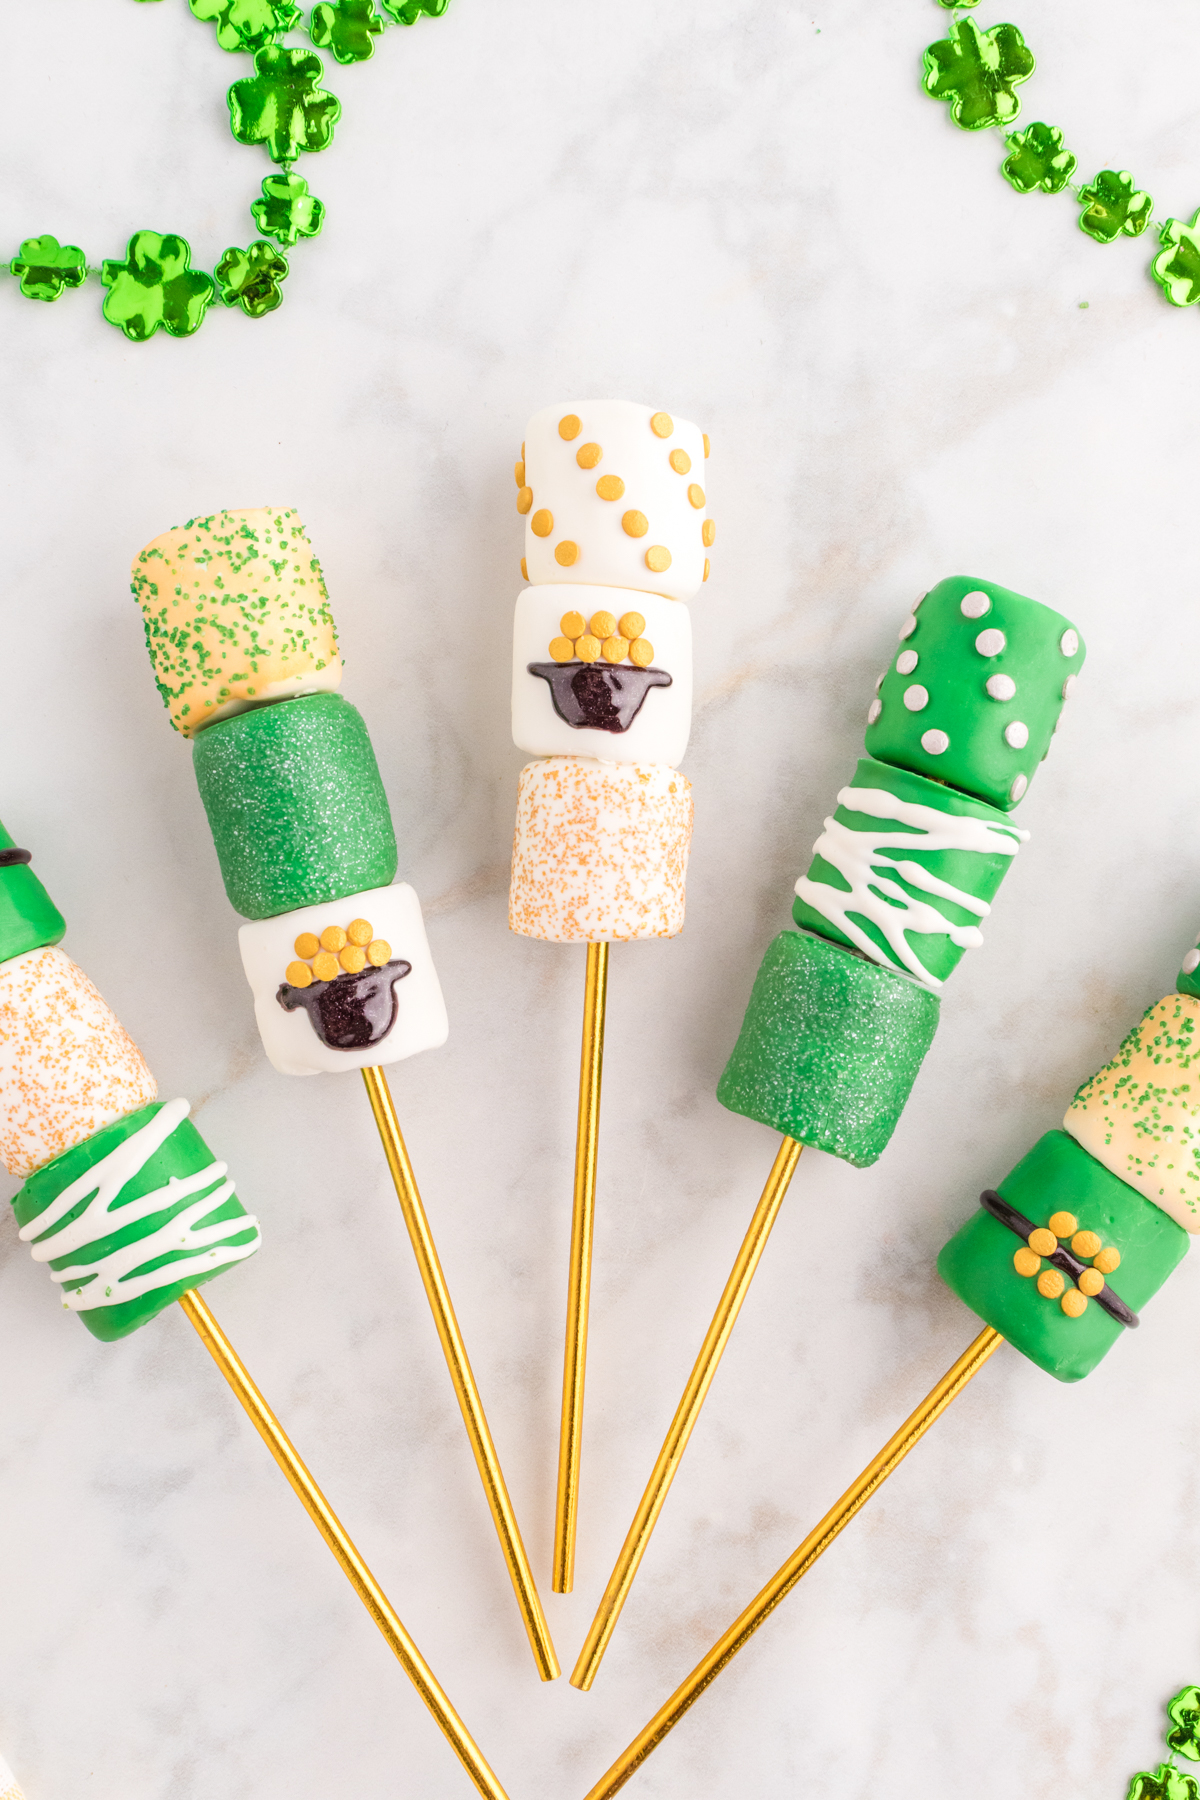
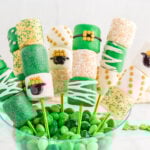
I did six different designs on my marshmallows – diagonal sprinkles, coated in sanding sugar, gold colored, white drizzled, leprechaun buckles, and pots of gold.
The first is the simplest and that was just adding confetti sprinkles in diagonal lines. I used baking tweezers to add them on carefully without touching the candy melt with my hands. You could also just use your fingers but I found the baking tweezers were much easier to use.
I did gold on the white and silver on the green marshmallows.
The second was just sprinkling sanding sugar on top of the candy melts to give it a nice sheen and sparkle. You can see how those turned out in the picture below. I did gold on the white and silver on the green.
For the third design, I first dipped the marshmallow in white candy melts then sprayed with gold edible food coloring (to get gold marshmallows) and decorated those in green sanding sugar. You can totally skip this if you want, I just liked the idea of having gold marshmallows too!
For the fourth design, I simply drizzled white candy melts on top of a green dipped marshmallow. You could do this same thing with green on white as well, I just liked the look of the light on the dark better.
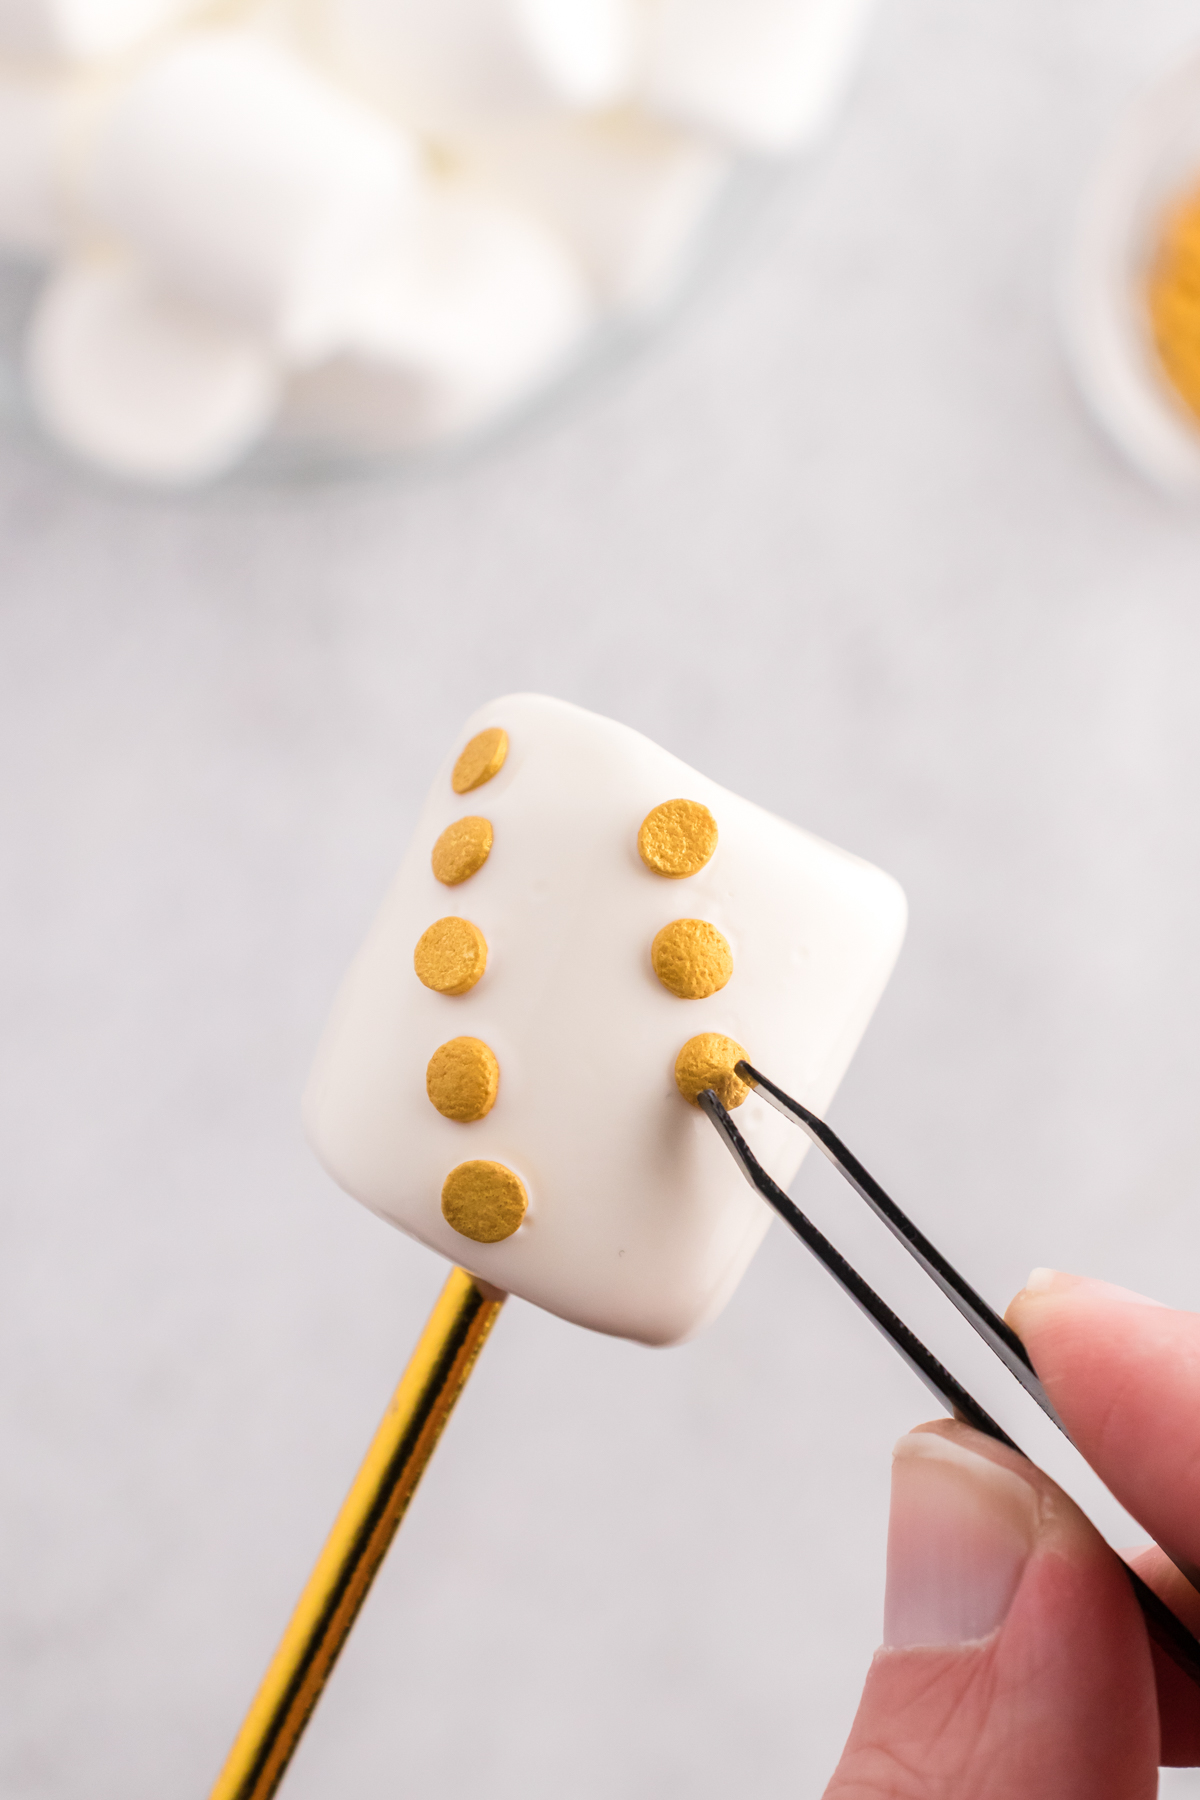
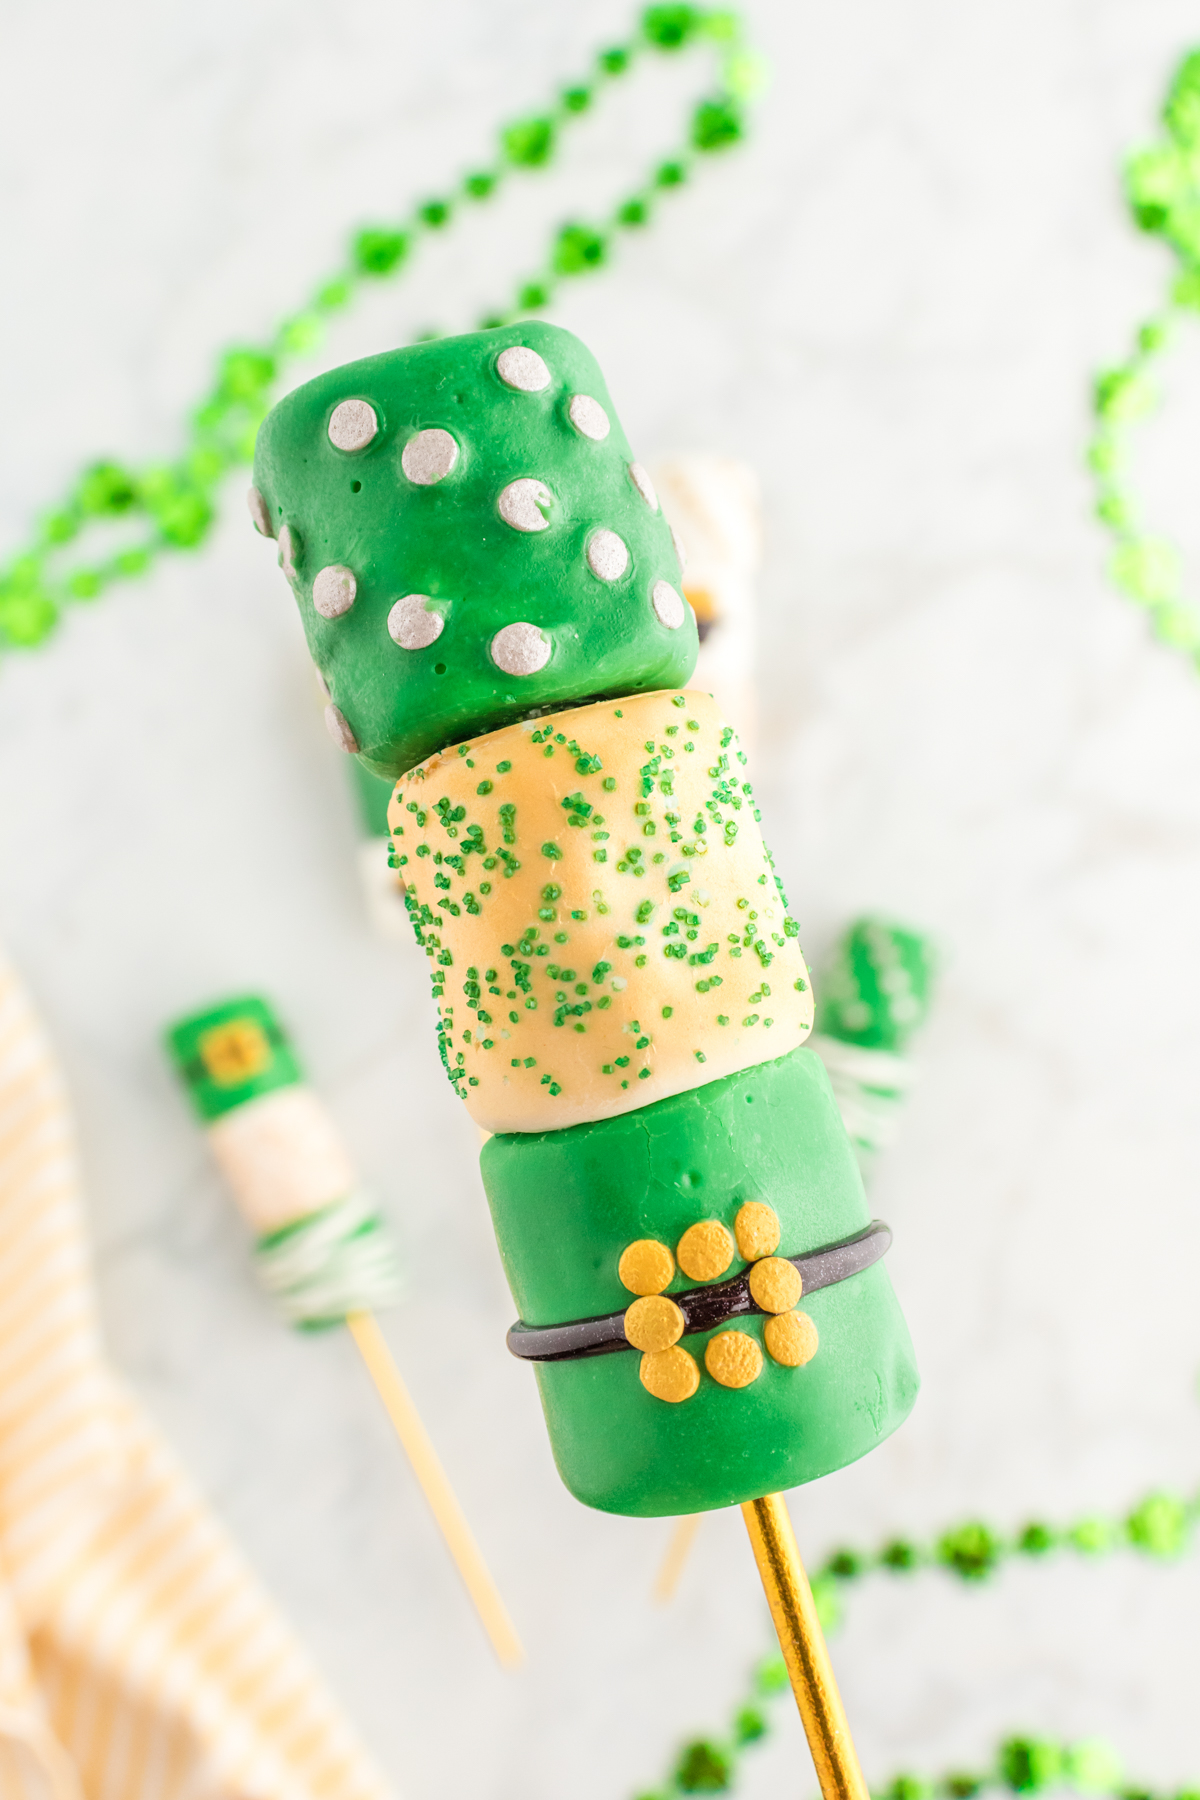
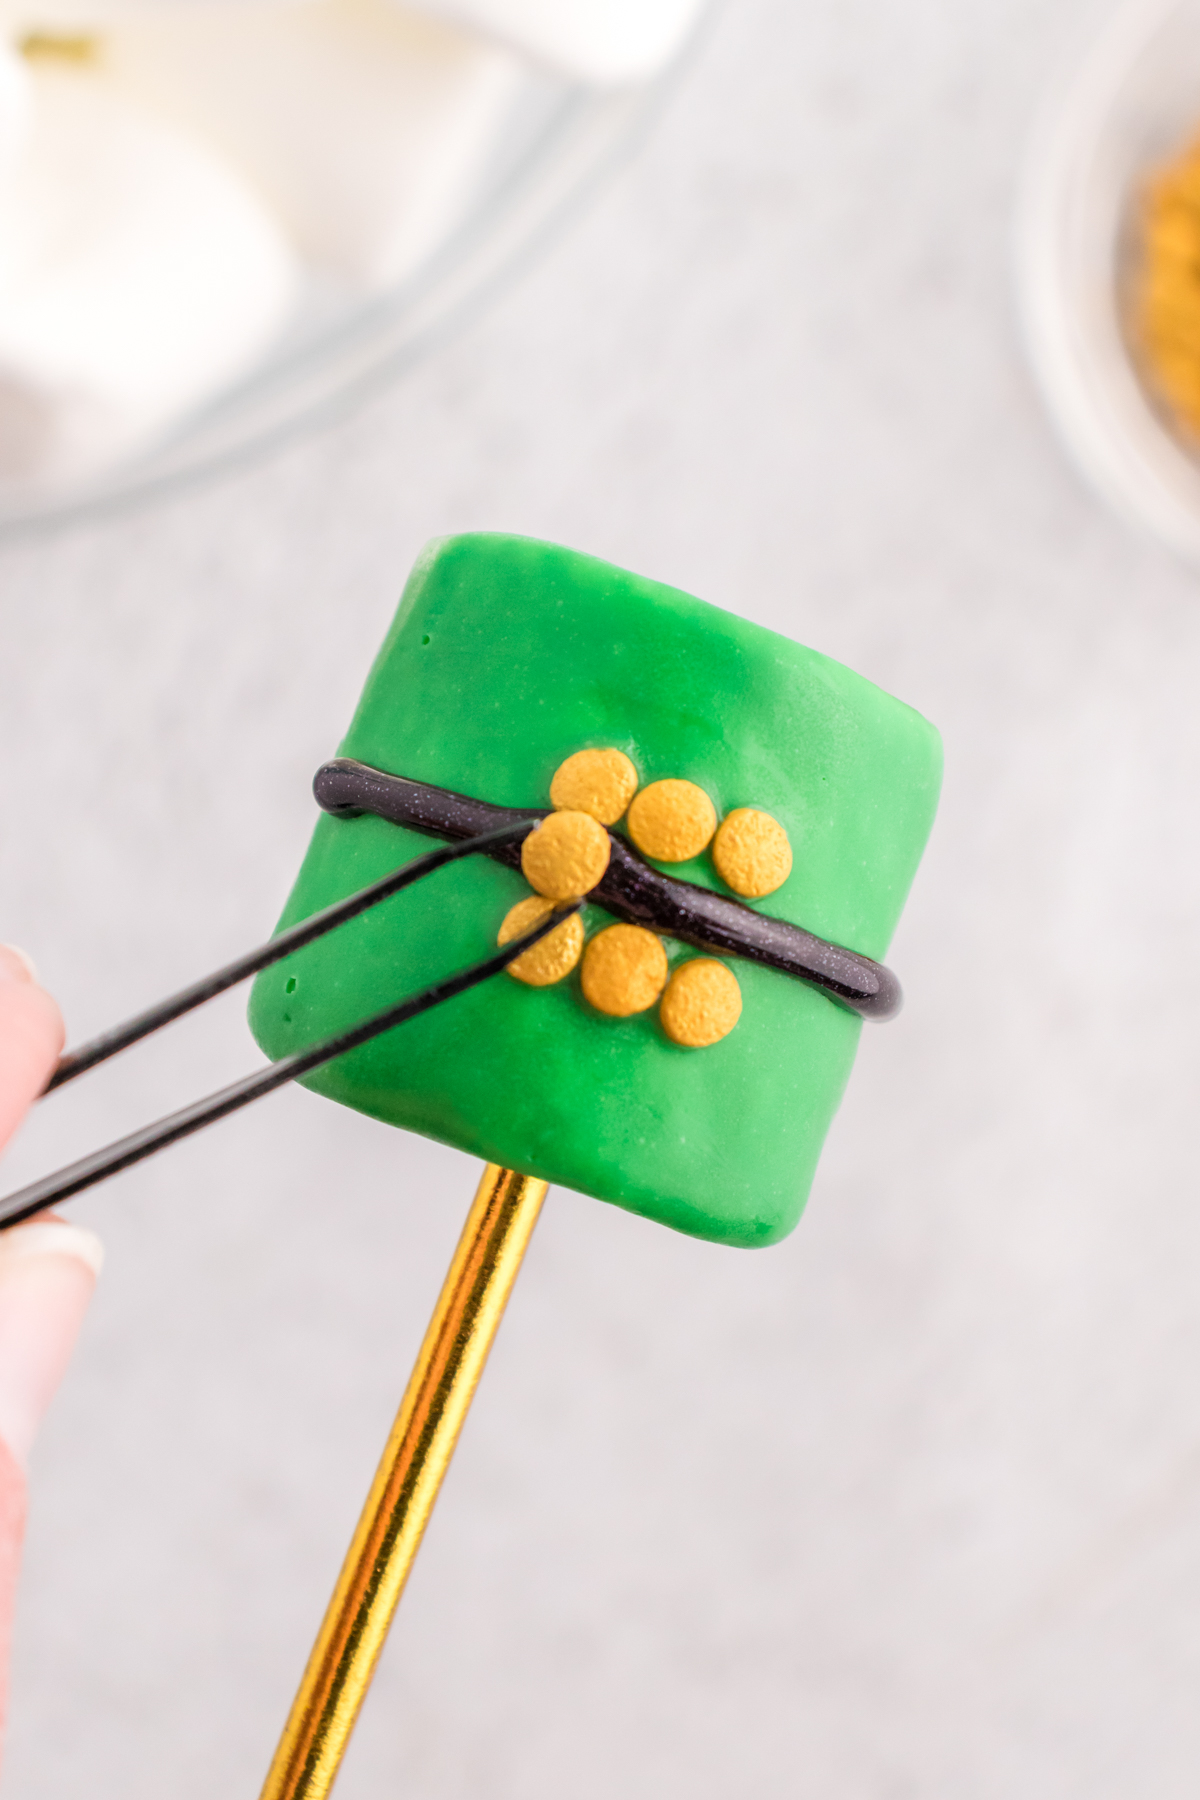
The fifth design was a little more work but still easy to do – just added a strip of the black glitter gel all the way around a green marshmallow and eight gold confetti sprinkles to give the appearance of a leprechaun’s belt buckle. I only did a couple of these because they’re definitely more work, but they’re so cute!
To do this, I recommend adding the top and bottom row of confetti sprinkles while the candy melt is still wet. Then once it dries, add your black belt around the marshmallow and finish it off by adding the two missing confetti sprinkles on top of the wet gel.
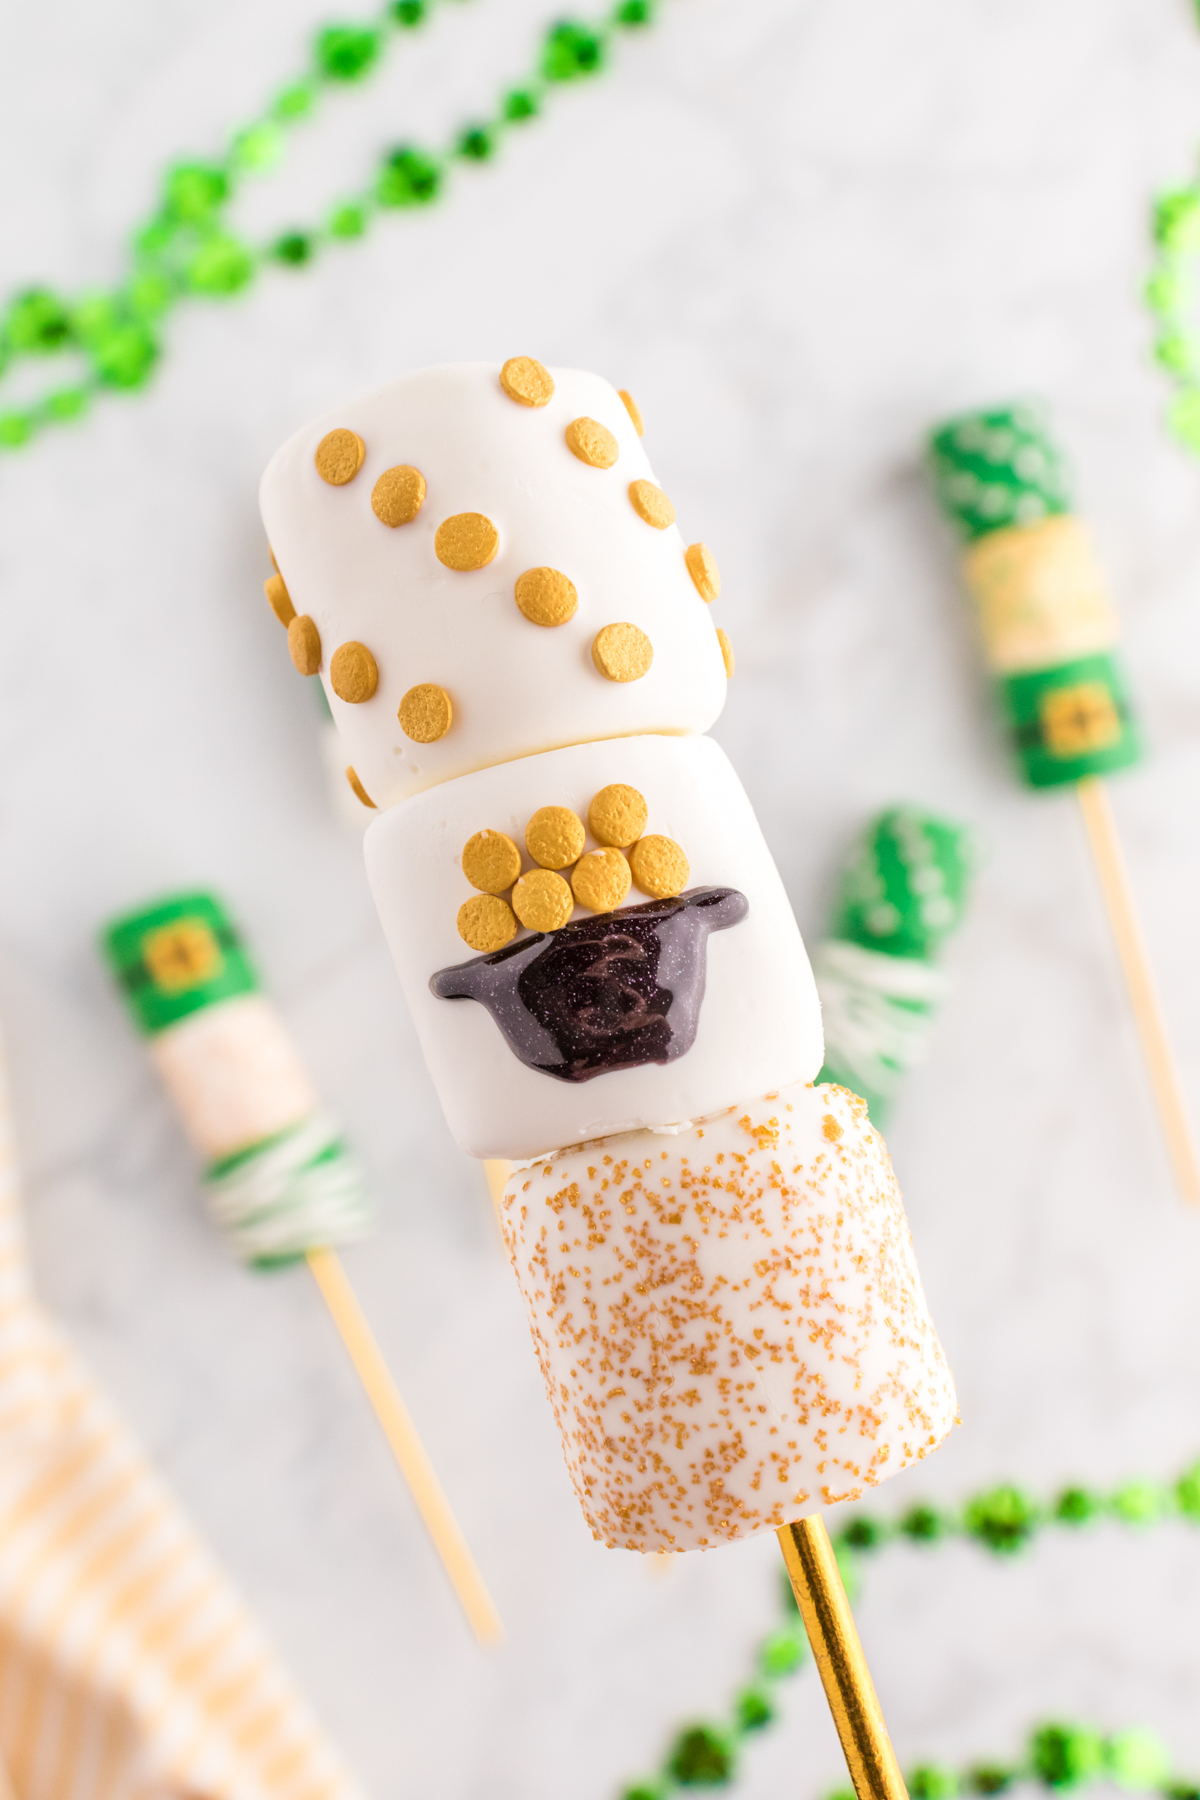
The last design I did was just a hand drawn pot pot with the black gel with confetti gold coins. Just like with the leprechaun’s belt, add the confetti coins first while the candy melt is still wet and then add the black gel after it’s dry.
3 – Let the marshmallows dry
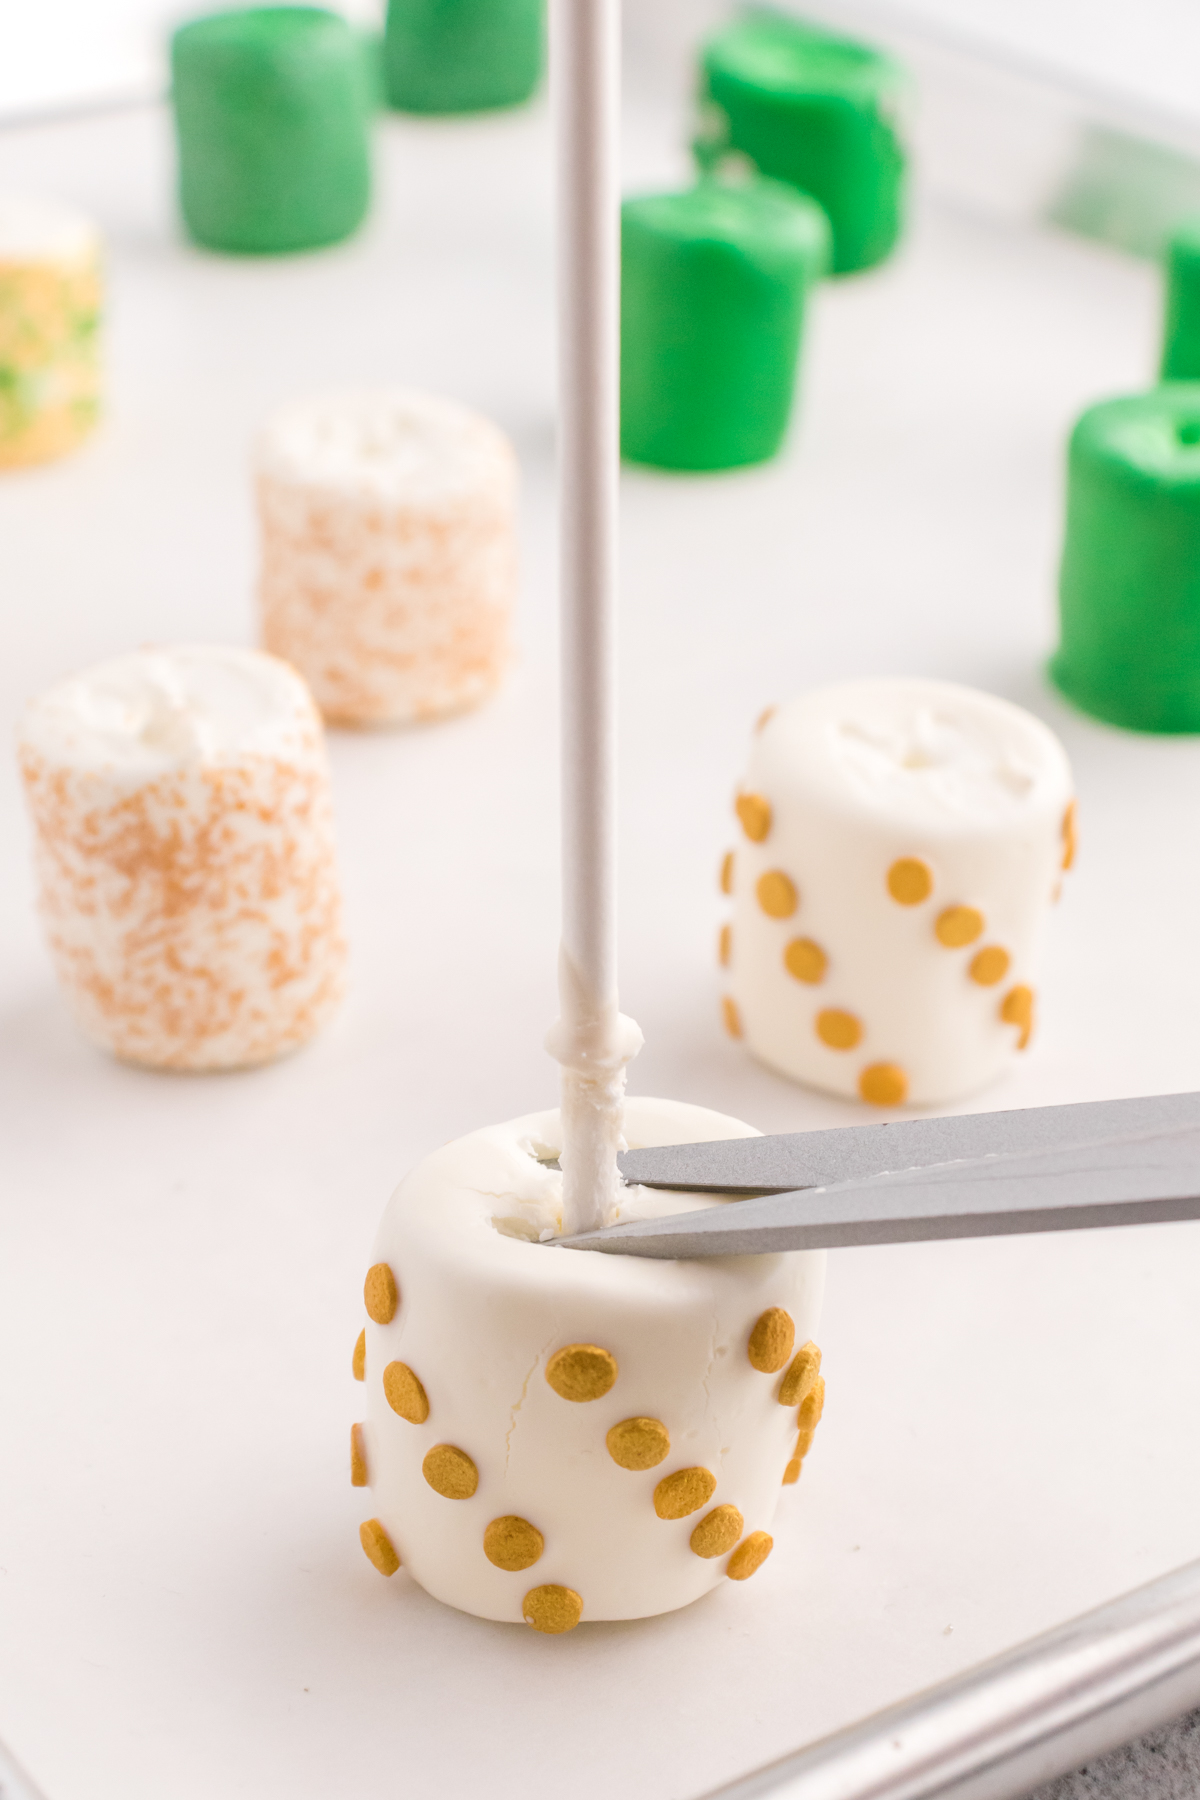
As you finish dipping and decorating each marshmallow, gently push it off the stick onto the parchment paper, hole facing up to dry.
A clean pair of scissors works well to push the marshmallow off the stick. If you want the marshmallows to have a smooth top then push the stick with the marshmallow still on it into the styrofoam block to dry.
Let the marshmallows dry until the candy coating on the outside is hard to the touch.
4 – Add the Sticks
After all marshmallows are completely dried, push three different marshmallows onto each stick. I like to mix up the green, white, and gold marshmallows to give it a nice complete look!
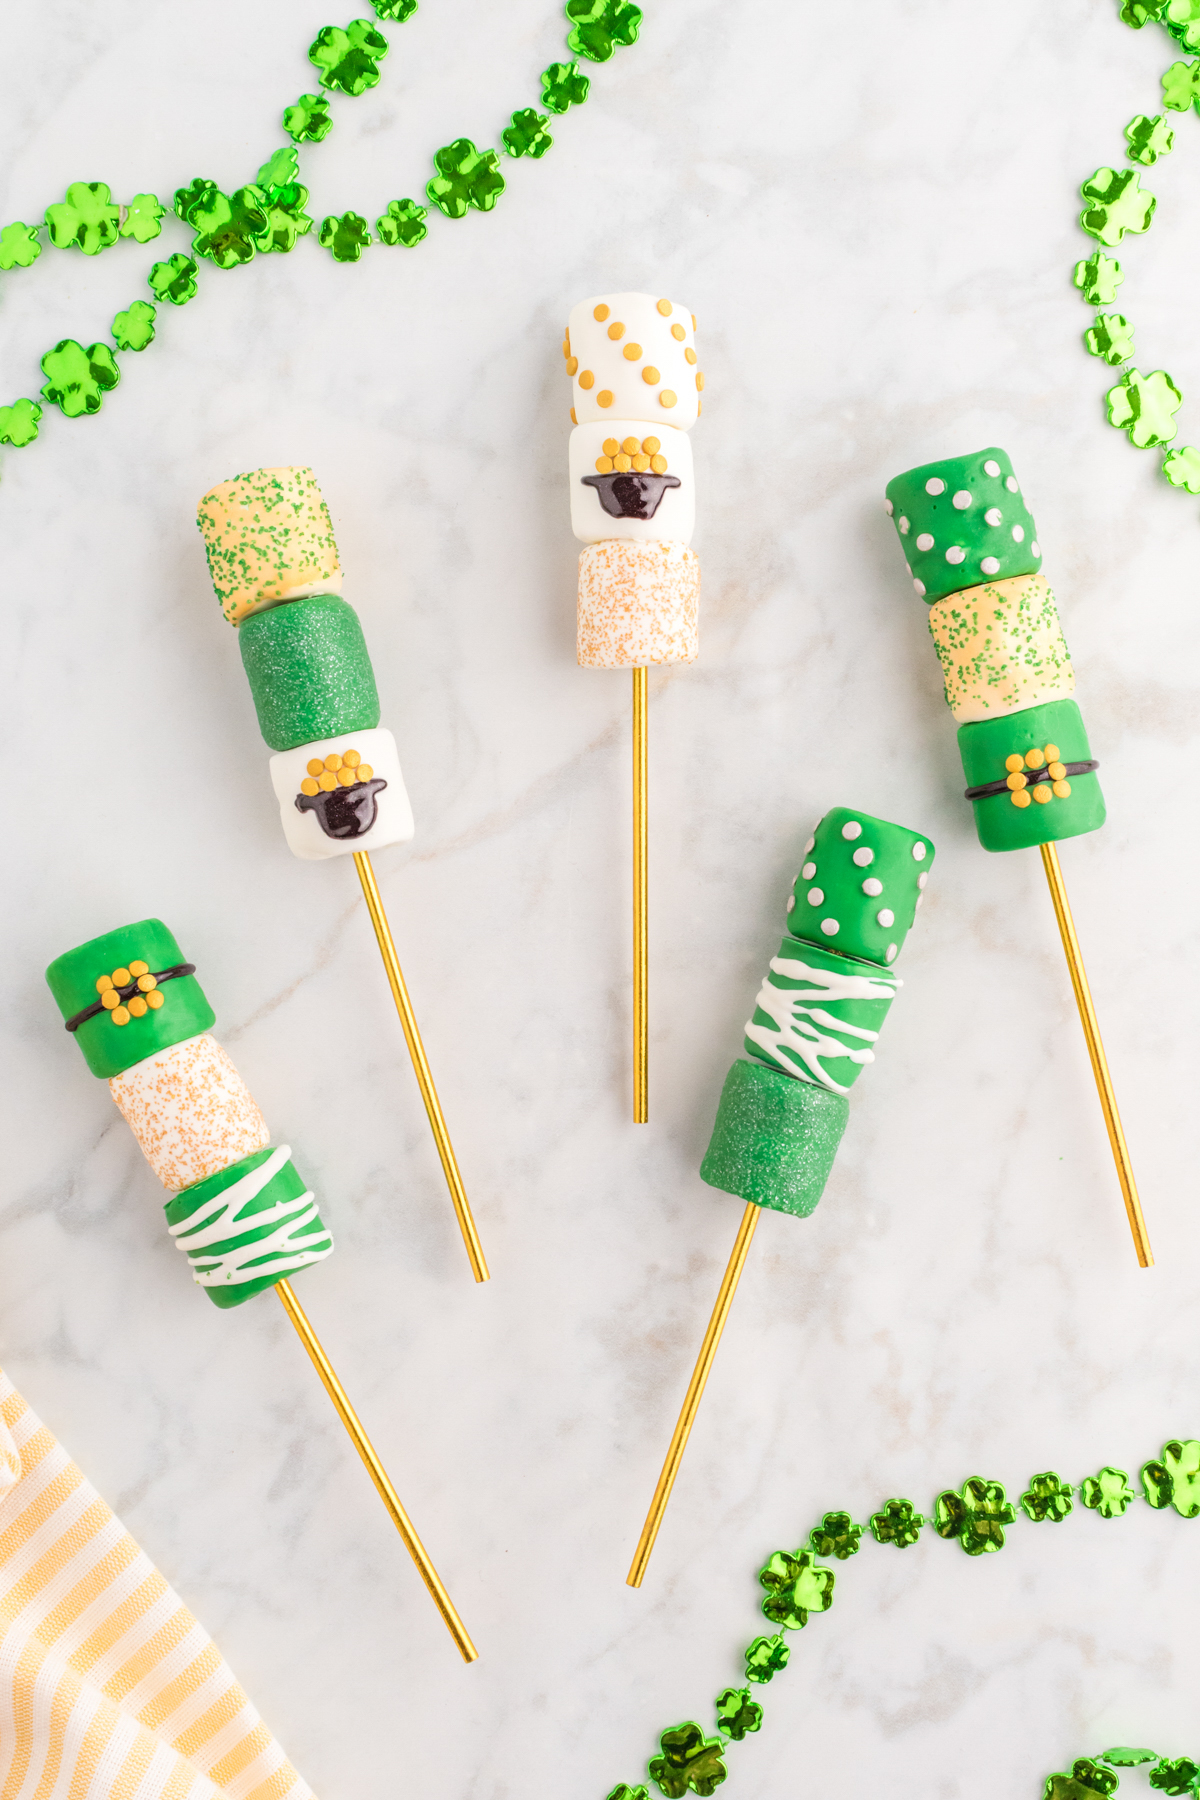
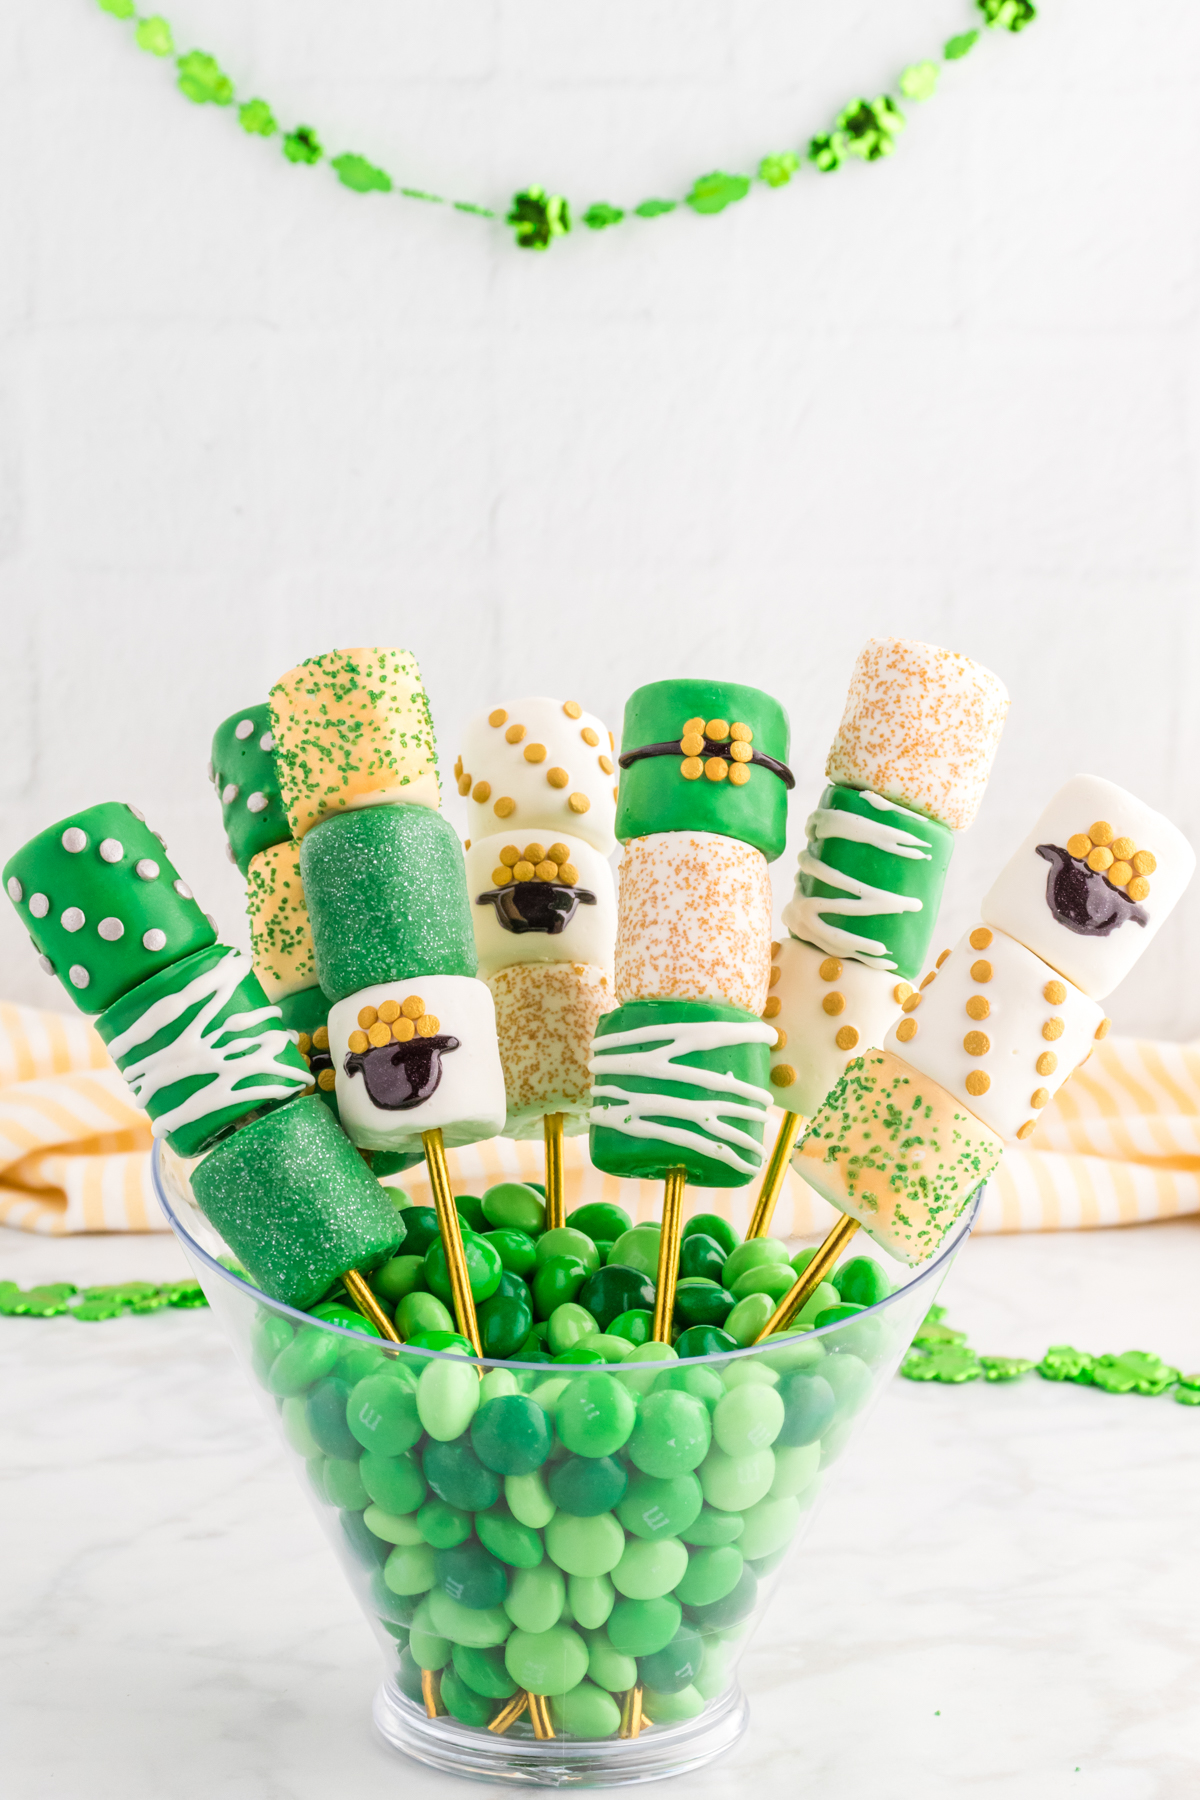
Place the marshmallow sticks in a vase filled with St. Patrick’s Day candy, a styrofoam base, or even a cake pop holder to serve! Or you could even wrap them up individually to give out to people as party favors!
Or put them out as a table centerpiece that people can crave while they enjoy a little Instant Pot Corned Beef and Cabbage!
Expert Tips
Store in an airtight container at room temperature for up to one week.
Mix 1 tsp of coconut oil into the candy melts if they are too thick for dipping.
Use plain white sticks for dipping then put them on pretty sticks for serving. The dipping sticks can get pretty messy so you may not want to use them for actual serving.
Select marshmallows that are similar in size and shape to make your marshmallow pops nice and consistent for better looking marshmallow pops!
Melt the candy melts in a deep cup with a wide mouth for easy dipping.
Put the marshmallows in the refrigerator for 10 minutes to speed up the drying process. Just don’t leave them in there too long or the marshmallows themselves will get hard.
Choose lollipop sticks that are long enough to fit 3 marshmallows and still have a handle.
Rest the stick on the edge of the bowl (parallel to the bowl) and shake back and forth until the excess candy melt comes off and your marshmallows are smooth.
Don’t push the stick all the way through the top marshmallow when you’re putting it on so that you have a nice clean top.
Recipe FAQs
Can I use something else other than candy melts?
If you can’t find candy melts, you can use white chocolate chips in place of the white candy melts and white chocolate chips plus green food coloring in place of the green candy melts. Just make sure to give them ample time to dry as chocolate chips tend to not dry as quickly.
What if my candy melts are too thick?
If your candy melts are too thick to dip the marshmallows, you can add either a teaspoon of vegetable shortening or coconut oil to the mixture. This will thin out the candy melts and can also add a nice sheen to your coating.
More Easy St. Patrick’s Day Recipes
If you’re looking for fun St. Patrick’s Day treats, you’re in the right place! You’ll love these other St. Patrick’s Day sweets!
- Rainbow donuts – donuts in all colors of the rainbows are a great way to start out your St. Patrick’s Day!
- Pot of gold cupcakes – these fun cupcakes have a rainbow frosting and a golden surprise inside!
- Mint hot chocolate bombs – hot chocolate bombs full of mint, Lucky Charms marshmallows, and all sorts of fun St. Patrick’s Day surprises!
- Andes mint cookies – chocolate cookies stuffed full of Andes Mints – easy to make and delicious!
- Homemade limeade – add a little green food coloring to this drink for a really fun St. Patrick’s Day treat that’s green!
St. Patrick’s Day Marshmallow Pops
Ingredients
- 24 regular size marshmallows
- 12 ounces green candy melts
- 12 ounces white candy melts
- gold confetti sprinkles
- silver confetti sprinkles
- gold, silver, and green sanding sugar
- black food sparkle gel
Instructions
- Line a baking sheet with parchment paper and set it aside for later.
- In a microwave-safe bowl, Melt 1 – 1 1/2 cups of green candy melts in the microwave for 30 seconds, stir and repeat until fully melted and smooth.12 ounces green candy melts
- Place one marshmallow on a stick and then dip it into the melted candy at a 45°angle. Turn the stick slowly until the marshmallow is completely covered.24 regular size marshmallows
- Before the candy melts harden, add confetti sprinkles in diagonal lines, green or silver sanding sugar, or a leprechaun belt to 9 marshmallows.gold, silver, and green sanding sugar, gold confetti sprinkles
- For the belt and buckle, add 3 gold confetti sprinkles on top and bottom of where black belt line would be while candy is wet. Once dry, draw the black belt line and add the remaining 2 gold sprinkles to complete.black food sparkle gel, silver confetti sprinkles
- As you finish dipping and decorating each marshmallow, gently push it off the stick onto the parchment paper, hole facing up, to dry. A clean pair of scissors works well to push the marshmallow off the stick. For a smooth top then push the stick with the marshmallow still on it into the Styrofoam block to dry.
- Melt white candy melts as directed above. Once green dipped marshmallows are dry, use a small amount of the white to drizzle over the remaining three green dipped marshmallows.12 ounces white candy melts
- Dip remaining marshmallows in the white candy melts and decorate with gold confetti sprinkles, green or gold sanding sugar or a Pot of Gold.gold confetti sprinkles, gold, silver, and green sanding sugar
- To make the Pot of Gold, wait until candy melts are hardened then use black food gel to create the pot and to stick the gold confetti sprinkles to the marshmallow to make the gold in the pot.black food sparkle gel
- After all marshmallows are completely dried, push three different marshmallows onto each gold stick and serve!


Leave a Reply