
Make your very own Halloween dessert board for a party or movie night with this simple DIY dessert charcuterie tutorial! It’s perfect for serving a lot of treats in a festive way!

Want to save this recipe?
Enter your email below and we’ll send this idea straight to your inbox (plus you’ll receive fun weekly ideas from us too!)
One of my favorite things about movie night is the snacks and just like at a buffet, I love being able to sample a bunch of different snacks rather than just finish off a bucket of popcorn.
Last year for Halloween I made this super fun Halloween dessert board, and it’s one of my favorite charcuterie boards I’ve ever made – and I’ve made a lot including a skeleton Halloween charcuterie board and a kid-friendly Halloween snack board!
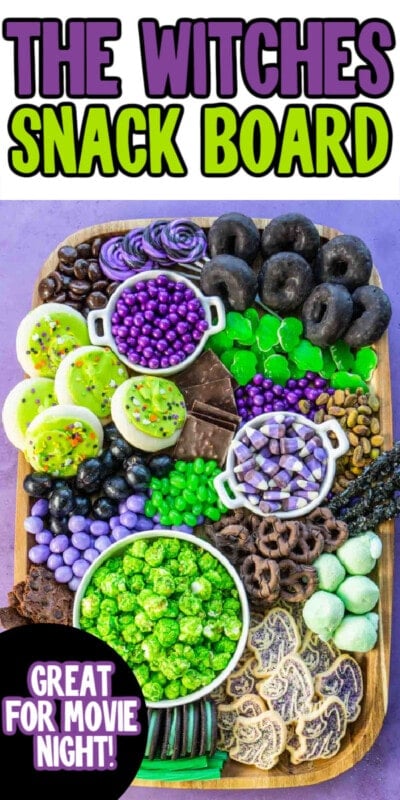
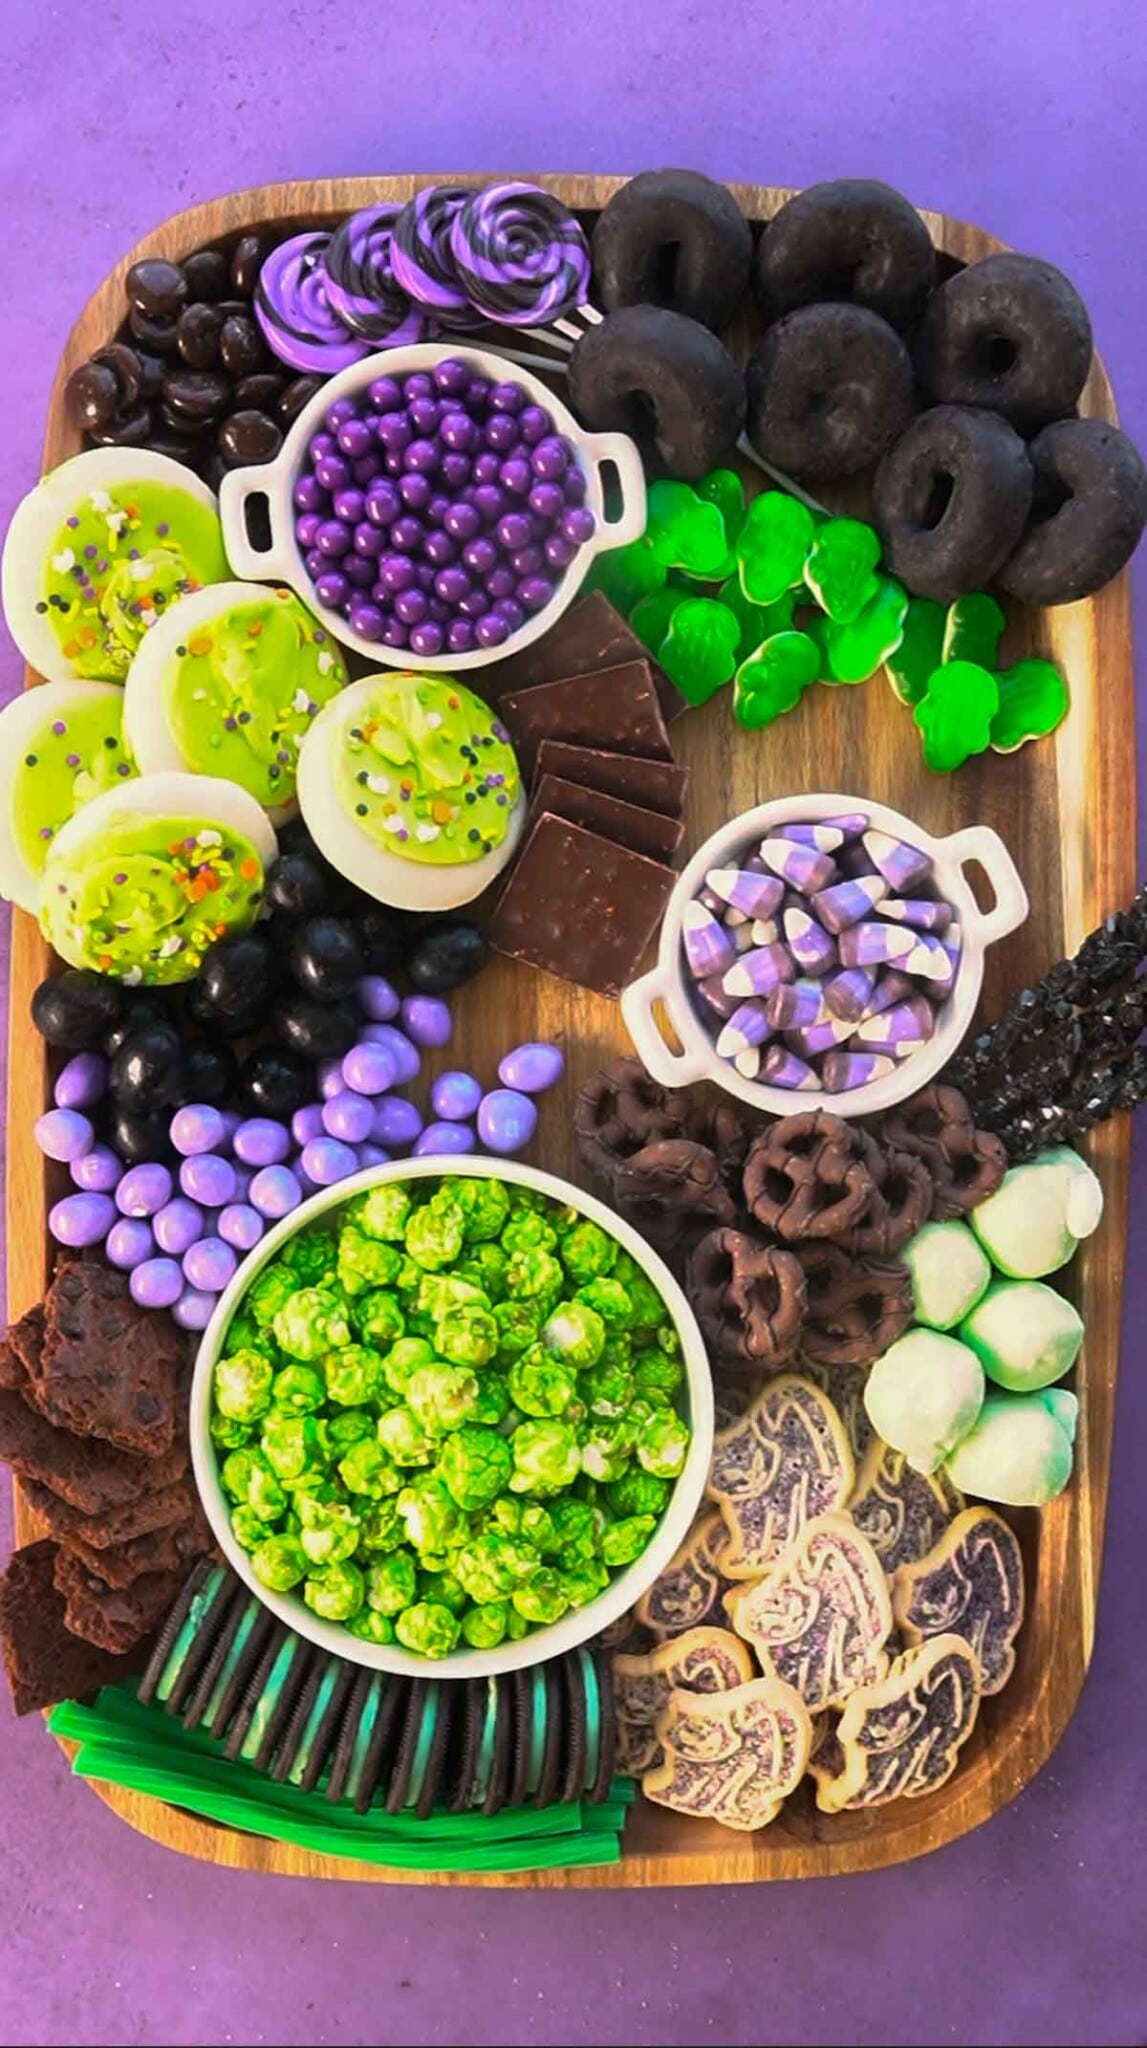
This witch themed Halloween board is perfect for a Halloween party or Halloween movie night – just fill it up with all the best Halloween party snacks and it’s guaranteed to be a hit!

Ingredients in this Halloween Dessert Board
The beauty of creating a dessert board is that you get to choose what goes on it based on a couple of different things:
- Your theme – I went with a witch theme and witchy colors but you could do a dessert board for any of these Halloween party themes!
- Your tastes – Make the board what your family wants to eat for movie night. If you really like having sour candy at the movies, add sour candy to your board. I went with my son’s favorite frosted cookies, donuts, and gummy frogs because I knew they were things he’d actually enjoy!
- Your budget – If you want to keep it inexpensive, make things from scratch rather than buying them at the store. You can also keep things more budget friendly by limiting the number of dessert items on the board. Mix and match homemade (these witch hat cookies would’ve been perfect) to keep things cheaper!
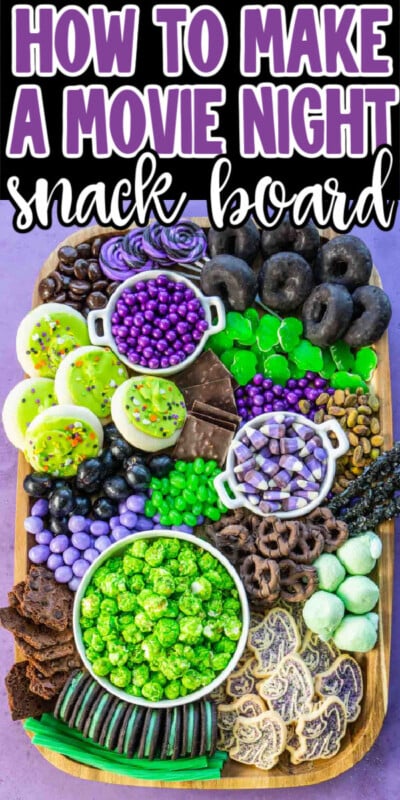
If you want to recreate this actual witch themed Halloween snack board, here’s what I used from top to bottom, left to right.
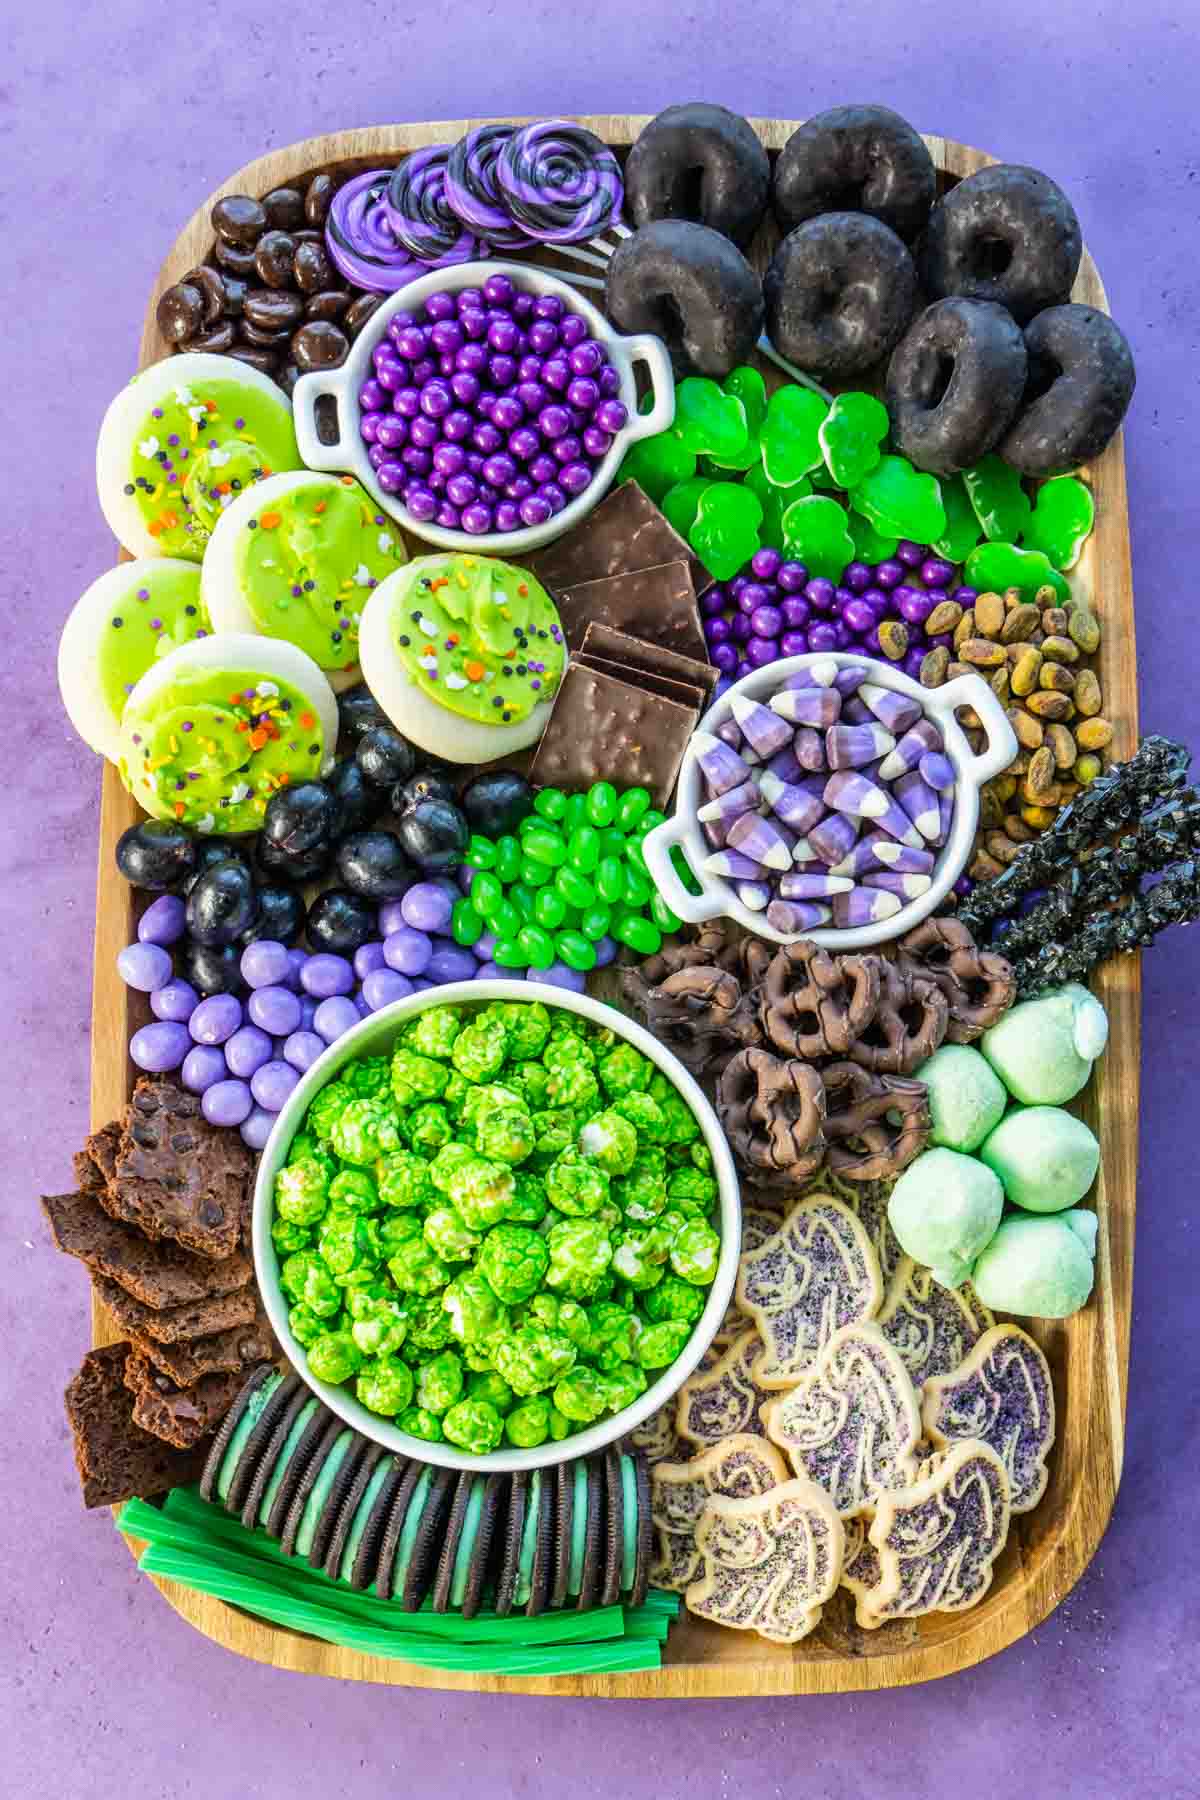
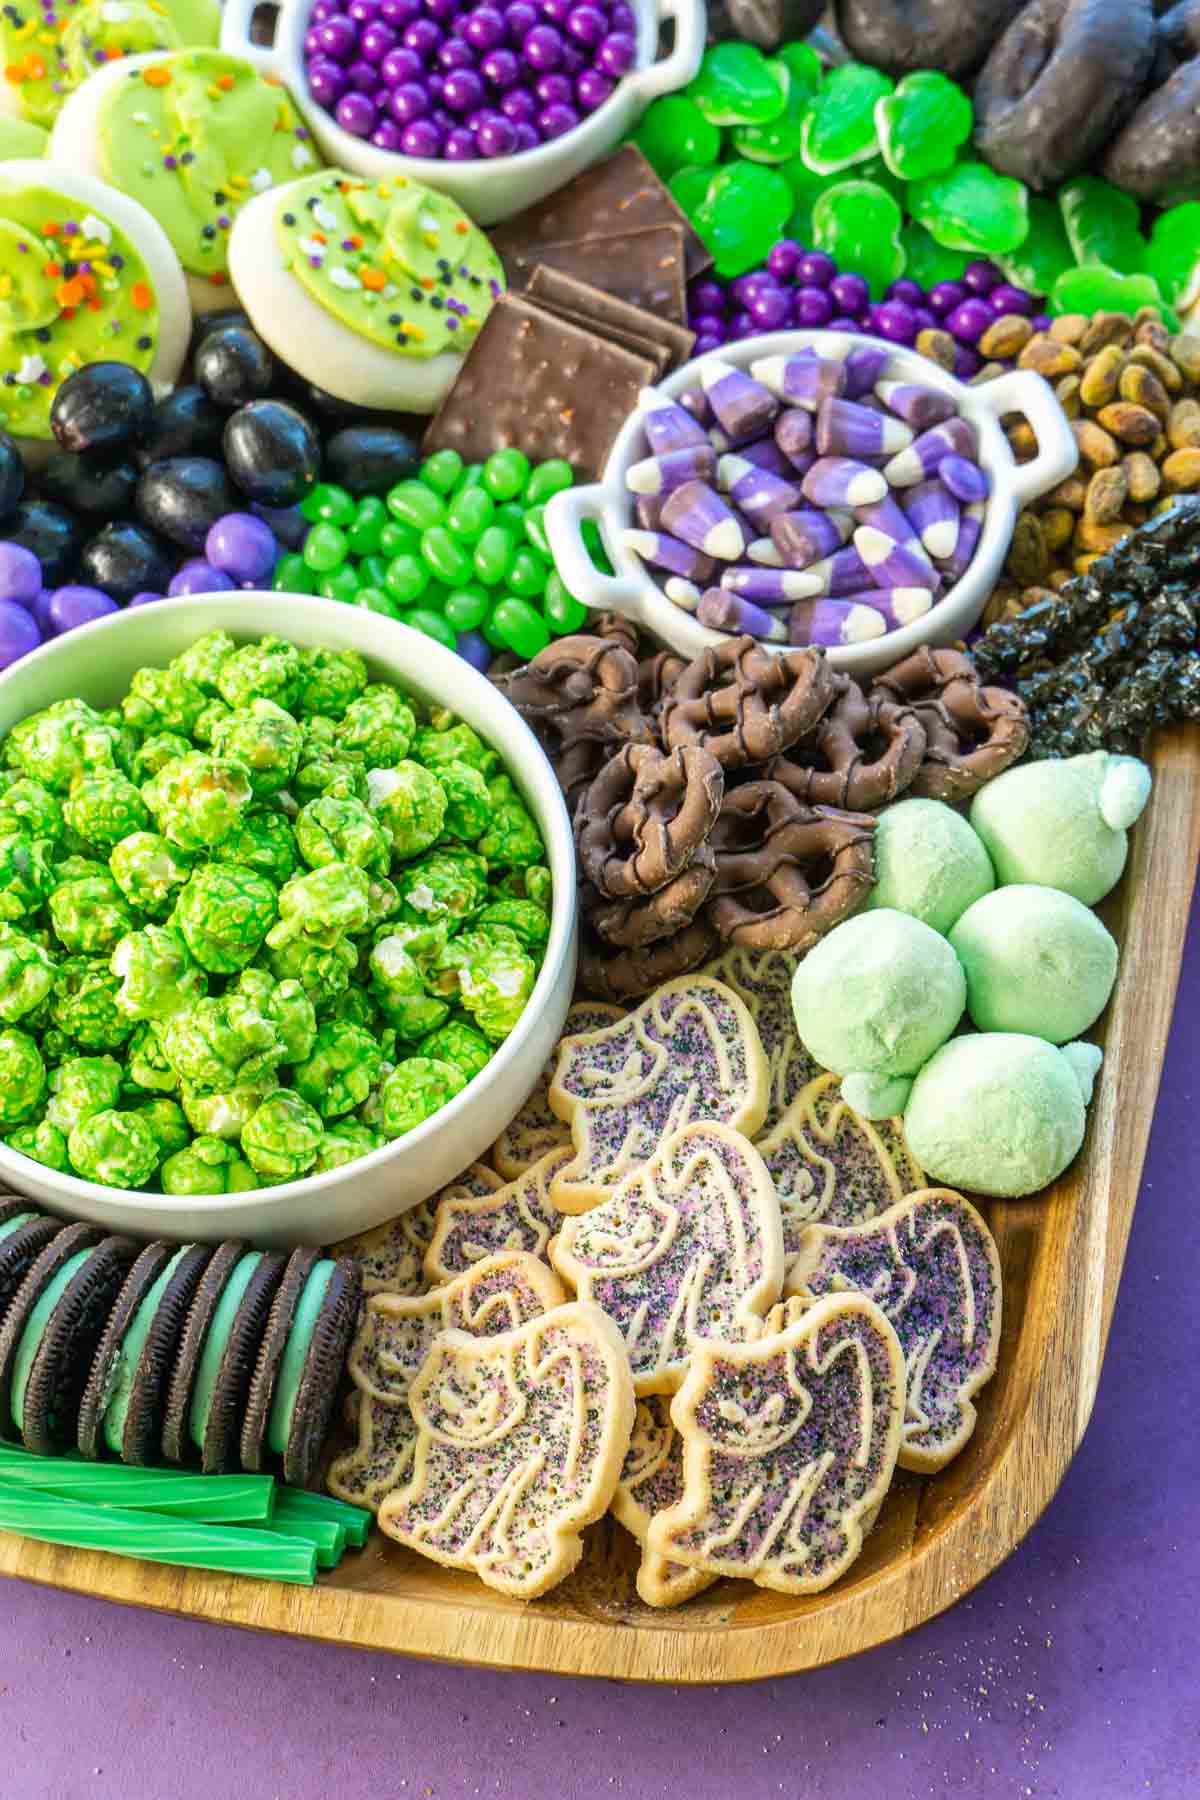
- Mint chocolate candies
- Purple and black lollipops
- Chocolate donuts
- Green frosted cookies
- Purple chocolate balls
- Gummy frogs
- Dark chocolate squares with nuts
- Pistachios
- Black grapes
- Green jelly beans
- Purple candy corn
- Black rock candy
- Purple chocolate candies
- Chocolate covered pretzels
- Green marshmallows
- Green apple popcorn
- Brownie pieces
- Cat sugar cookies
- Mint chocolate sandwich cookies
- Green licorice
What you need to make a dessert board
Okay so I’m going to walk you through how I created this board so that you can recreate it at home!
But before we get to actually adding food to the board, let’s talk about the base supplies you’ll need!
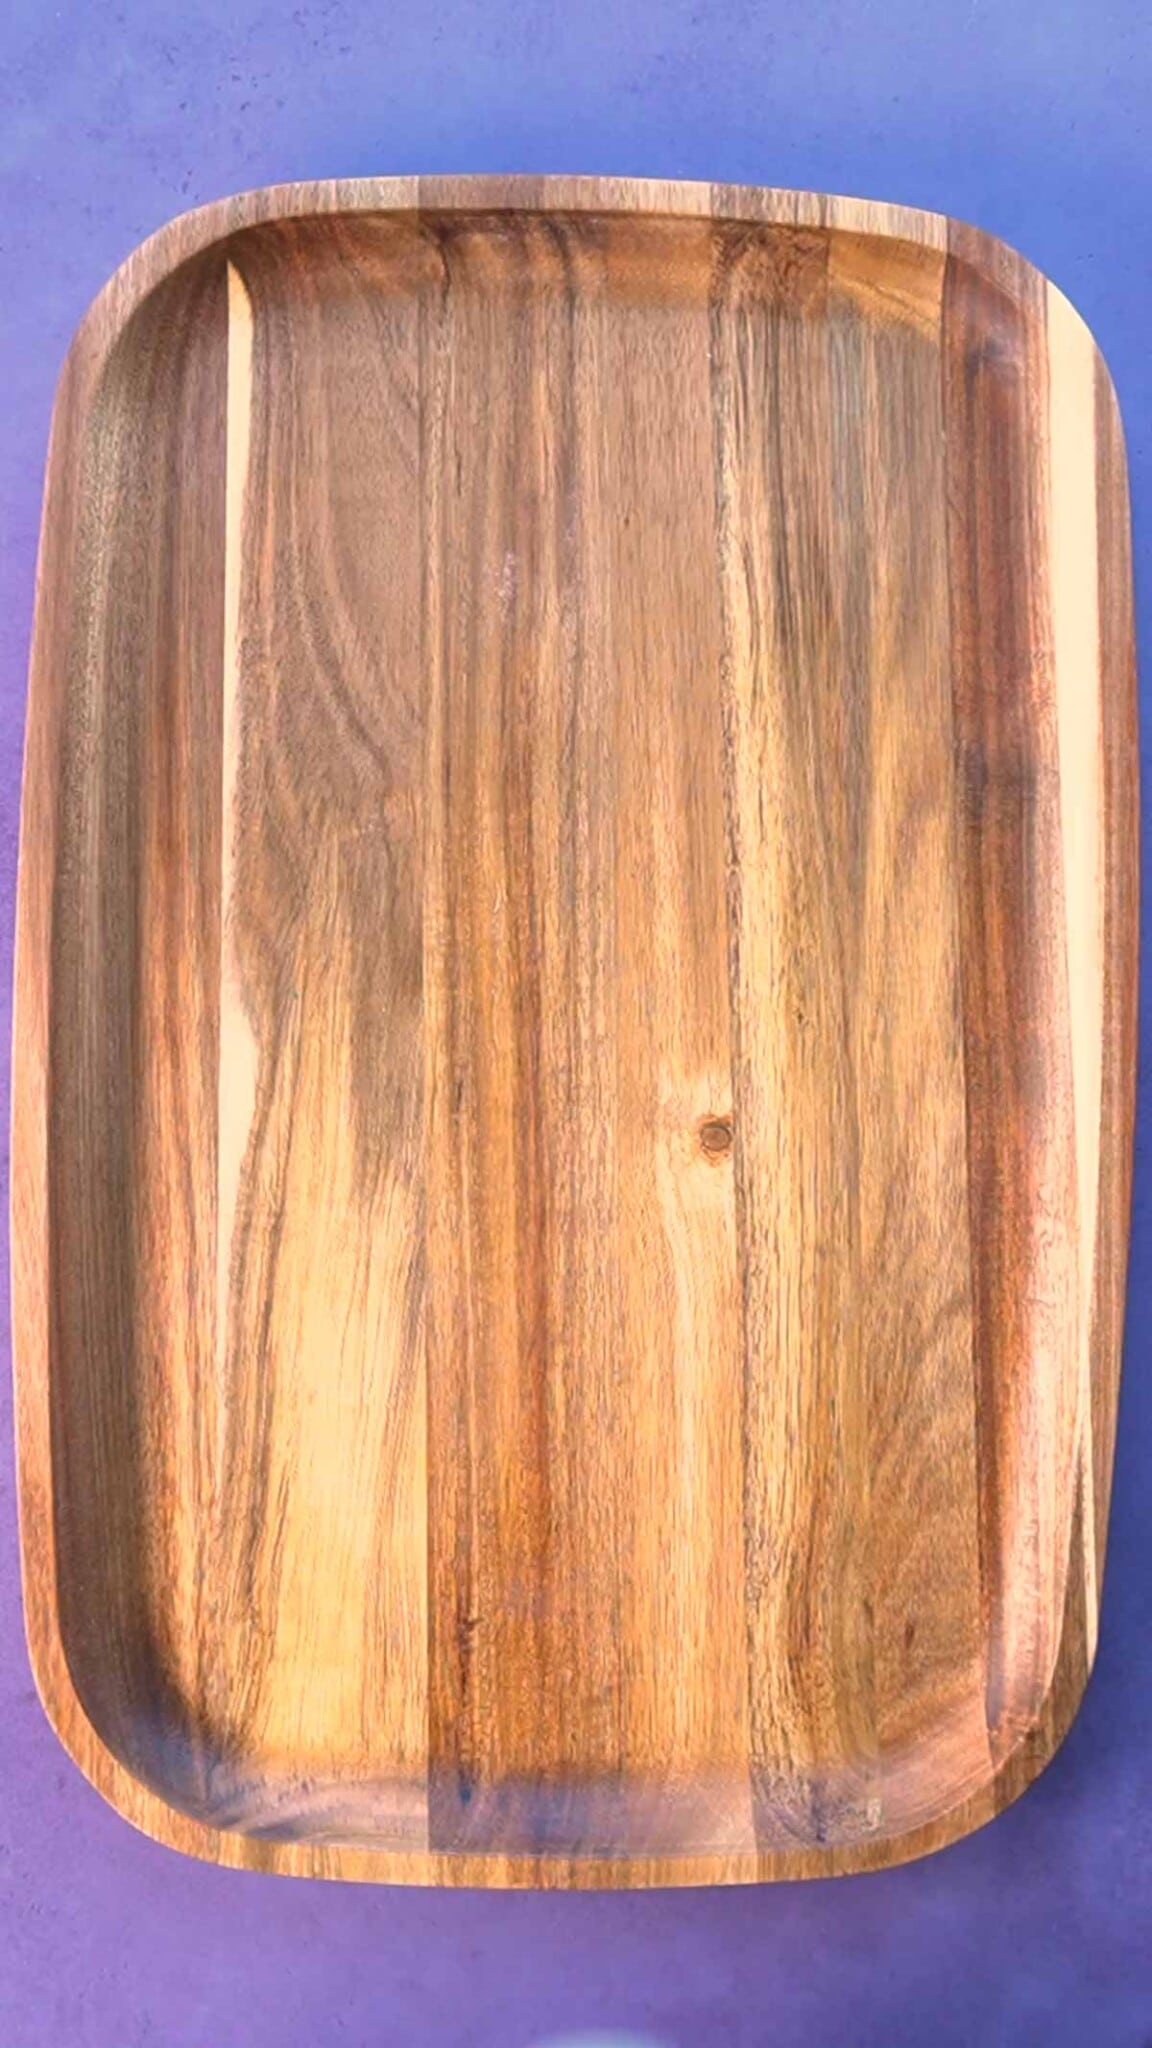
1 – Choose a board
The first thing you need to do is choose your board. I really like to do boards that have a little lip around them so that things (like the chocolate candies) don’t just roll off. It just helps keep things together.
I also prefer a rectangle board over a round one but if you already have round, feel free to use that instead. Use a board that’s big enough for all the snacks you want to include!
2 – Choose your snacks
Next up you want to choose your snacks. I like to try to envision my board a bit before I go shopping, possibly even draw it out, like I do with my party tables.
It makes it easier to put everything together and you’ll have a better sense of how much you want to buy.
One thing to note is that you likely will only be putting a portion of whatever you buy on the actual dessert board. Like this was only 1/4 the box of donuts, 1/2 the box of cookies, and like 1/4 cup of a whole bag of pistachios.
When you’re shopping, keep the tips under ingredients above in mind. Also, try to pick up things of varying size, shape, and texture. It’ll give your board more visual appeal and help to fill in the large space and the small gaps between the large items.
How to make
a Halloween Dessert Board
Now that you have your snacks and board, you’re ready to create your very own dessert board. It’s easier than you think but can take a bit of practice or really just moving things around until you get it how you want.
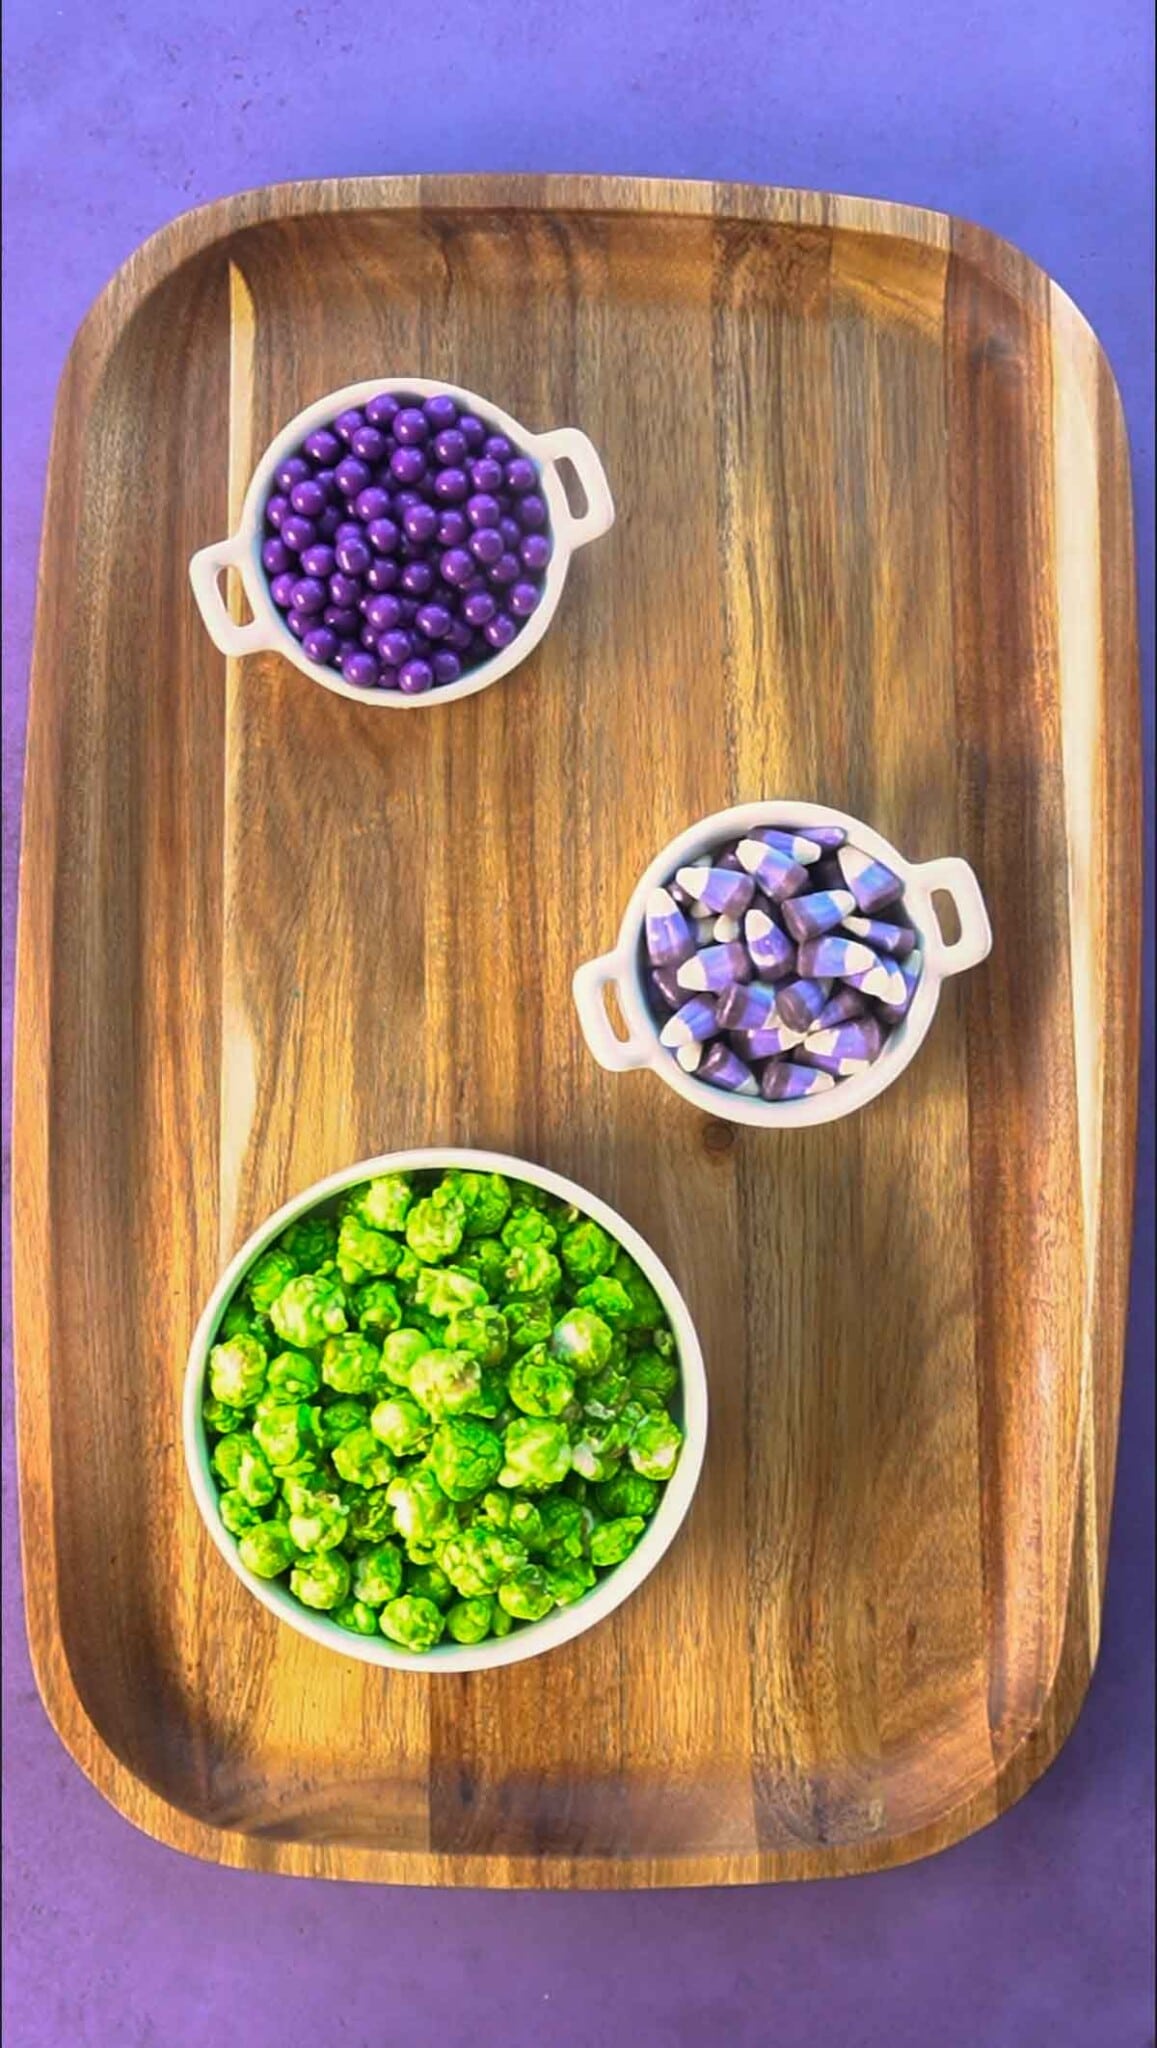
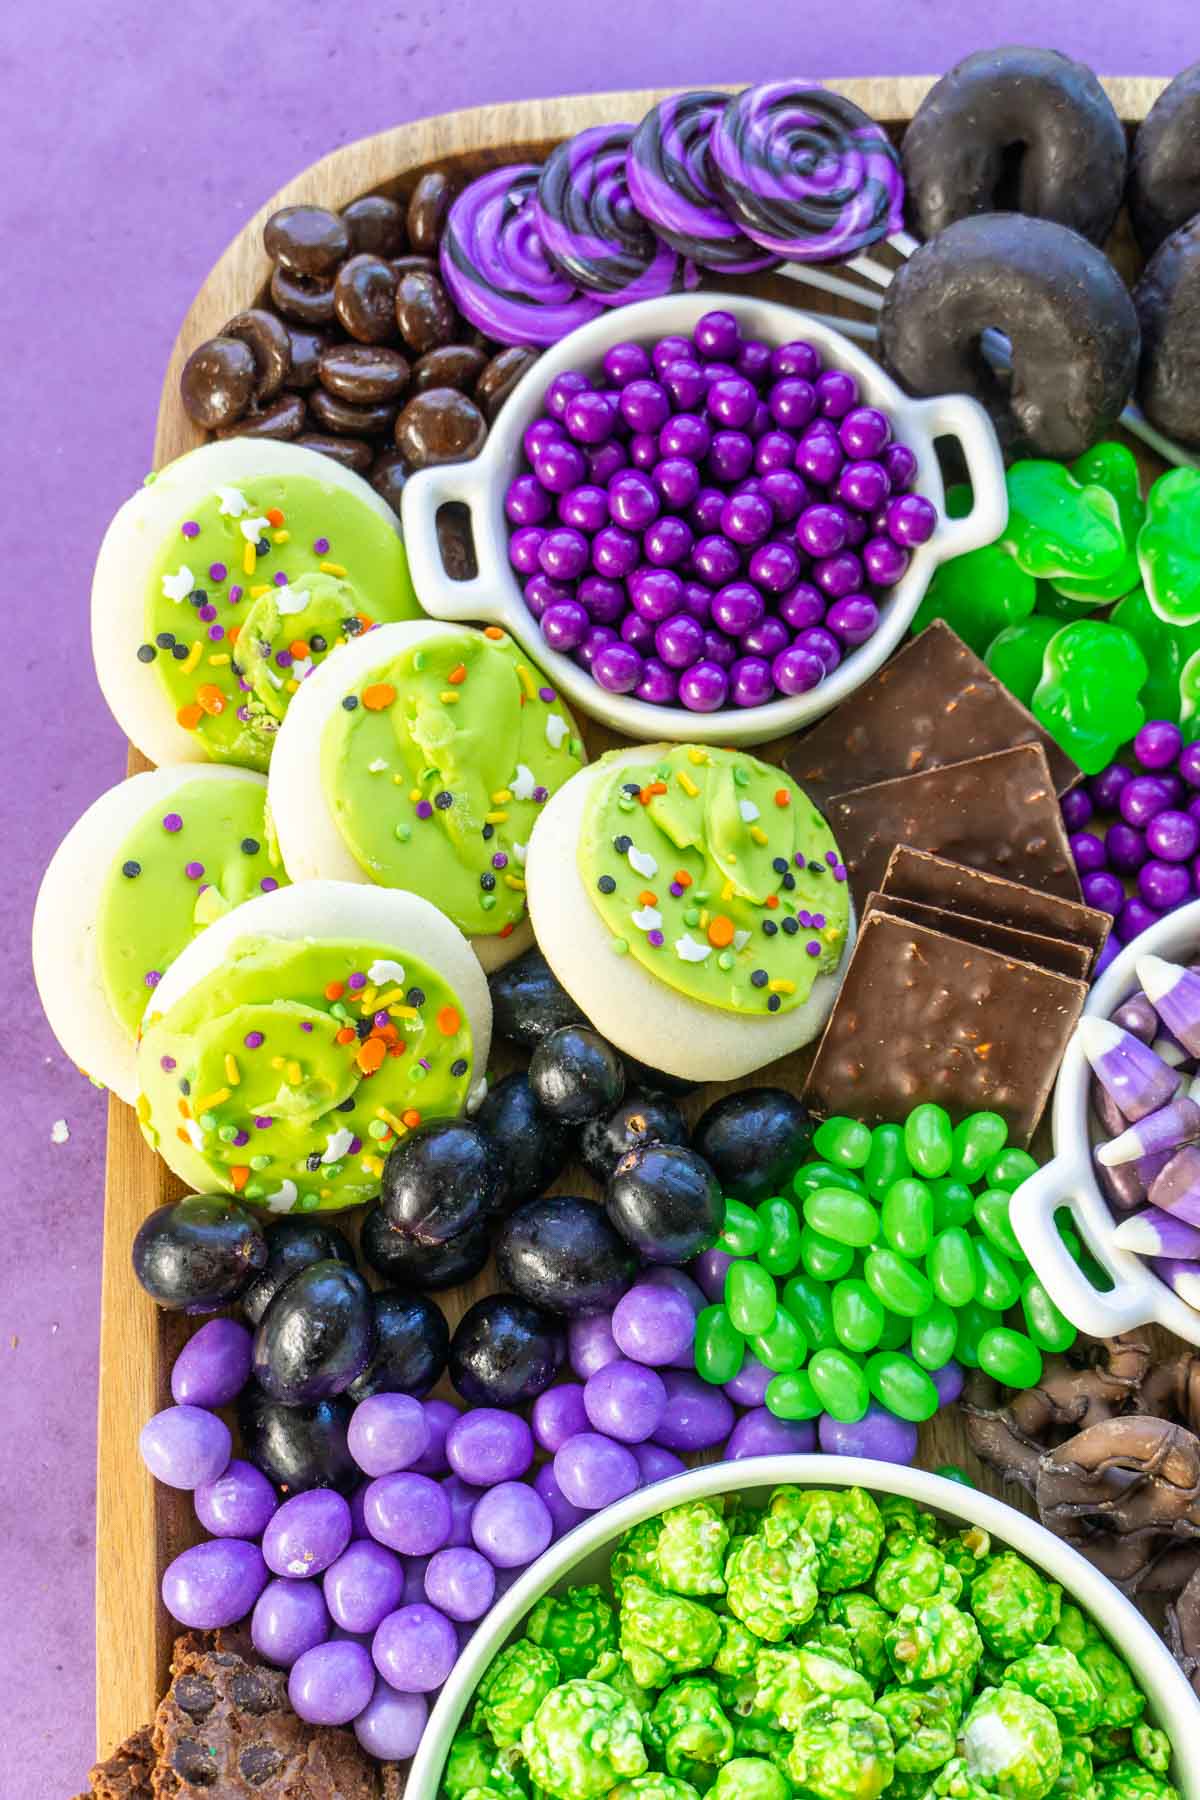
1 – Start with 2-3 bowls
The first thing I like to do is to add 2-3 bowls to different sections of the board. You can either fill these with candies and popcorn like I did or if you’re doing something where dips would make sense – dips are great in the bowls.
Split them up into different sections of your board and use them to anchor the rest of the items on your dessert board. They work well as posts to wrap other things around and also help to create a visual focal point.
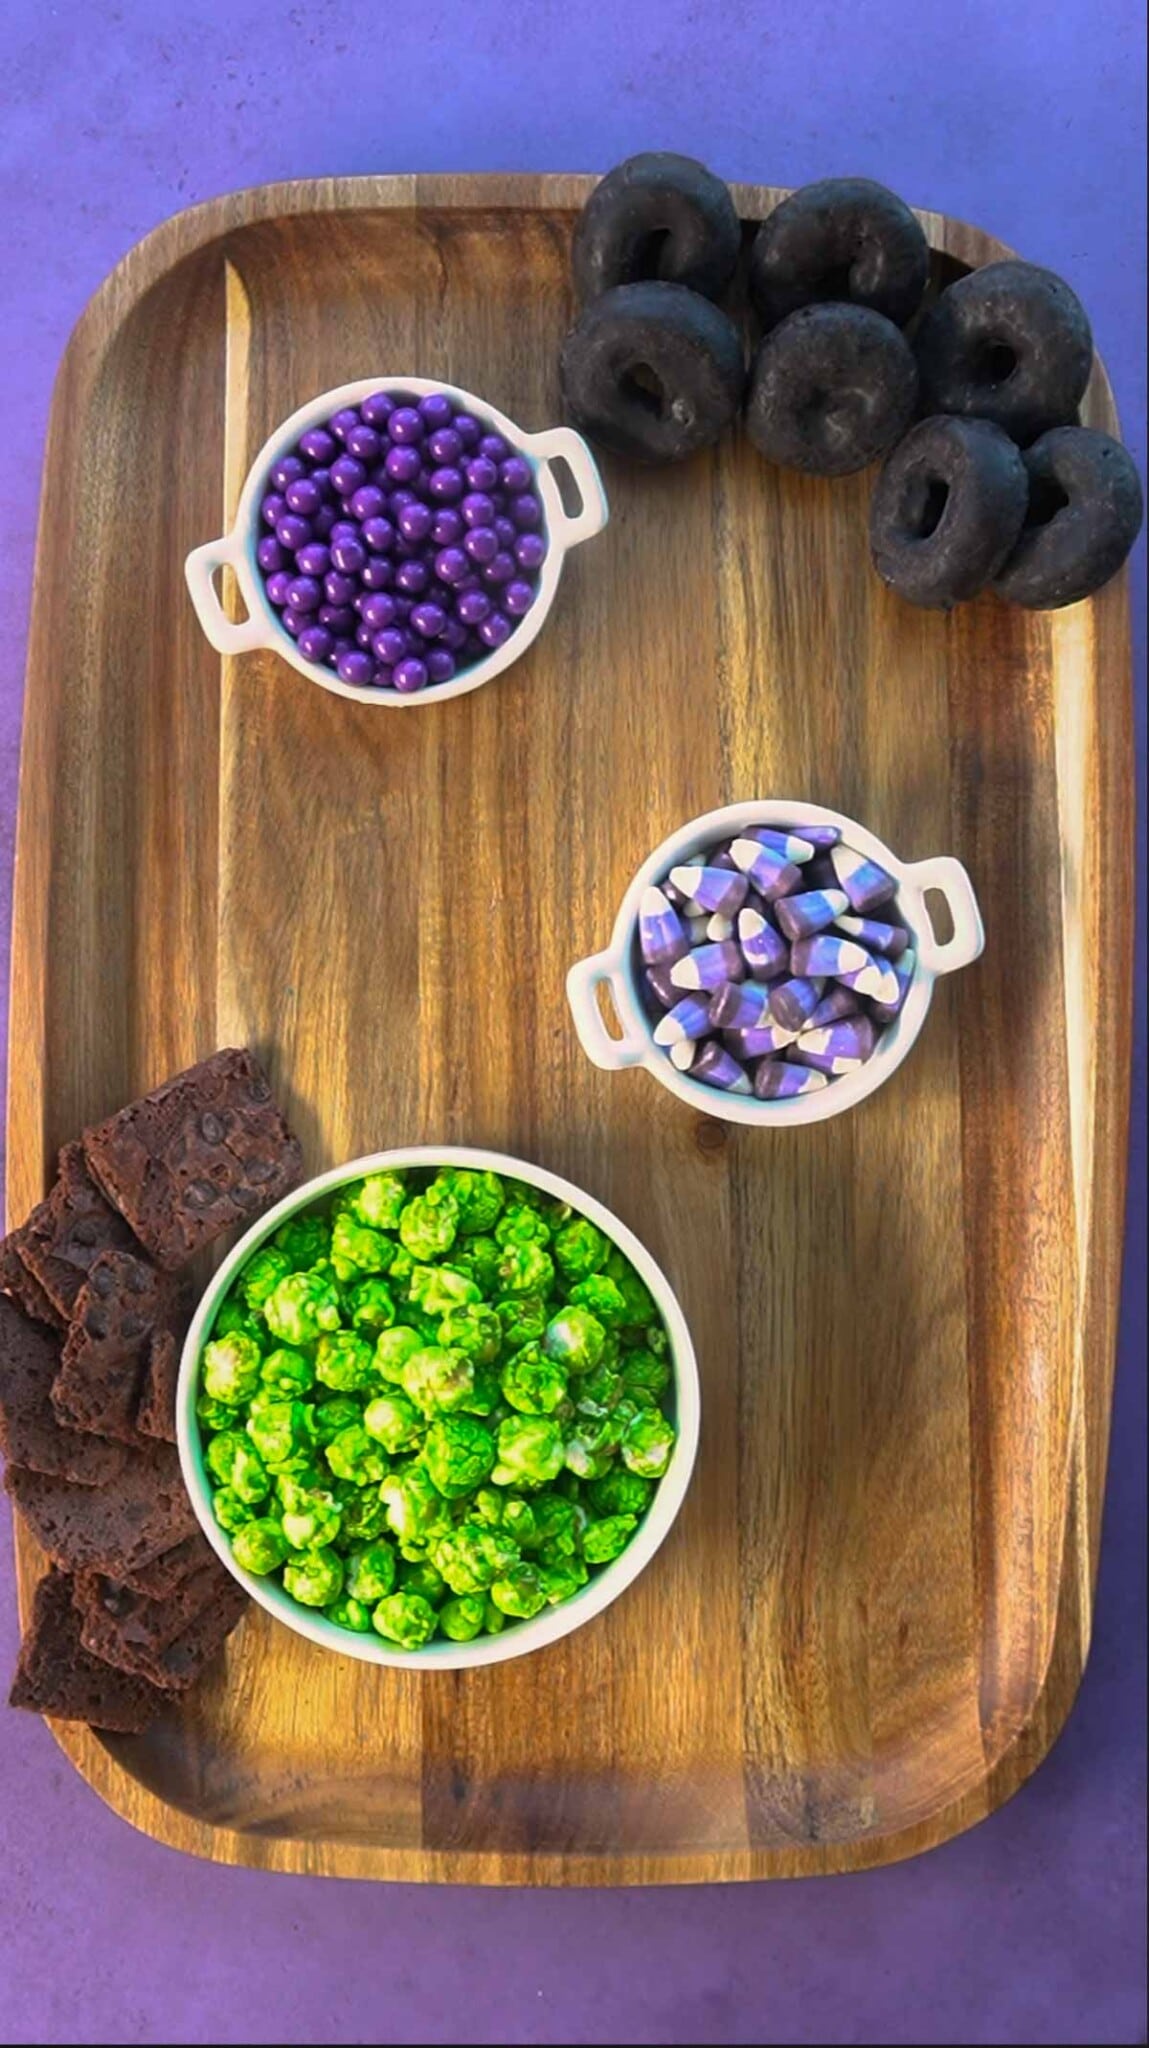
2 – Add large items
Next up, add your largest items. And add them in varying spots on the board so they’re not all together. I started with donuts on one corner and brownies on another.
If I’d put those two together not only would there be just a lot of big clunky items together, it’d be way too much dark all in one place.
3 – Add themed items
I always like to add themed elements into my snack boards, especially when I’m making a movie night snack board like this one.
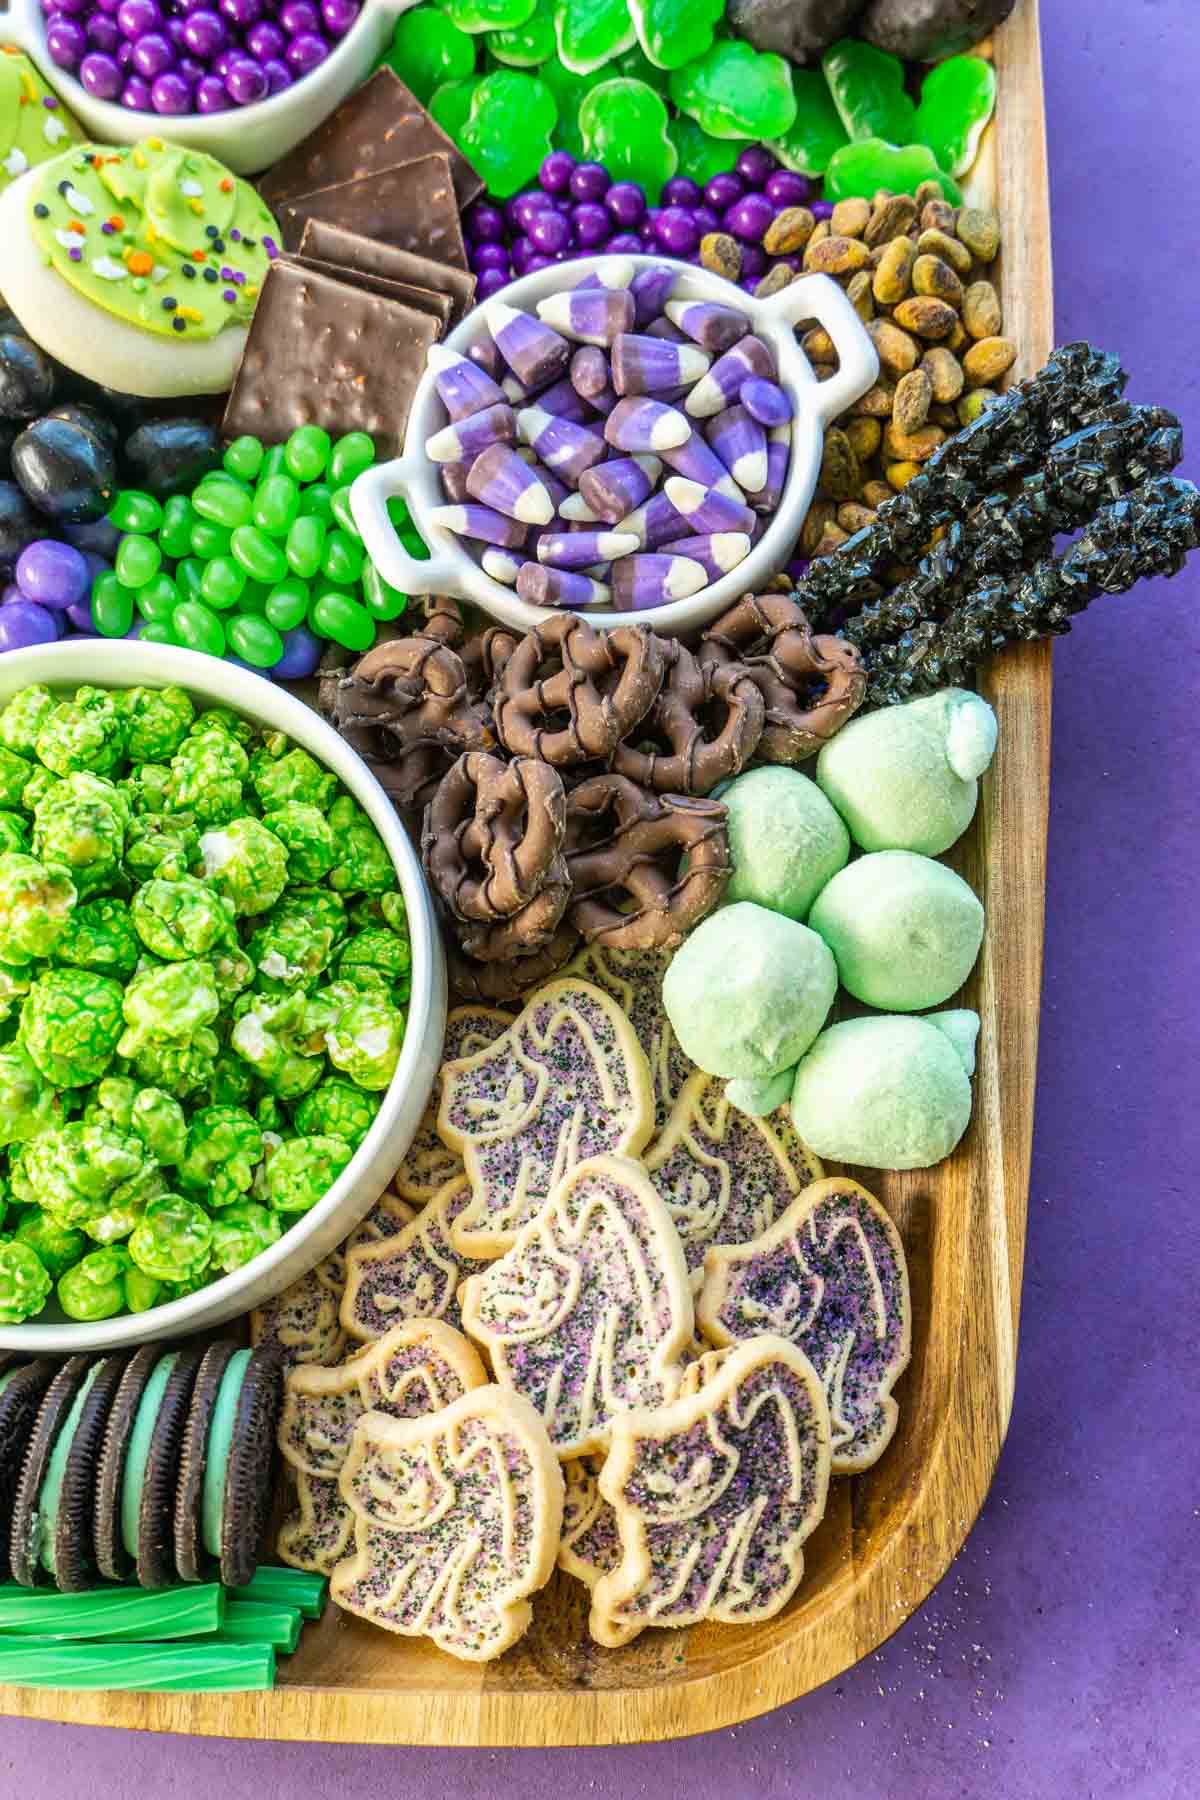
With this being a witch themed board, I added in some witchy themed elements and colors. Purple cat cookies, black rock candy that look like witch broomsticks, and green gummy frogs.

I also had a large gummy snake but it just didn’t fit.
And sometimes that happens – sometimes things really just don’t fit. In that case, set them aside and just enjoy them for a snack some other time.
4 – Break up colors
Continue adding your larger and medium size items to the board keeping in mind what color each of the items is. The goal is to not have too much of any color right next to each other.
If your budget allows, have a number of different snacks in each color so you can easily break up blocks of colors with another snack item. Or just repeat more of a snack you’ve already put on the board!
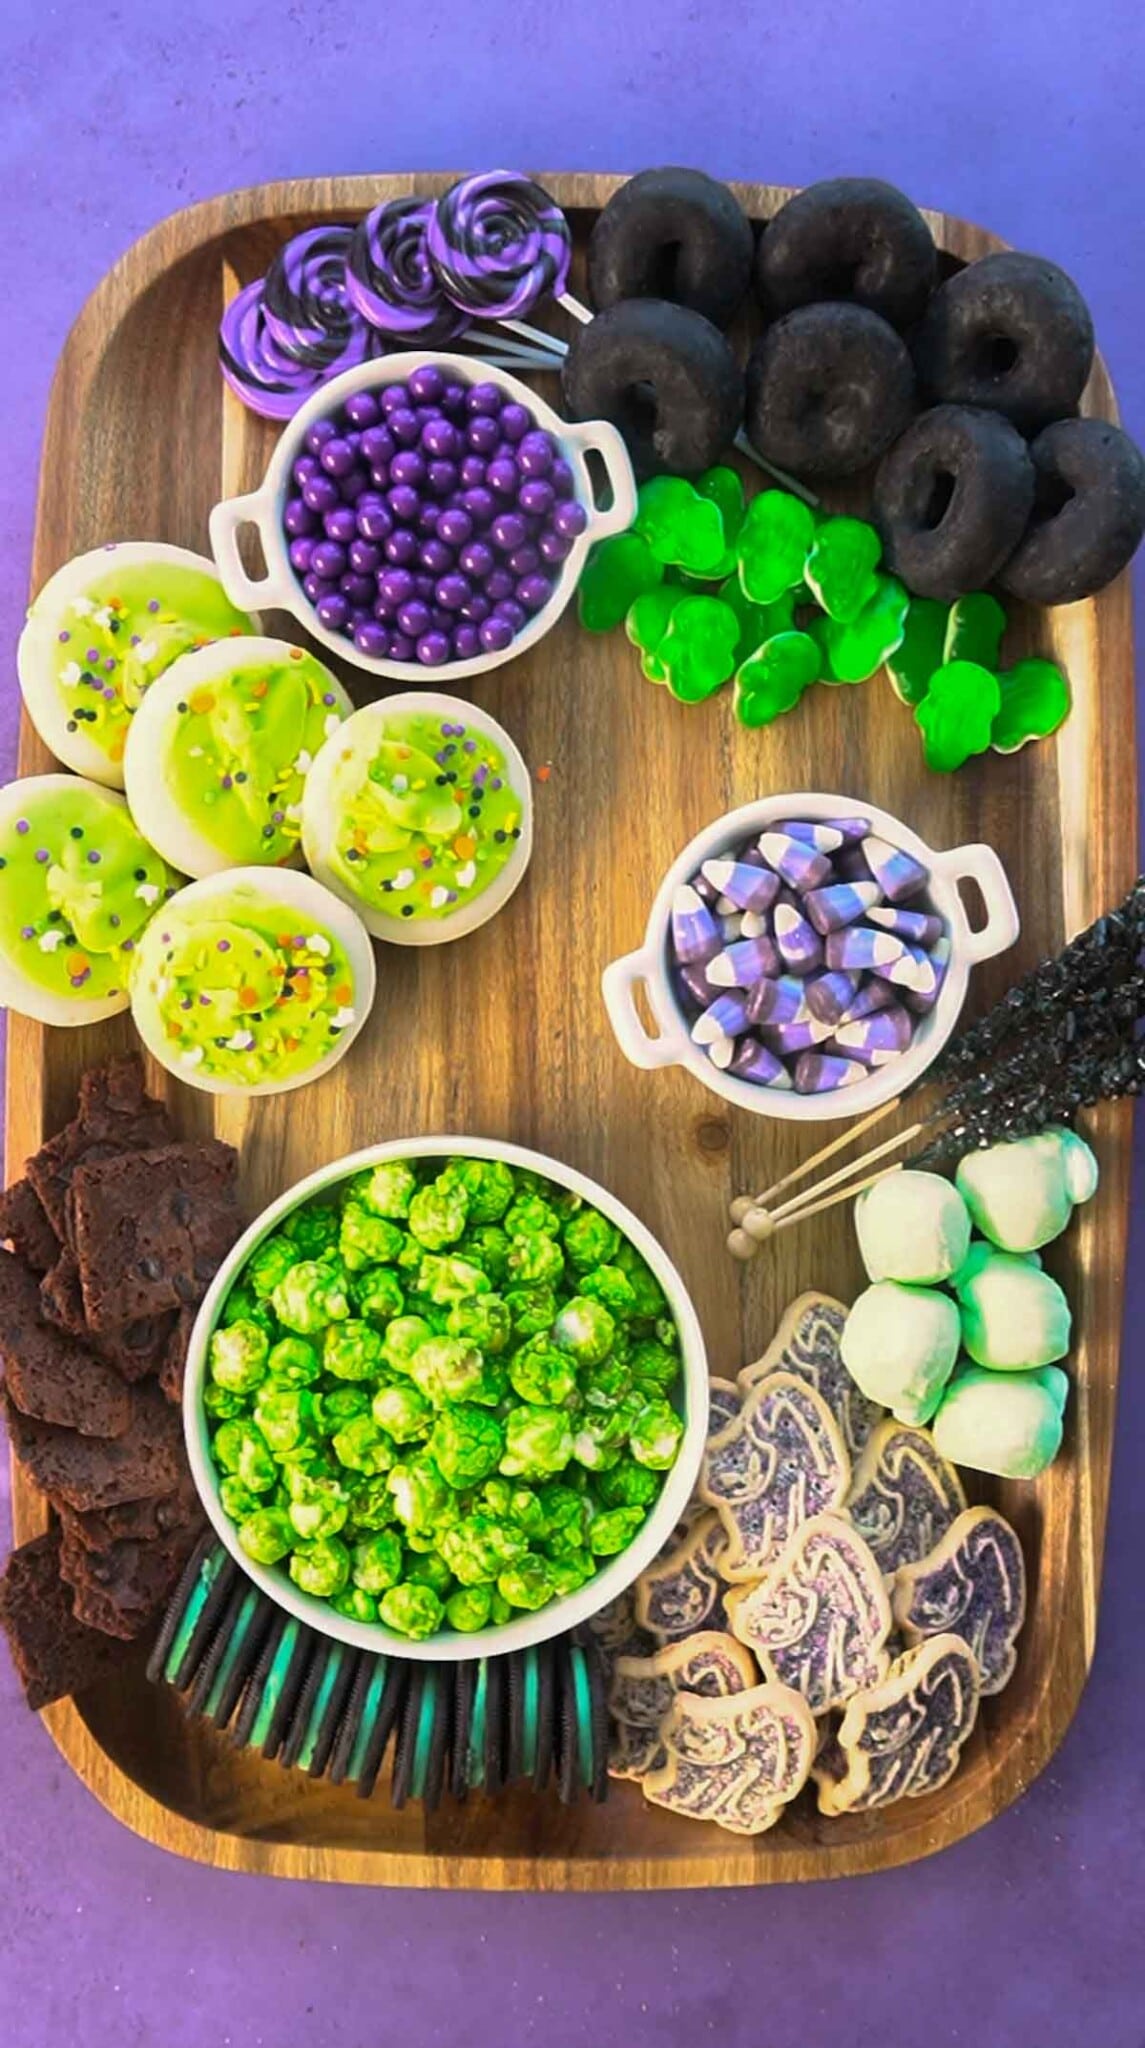
5 – Curve Straight edged items
One of the problems I had with my first ever snack board was buying a ton of square and rectangle items and trying to get them to fit well.
Spoiler alert – they didn’t. Most of those snacks just ended up in my son’s lunchbox or baseball team snacks.
I’ve found it works better to use mostly round elements, especially if you’re using a rounded board like I did. You can definitely add in some straight edge elements, just curve them on the board to give the illusion of being curved.
You can see how I did that below with the brownie and chocolate squares – two square items rounded around another circle shape to fit better into the space.
6 – Fill in gaps with small items
Last but not least, fill in any holes with all of those small items you picked up at the store. You want to cover up pretty much any empty space left on the board and feel free to use the same small item in different spaces on the board.
Items that work well as fillers include:
- Small candies
- Nuts and seeds
- Popcorn
- Small fruits like grapes and berries (just make sure they’re finger food type fruits and not something like cut up kiwi)
And there you go, the ultimate Halloween dessert board filled with all sorts of delicious Halloween party food! The only thing missing that I’d add next time are these witch rice krispy treats!

More Halloween Snacks
Want more Halloween snacks you could add to your next charcuterie board? Try one of these!
- Halloween rice krispie treats – these ooey, gooey rice krispy treats are the perfect addition to a Halloween movie night!
- Monster snacks – these fun sweet and salty monster snacks are a cute and colorful Halloween snack!
- Halloween bark – the most delicious bark made out of Halloween candy and chocolate!
- Halloween pretzels – these went viral on social media for a reason, they’re so cute!
- Spiderweb pretzels – another sweet and salty snack that everyone will love!
Halloween Dessert Board
Ingredients
- cat sugar cookies
- chocolate frosted donuts
- brownie bark
- black and purple swirl lollipops
- green lofthouse cookies
- mint Oreos
- chocolate covered pretzels
- green apple marshmallows
- caramel apple popcorn
- green licorice
- gummy frogs
- chocolate squares
- black rock candy
- purple sixlets
- purple M&Ms
- green jelly beans
- purple candy corn
- Junior Mint candies
- black grapes
Instructions
- Add 2-3 bowls filled with loose items like popcorn and candy to the board to create structure and anchor the rest of your snacks.caramel apple popcorn, purple sixlets, purple candy corn, brownie bark
- Add your large items in opposite corners, areas of the board.cat sugar cookies, chocolate frosted donuts, green lofthouse cookies, mint Oreos
- Add themed items in varying locations on the board like the swirl lollipops and gummy frogs.black and purple swirl lollipops, gummy frogs, black rock candy
- Break up big blocks of the same color with other colors to create visual interest.green apple marshmallows, purple M&Ms
- Make square and rectangle items fit better by placing them on the dessert board in a curved fashion.chocolate covered pretzels, chocolate squares, green licorice
- Use small items like candies, nuts, and fruit to fill in any remaining gaps in the board. You want to cover the entire board to give that cohesive and visually appealing dessert board look.green jelly beans, Junior Mint candies, black grapes
- Serve with plates and serving utensils on the side for people to grab and take their snacks to enjoy.
Tips & Notes:
- Theme – choose elements to match the event, movie, or theme of the occasion.
- Tastes – Make the board what your family wants to eat for movie night. If you really like having sour candy at the movies, add sour candy to your board. I went with my son’s favorite frosted cookies, donuts, and gummy frogs because I knew they were things he’d actually enjoy!
- Size – Buy items in varying sizes to fill up the board the best possible.
- Budget – If you want to keep it inexpensive, make things from scratch rather than buying them at the store. You can also keep things more budget friendly by limiting the number of dessert items on the board.


Leave a Reply