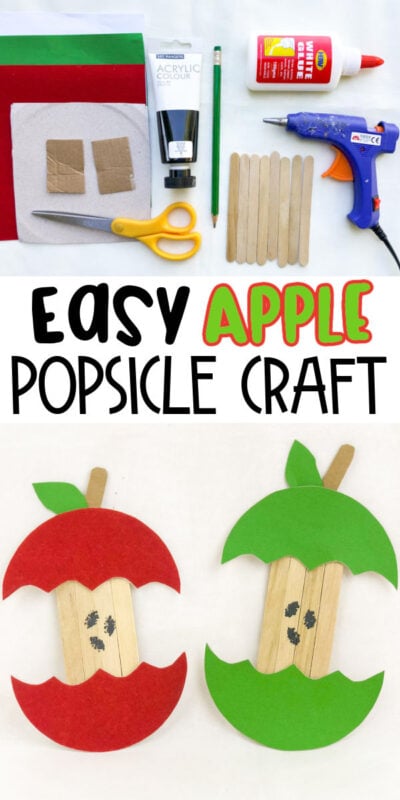
Kick off apple season with this fun and easy apple craft. These apple core crafts are budget-friendly, kid-approved and use just a few supplies. They’re perfect for an activity during a fall party, a unit on the letter A, or any time you just want a fun fall craft!
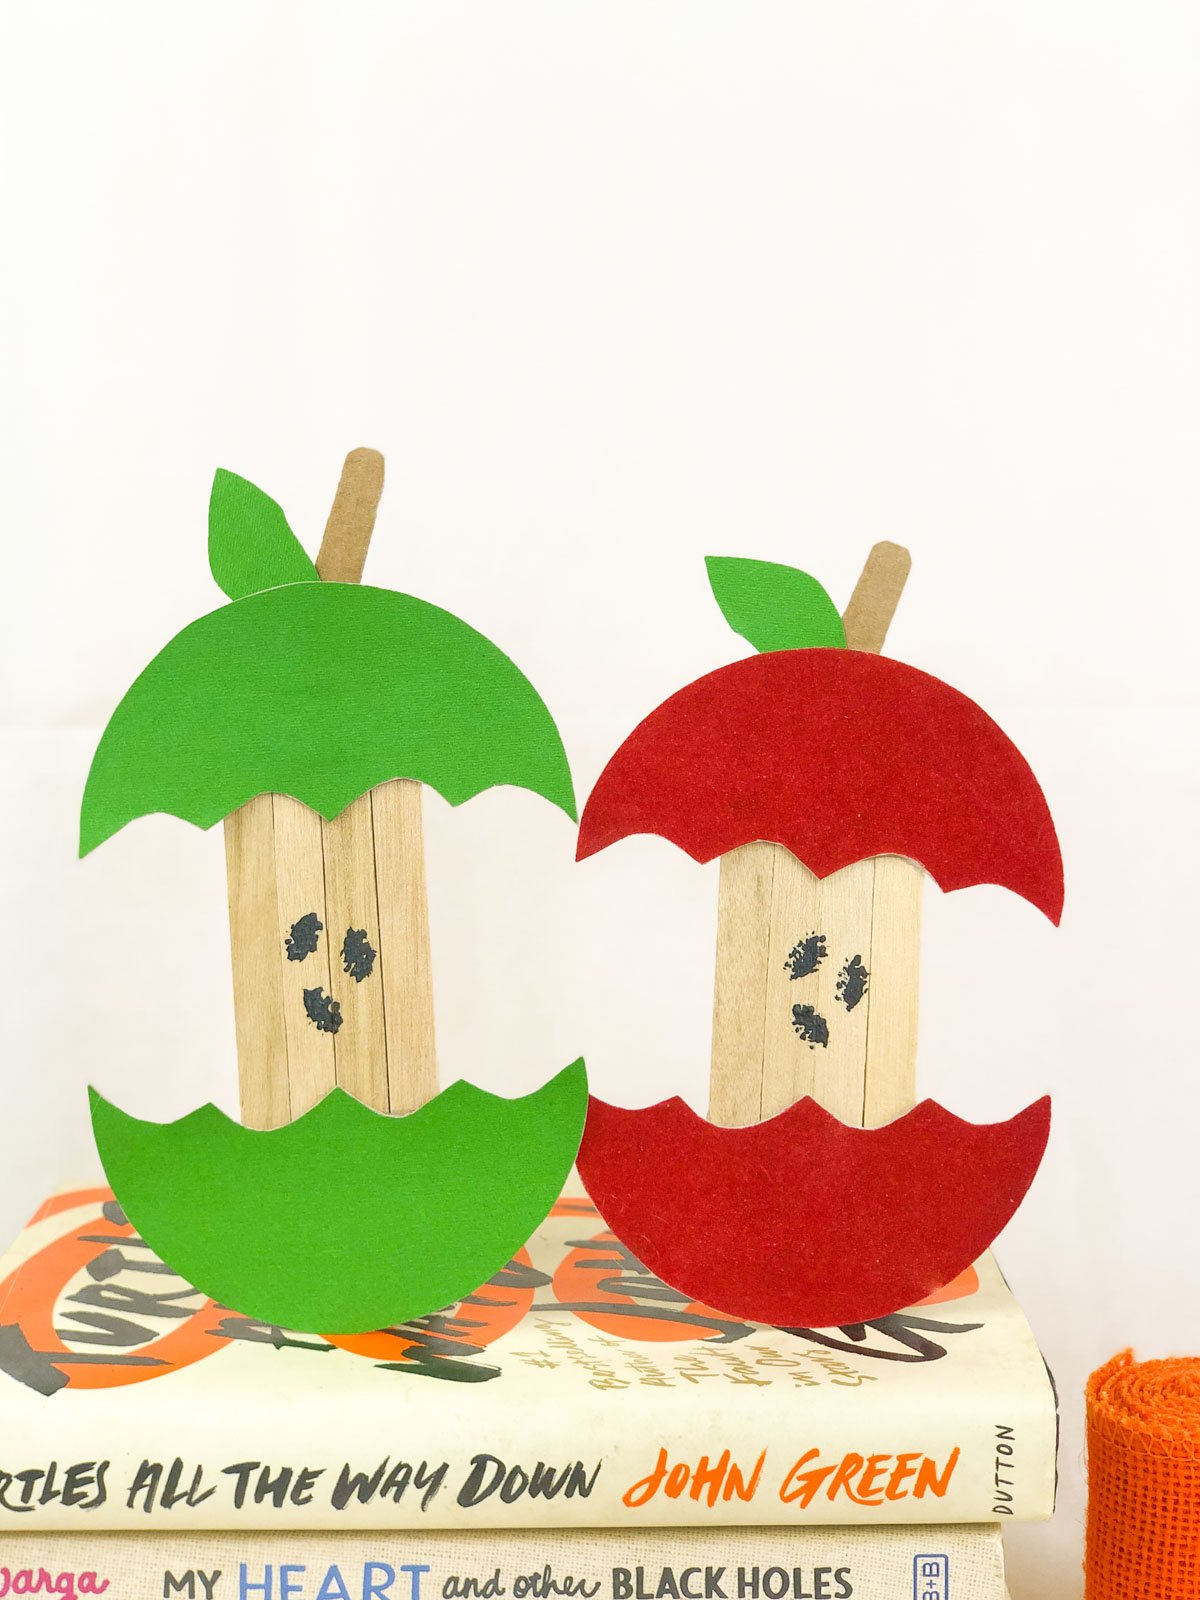
Apples are a fall staple, whether you are picking, eating, or creating them. This fun craft works for any occasion that calls for apples from preschool to an apple theme party to teaching the alphabet. I mean everyone knows A is for apple!
I’ve seen all sorts of apple crafts such as a paper plate apple craft, a handprint apple craft, and more but never a popsicle stick apple craft – and I’m so excited about how cute these turned out!
These would be perfect to do with kids at your next fall party, when you’re working on the letter A, or when you just need an apple themed craft for Johnny Appleseed week at school!
It would also work if you wanted to teach kids or all ages about healthy eating and make this fun eaten apple craft and talk about eating apples!
For added fun, pair your apple art with these delicious and easy-to-make apple pie cups or caramel apple bark that the kids can enjoy after they’re done with the craft.
Why You’ll Love This Craft
- Great for development – kids of all ages will love making this fun fall craft while they work on their fine motor skills and hand-eye coordination. It uses scissors, glue, and coloring – perfect things for kids to do!
- Easy to follow directions - these easy apple craft directions walks you through each step so that even the most novice crafter can make it. And since there is no apple craft template, it’s okay for the final crafts to look different ways!
- Easy-to-find materials – all the materials needed for this simple craft can be readily found in any home, preschool, or elementary school classroom! If you don’t have them, they are definitely at local craft stores!
Supplies
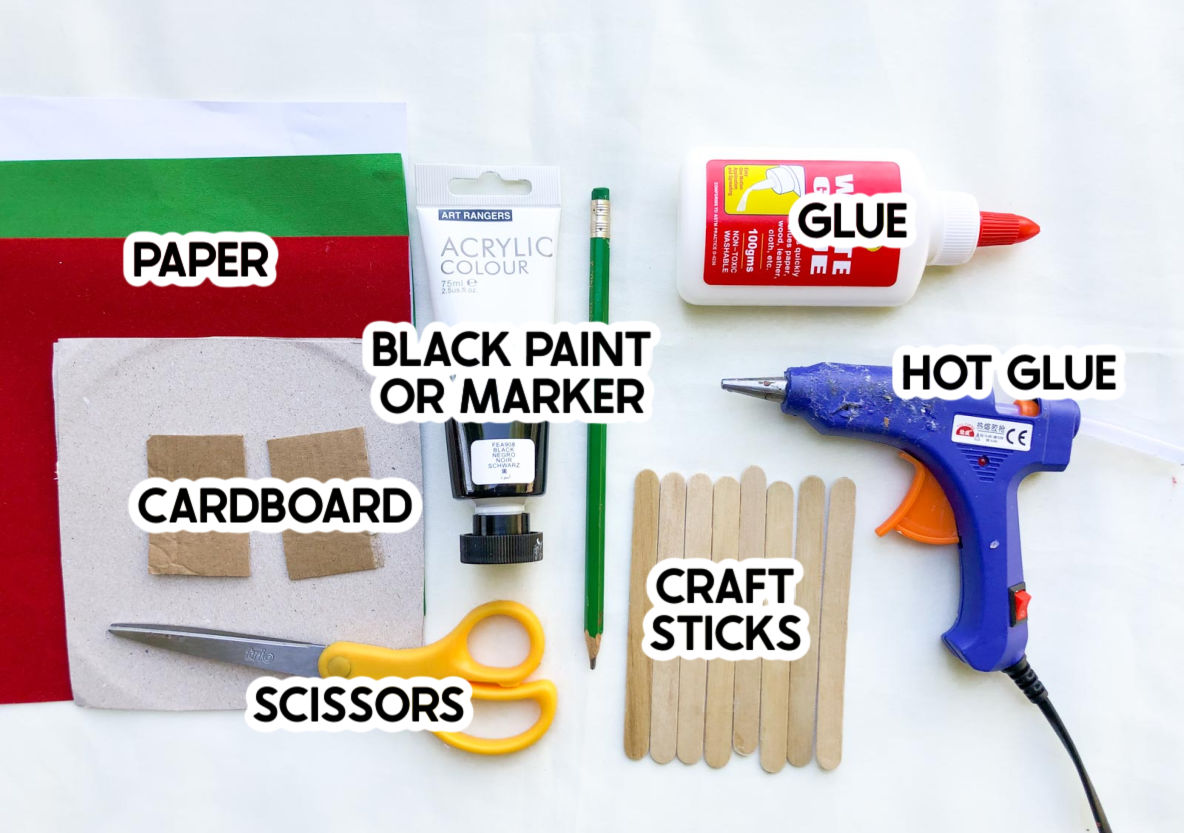
Supply Notes
- Popsicle sticks – buy them in bulk here or find them at any crafting store. If you have leftovers, use them for other crafts like this bat craft, this vampire craft, or even this Frankenstein craft!
- Colored paper - I find that construction paper is best but you can use printer paper as well. I wouldn’t recommend using tissue paper squares because they will be too flimsy.
- Cardboard – no need to go out and buy this, just use an old cereal box or an old Amazon box. Or if you don’t even have that, you can also just use brown paper!
- Hot glue gun – I find this is best for gluing the popsicle sticks together quickly, though you can use white school glue or craft glue for this if you are okay waiting for it to dry before continuing the craft. If you’re using hot glue, obviously this is something that adults will need to do.
- Glue – a glue stick or white glue will work for gluing the paper to the cardboard.
- Scissors – I recommend using kid-safe scissors if the kids are cutting on their own.
- Black marker – you can also use paint and a paintbrush for this step if you want to add in painting!
Note!
I did not include a free apple template in this post, and I did that on purpose. One of my favorite parts of this craft is that the apple shape can be a little different for everyone. It doesn’t have to look one specific way and be various shapes, sizes, and squiggles! So no free printable apple templates here – have kids use their imagination instead!
How to make this Apple Craft
Have so much fun making your own apples this fall season with this fun activity. I’ve included detailed instructions below with pictures to keep you on track while you make this simple apple craft. Let’s get started!
1-Gather Supplies
First, gather all the supplies you’re going to need for this craft. If you are using a hot glue gun, you’ll want to plug it in now so it can heat up. Make sure it is away from any young learners and have an adult man the hot glue gun station.
Honestly, if you’re going to use a hot glue gun – I recommend just going ahead and gluing the popsicle sticks together ahead of time and just hand out the core already completed.
2 – Prep The Apple Halves
Choose what color apple you want to make and grab the corresponding colored paper or card stock. One page per apple is more than enough.
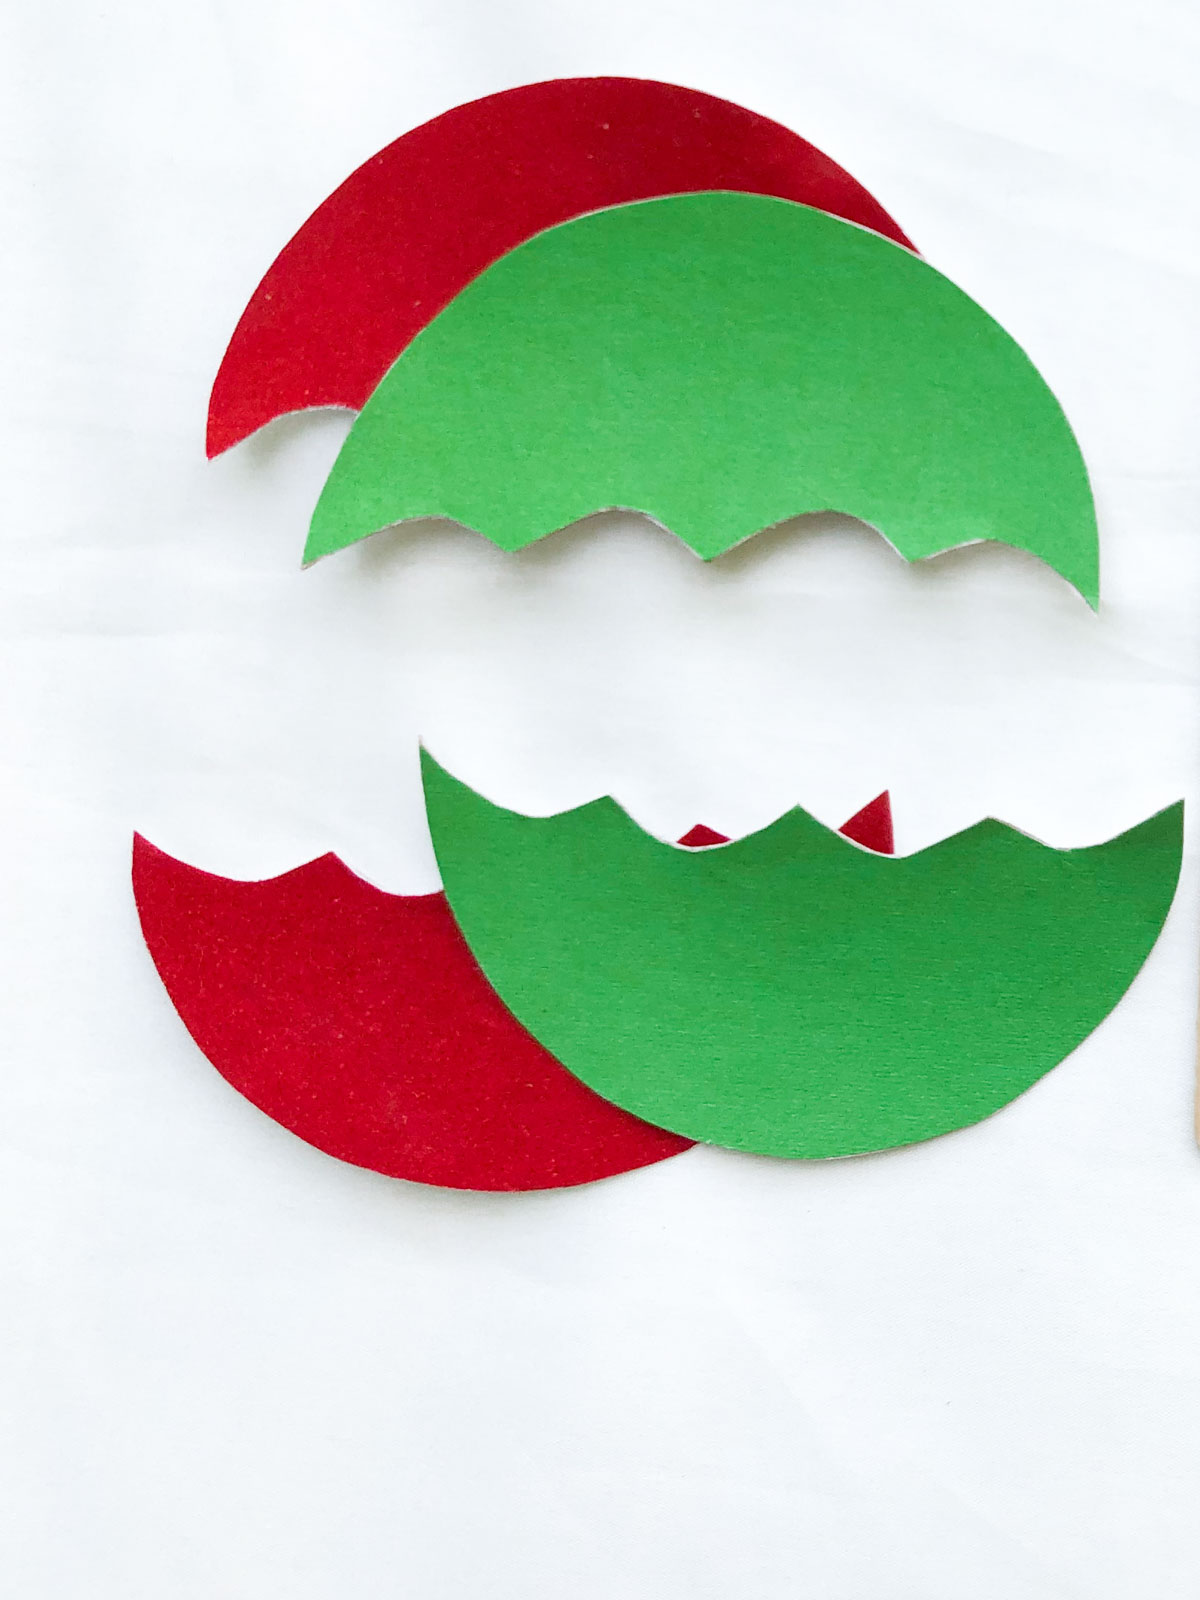
Next, using a pencil you are going to draw a half circle, or a large letter D, but instead of drawing a straight edge to connect the curve you will want to draw scallops along the bottom.
The goal is to make the scalloped edge look like someone took a bite out of the apple. Unless you are using a template you will have different sizes of apples which is part of the fun.
Then you will cut out the apple outlines and erase any excess pencil markings you have.
Now that the half circles are drawn, cut the half circles out.
3 – Glue The Popsicle Sticks Together
For this part of the craft, you will use a glue gun, which I recommend an adult do.
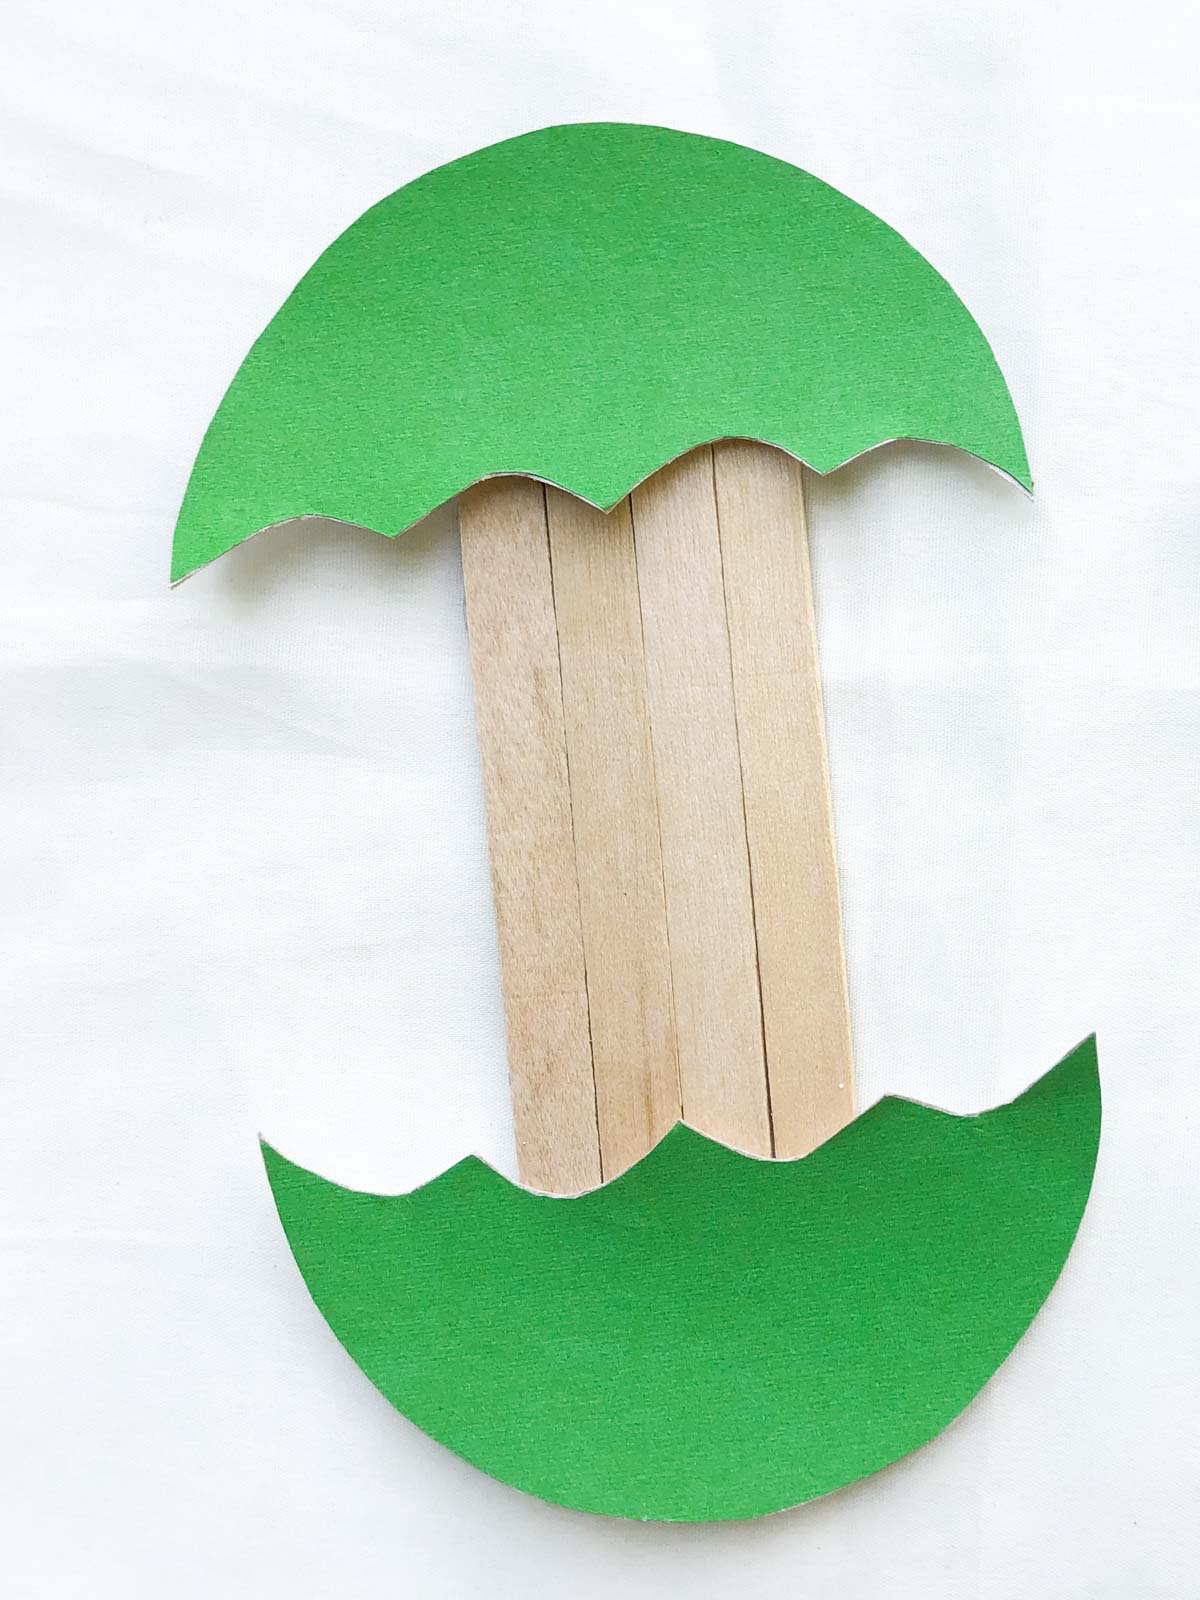
Using the hot glue, stick four popsicle sticks together side by side. Put a couple of drops along the side of each popsicle stick so the glue doesn’t make too big of a mess on the popsicle sticks. And be careful – hot glue is hot!
4 – Add the Apple Pieces
Add a drop of the regular glue to the bottom and top of each glued together set of sticks, and quickly add the half circles you just cut onto the top and bottom parts of the sticks to create your apple.
You could technically stop here but it doesn’t look nearly as much like an apple as it would if you added the stem and leaves, so I recommend doing that too!
5 – Cut Out The Leaves
Now that the apples are glued on and stuck together, it’s time to make the leaves. Using the green paper, outline two small leaves then cut them out. If you want to give them a little texture, you can add colored dots using different colors of green paint or markers.
6 – Make the Stems
Next using the cardboard cut very small stem-like pieces from it. You can outline them first if you are working with little hands. Then glue the green leaf and apple stem to the sticks where you want them.
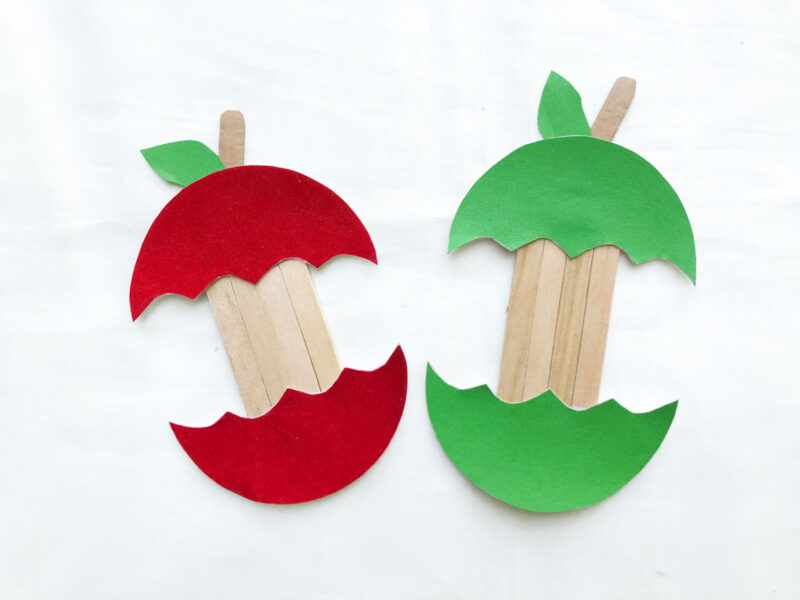
7- Finishing touches
Now it’s time to add the seeds. On the popsicle sticks paint three black little ovals for seeds. You can also draw these on using a black marker if you want it to be less messy or cut them out of paper and glue them on.
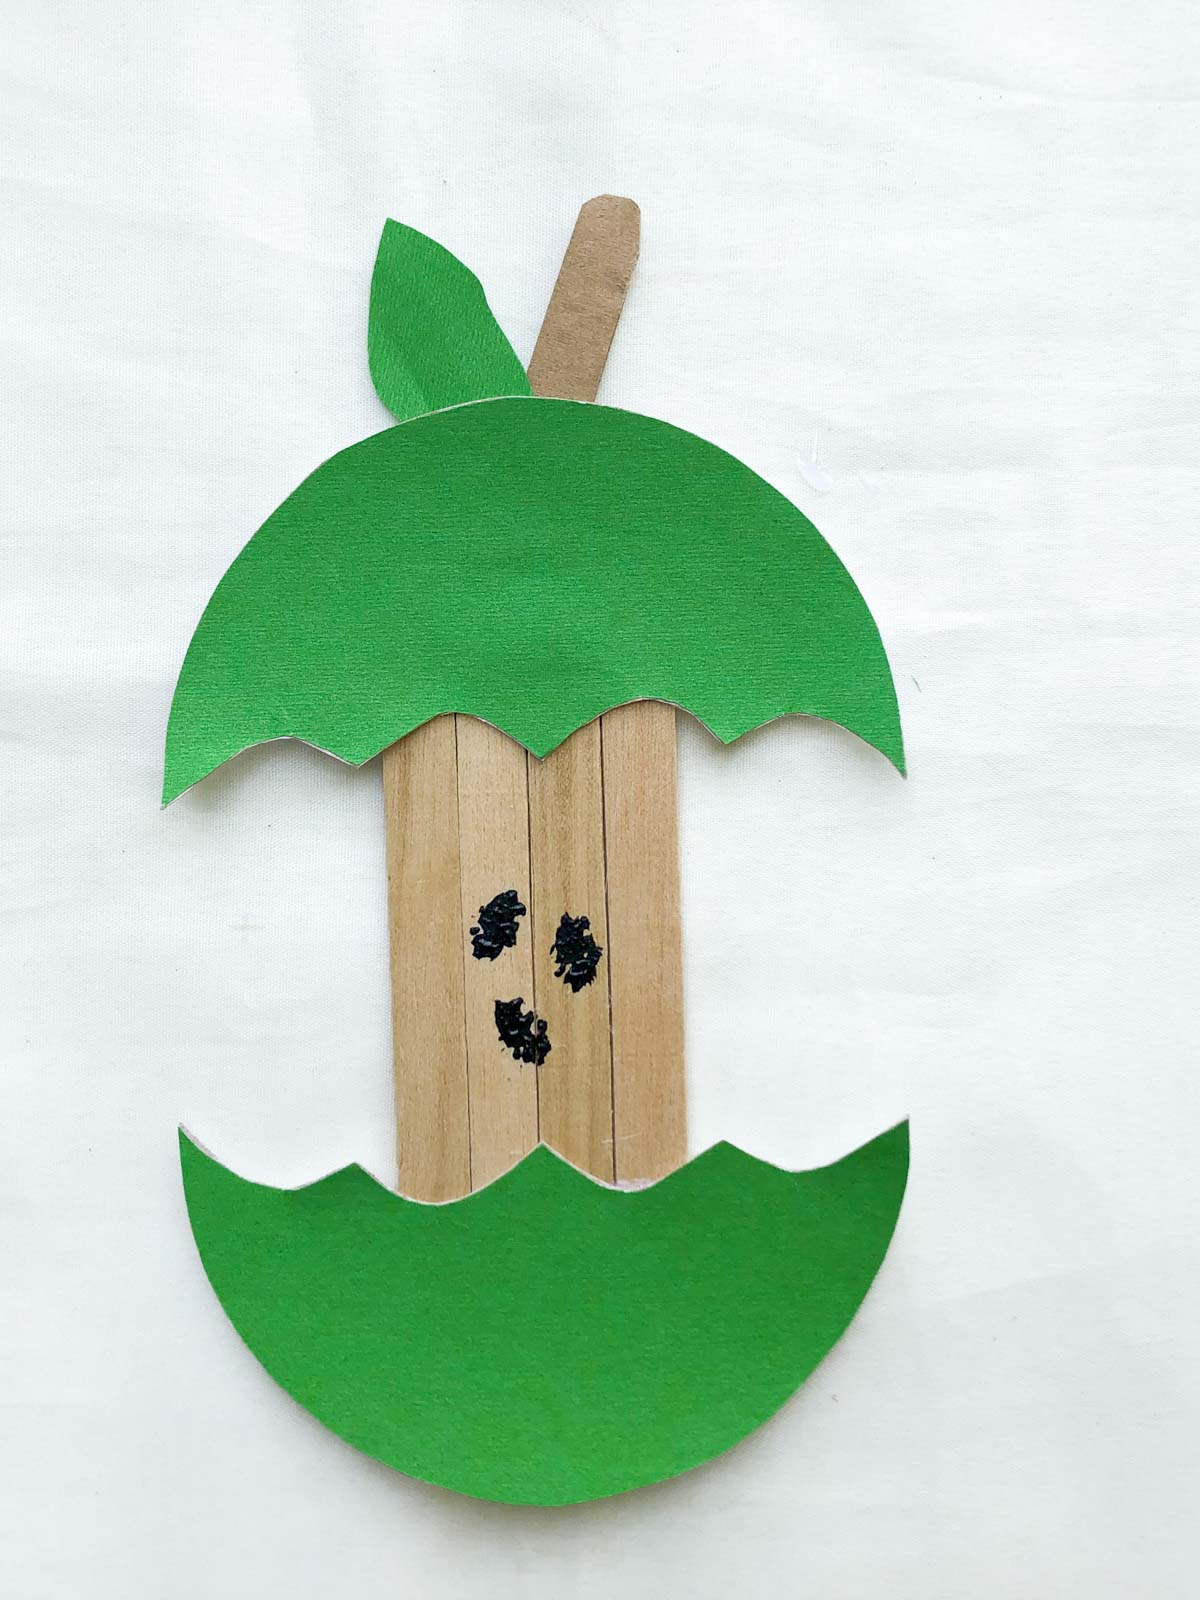
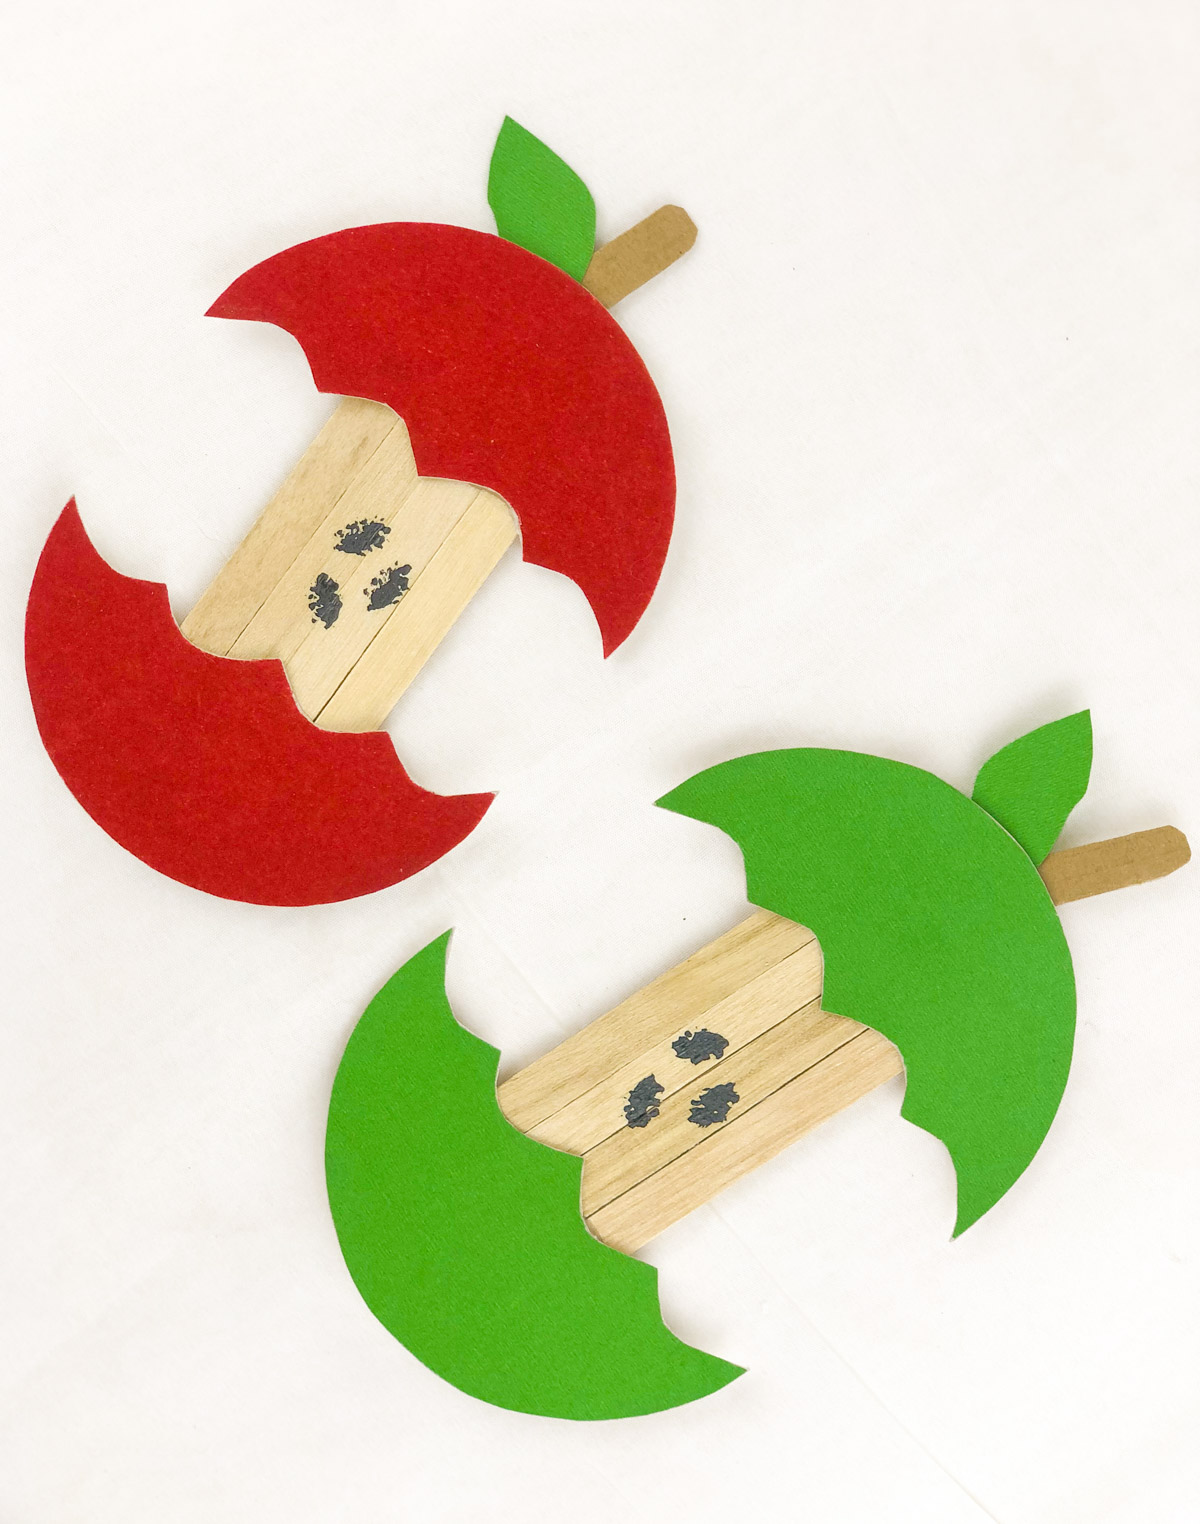
Once you’ve added your seeds you are done! Time to enjoy your craft or hang them up on the bulletin board. It’s always fun to see how these ended up if you have a class full of kids making them!
More Popsicle Stick Crafts
If you buy popsicle sticks (aka craft sticks) in bulk, here are some great ways to use them up!
Expert Tips
A great way to get creative is by adding any extra decoration to the apples you’d like. A little worm out of the center would be a fun way to add to the craft.
Create an apple tree on a board or doorway for students to display their apples.
If working with kindergarten students or younger try making dotted lines for the kids to connect when they are creating their apples.
Easy ways to enhance this craft could include mounting your colored paper on white paper and then leaving a small edge when cutting it out to resemble the apple flesh. After it’s been cut out, add it to the cardboard to make it sturdier.
Craft FAQs
Do I have to use cardboard for the stem?
No, you can use any type of brown paper you want for the stem including construction paper, card stock, or cardboard.
Do I have to use a hot glue gun?
You do not have to use a hot glue gun if you don’t want to. Instead, you can glue the popsicle sticks together using white school glue and allow them to dry before moving on to the next step.
If you do this, I recommend letting the kids glue their popsicle sticks together then doing another apple themed activity from this apple party like a caramel apple walk. Or you could always hand out these fall playdough mats and let kids do those while the glue dries!
More Fun Fall Activities
Don’t let the fall fun stop with this apple craft! Try out one of these fun fall activities to go along with it!
- Fall art for preschoolers – tons of fun fall art themed activities for the littlest school kids!
- Fall color palettes – let kids paint pictures after choosing of these fun fall color schemes!
- Fall games – tons of fall themed games that are perfect even for younger kids!
- Fall scavenger hunt – go for a little walk either outside or around your house (or classroom) and find these fall themed items!
- Fall bucket list – pick out your favorite fall activities and start doing!
Easy Apple Craft
Ingredients
- 1 piece red colored paper green and red
- 1 piece green colored paper
- 1 piece cardboard
- 4 popsicle sticks
Instructions
- Draw two half circles on one piece of red paper and a half circle on one piece of green paper (so you have four half circles total). Instead of drawing a straight line at the bottom of the half circles, draw a wavy line that looks like a bit apple.1 piece red colored paper, 1 piece green colored paper
- Once you’re satisfied with the half circles, cut the half circles out so you have two red half circles and two green half circles.
- Use the hot glue, hot glue four popsicle sticks together. Put a couple drops along the side of each popsicle stick. Allow them to dry completely (this will be quick) before moving onto the next step.4 popsicle sticks
- Use the white glue to glue one red half circle to the top of the popsicle sticks and one half circle to the bottom of the popsicle sticks. Repeat with the green apples.
- To make the leaves, cut two very small leaf shaped pieces from the green paper and set aside.
- Using the piece of cardboard, cut a very small stem like piece from it for each apple. Then glue the leaves and stem to the top of the apples.1 piece cardboard
- On the popsicle sticks add three black little ovals using the black marker for seeds. Let the marker dry and your apple craft is complete!



Leave a Reply